
I, like many bikers, had the idea of one day doing a project bike. Every bike I’ve owned has been modified to my personal taste, this is my K1200R which was dead stock when I got it.
I had talked about wanting to do a proper build for some time. My very supportive, beautiful wife asked me what I was waiting for? I stumbled across the following bike on the BIKEEXIF and got motivated!

I was blown away that a K100 could look so good! This blog is how, over 4 months, I turned this;

Into this.

And after my mate crashed it, this.

I found the donor bike in Adelaide as an unregistered trade-in advertised on gumtree. My Dad and I did a quick 1540km round trip, and the real journey began!

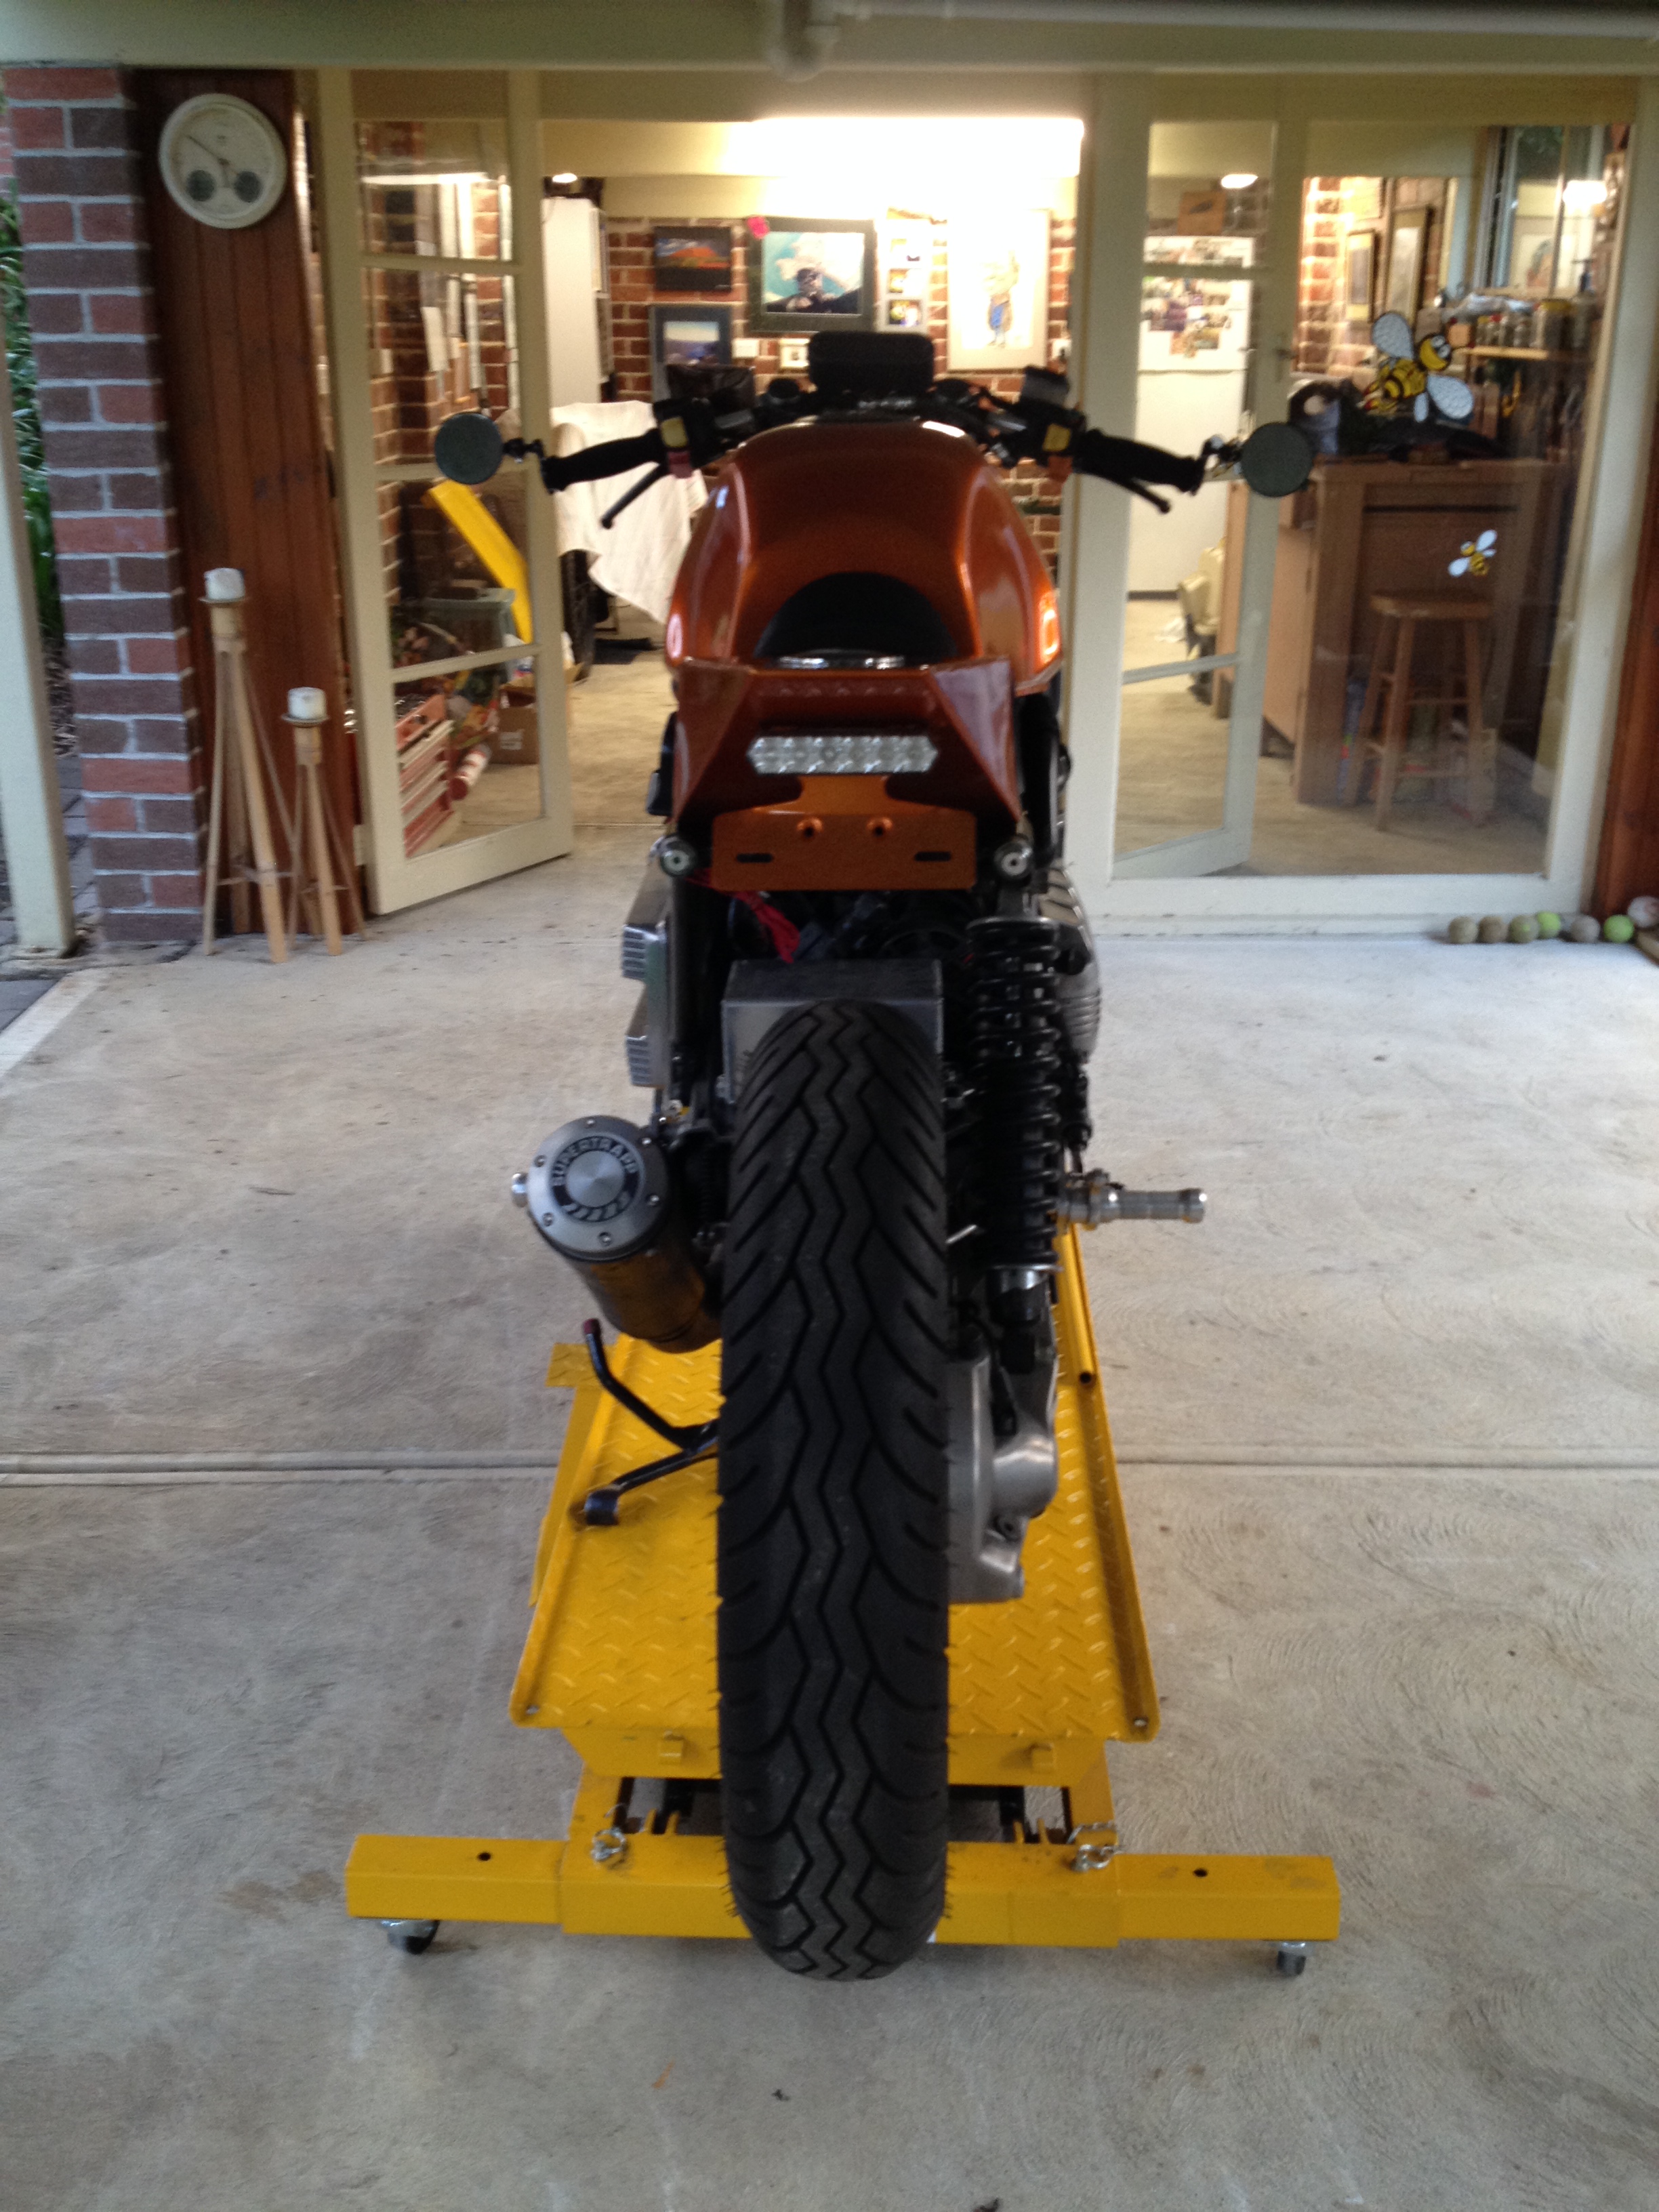
Bought a bike lift off ebay.

Fairings and seat were stripped and sold to a wrecker for $450, No turning back now!

Being my first build, I’m still trying to work out the sequence of work. It is a bit daunting! I decided to start easy and do the front guard. 
I marked out trimmed shape I wanted

and went at it with the dremel.

Have ordered 3M carbon fibre wrap to finish it off.
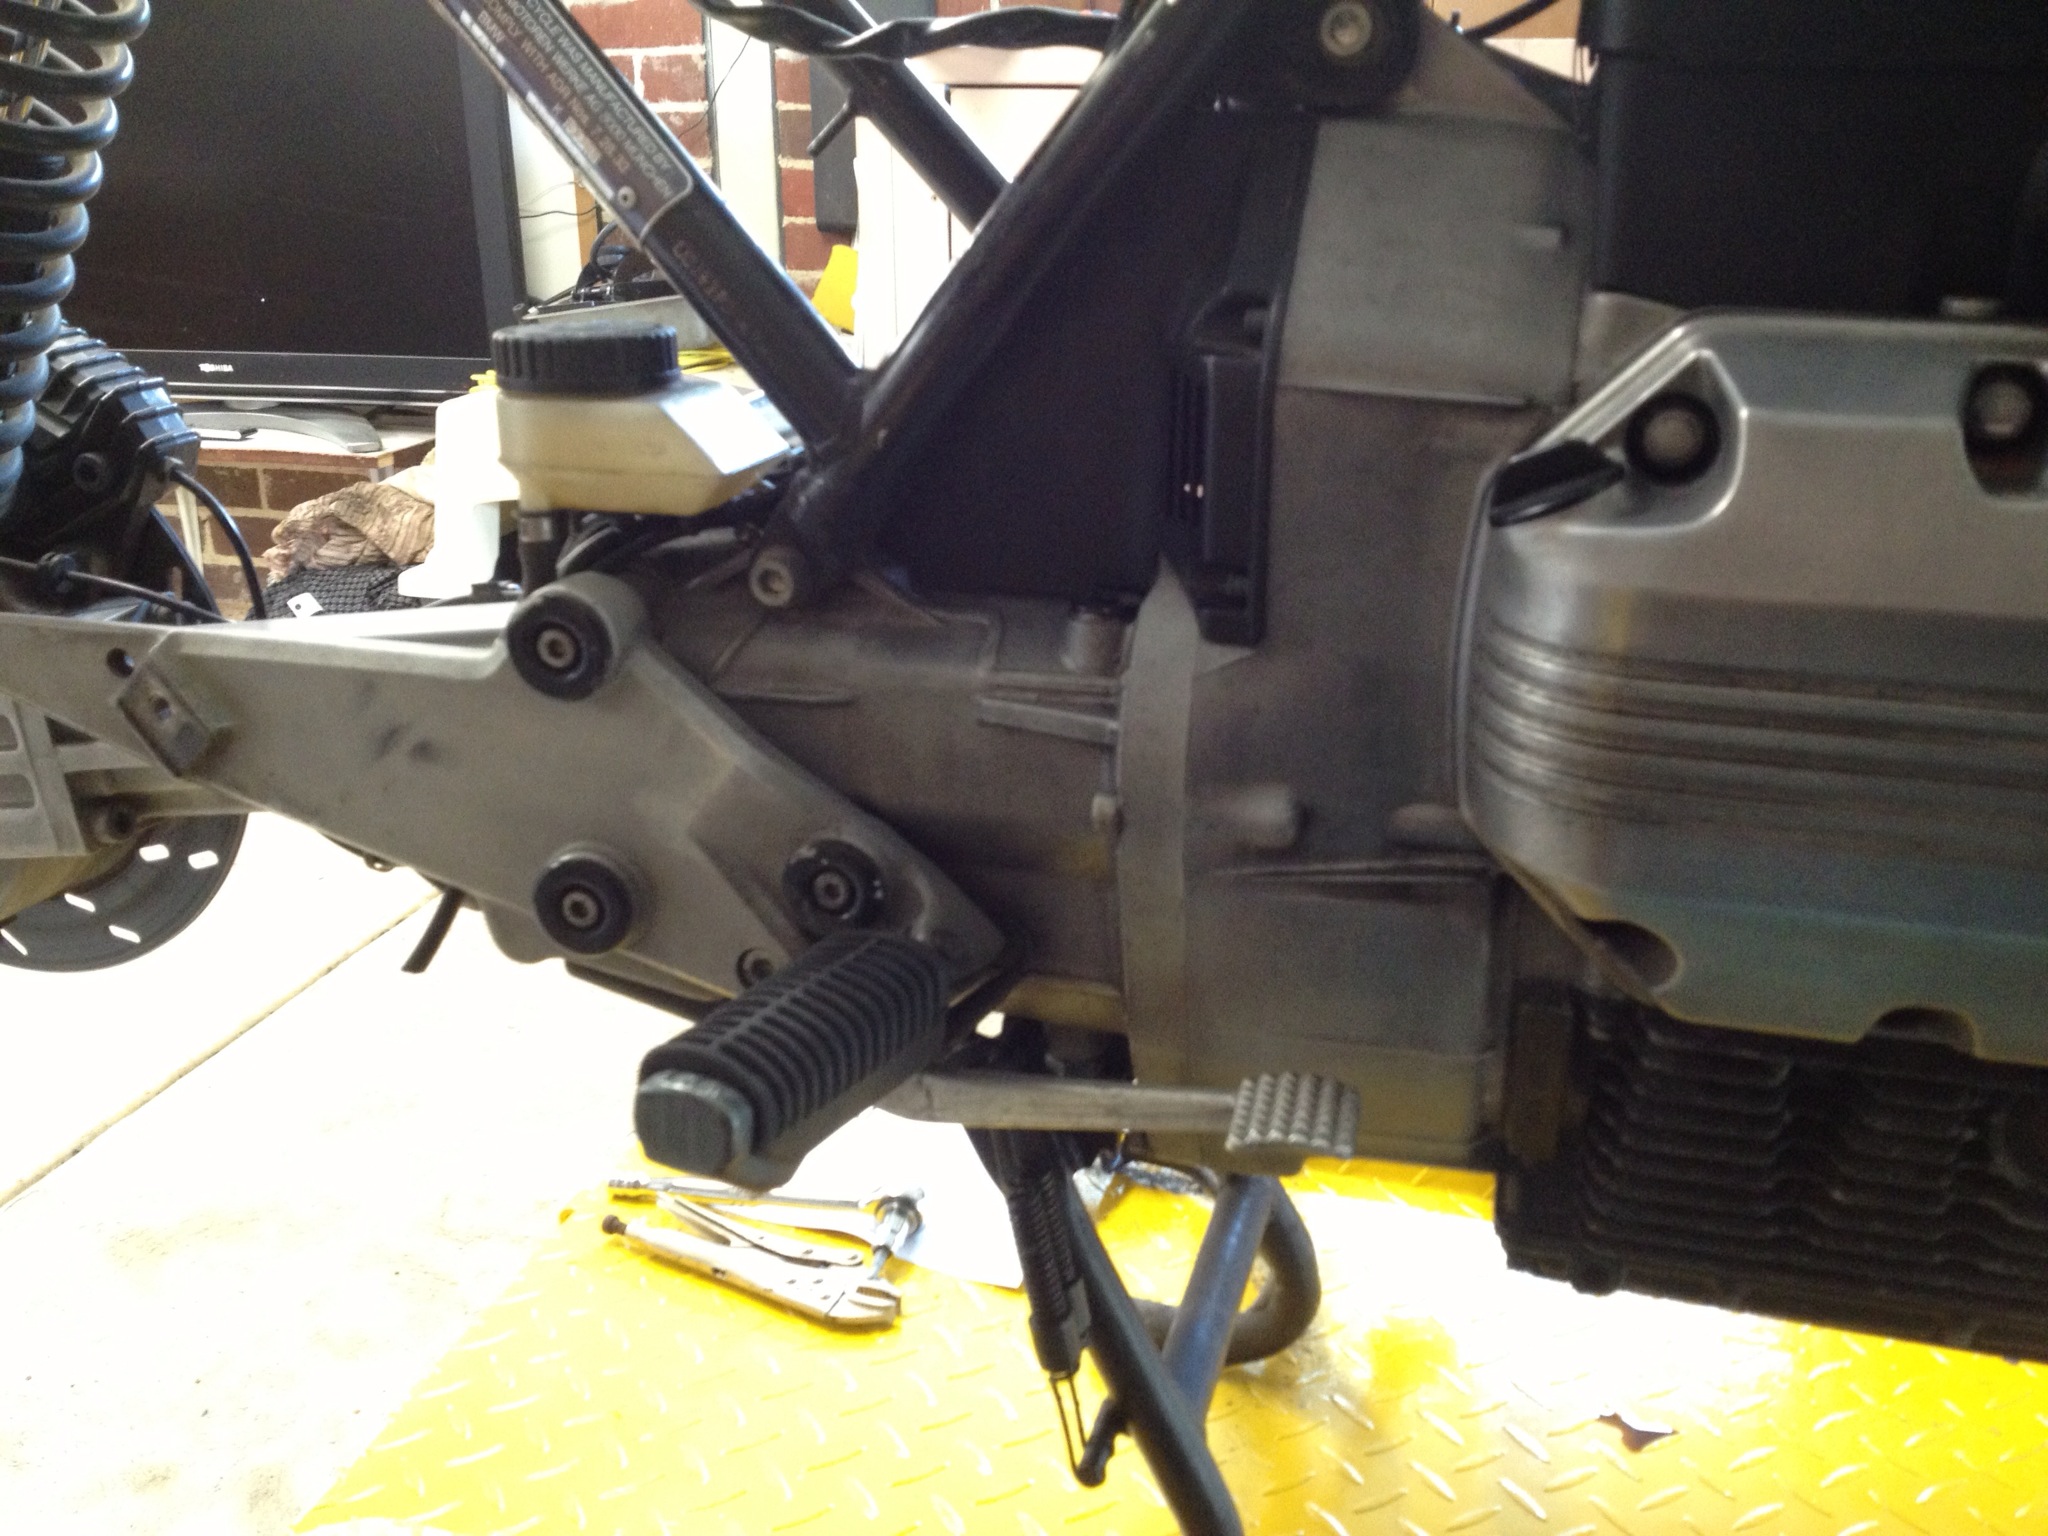
Dad did a good job of trimming unwanted metal tags from the subframe

I took a slightly different route for a radiator overflow tank!

Pace should pick up now, the goodies that arrived this week; Rear sets from BSK SpeedWorks Speedo from Daktota Digital
The rear-sets were an easy fit, and very well made
Before
After

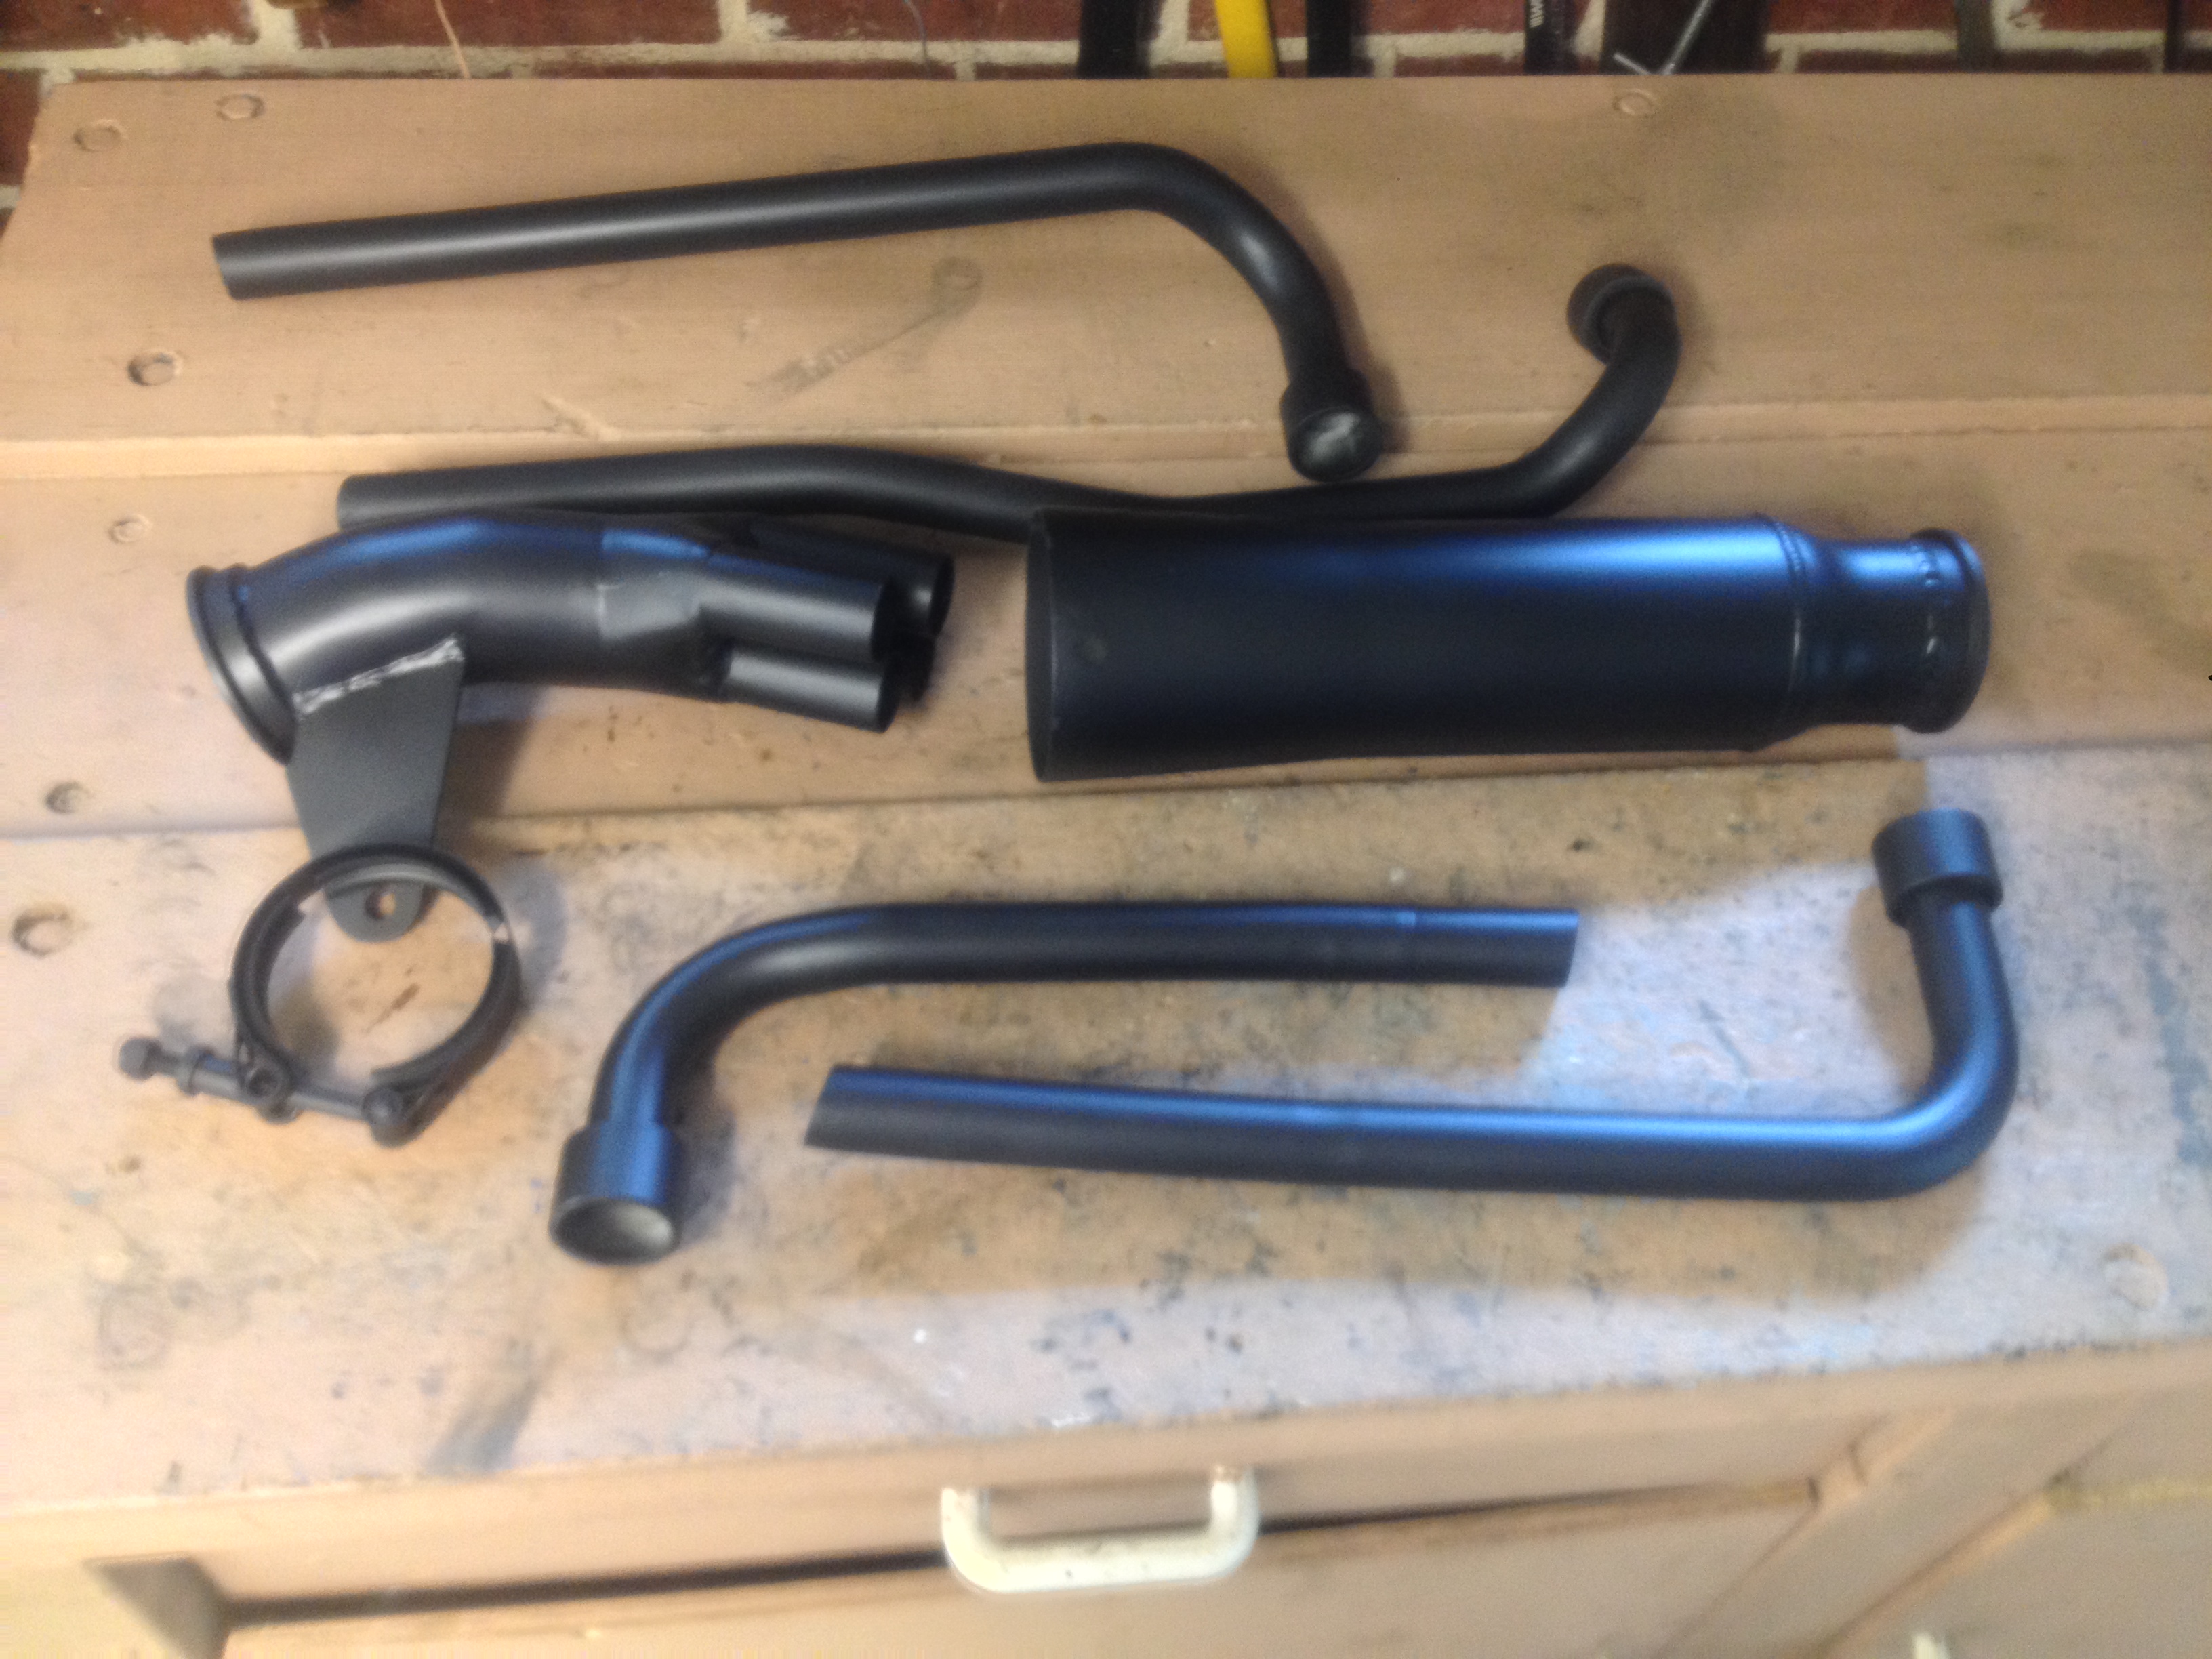
I was hoping the exhaust collector I found would be easy to rotate 90 degrees to get the angle I wanted. Not possible! It will only fit in the header pipes one way.


Have found Mick at Valley Engineering, who has modified it to suit.


He also has fixed the Clip-On bars, making the bars 22mm and the mounts 41.3mm. I’m getting a rough idea of the seat unit style I’m after. I want to follow the line from the fuel tank base through to the rear tail unit. I’m not after a particular style, but aiming for a look that is a cross between café racer and street fighter.

Clip-ons were an easy fit after mods to the bar diameter and fork clamp!


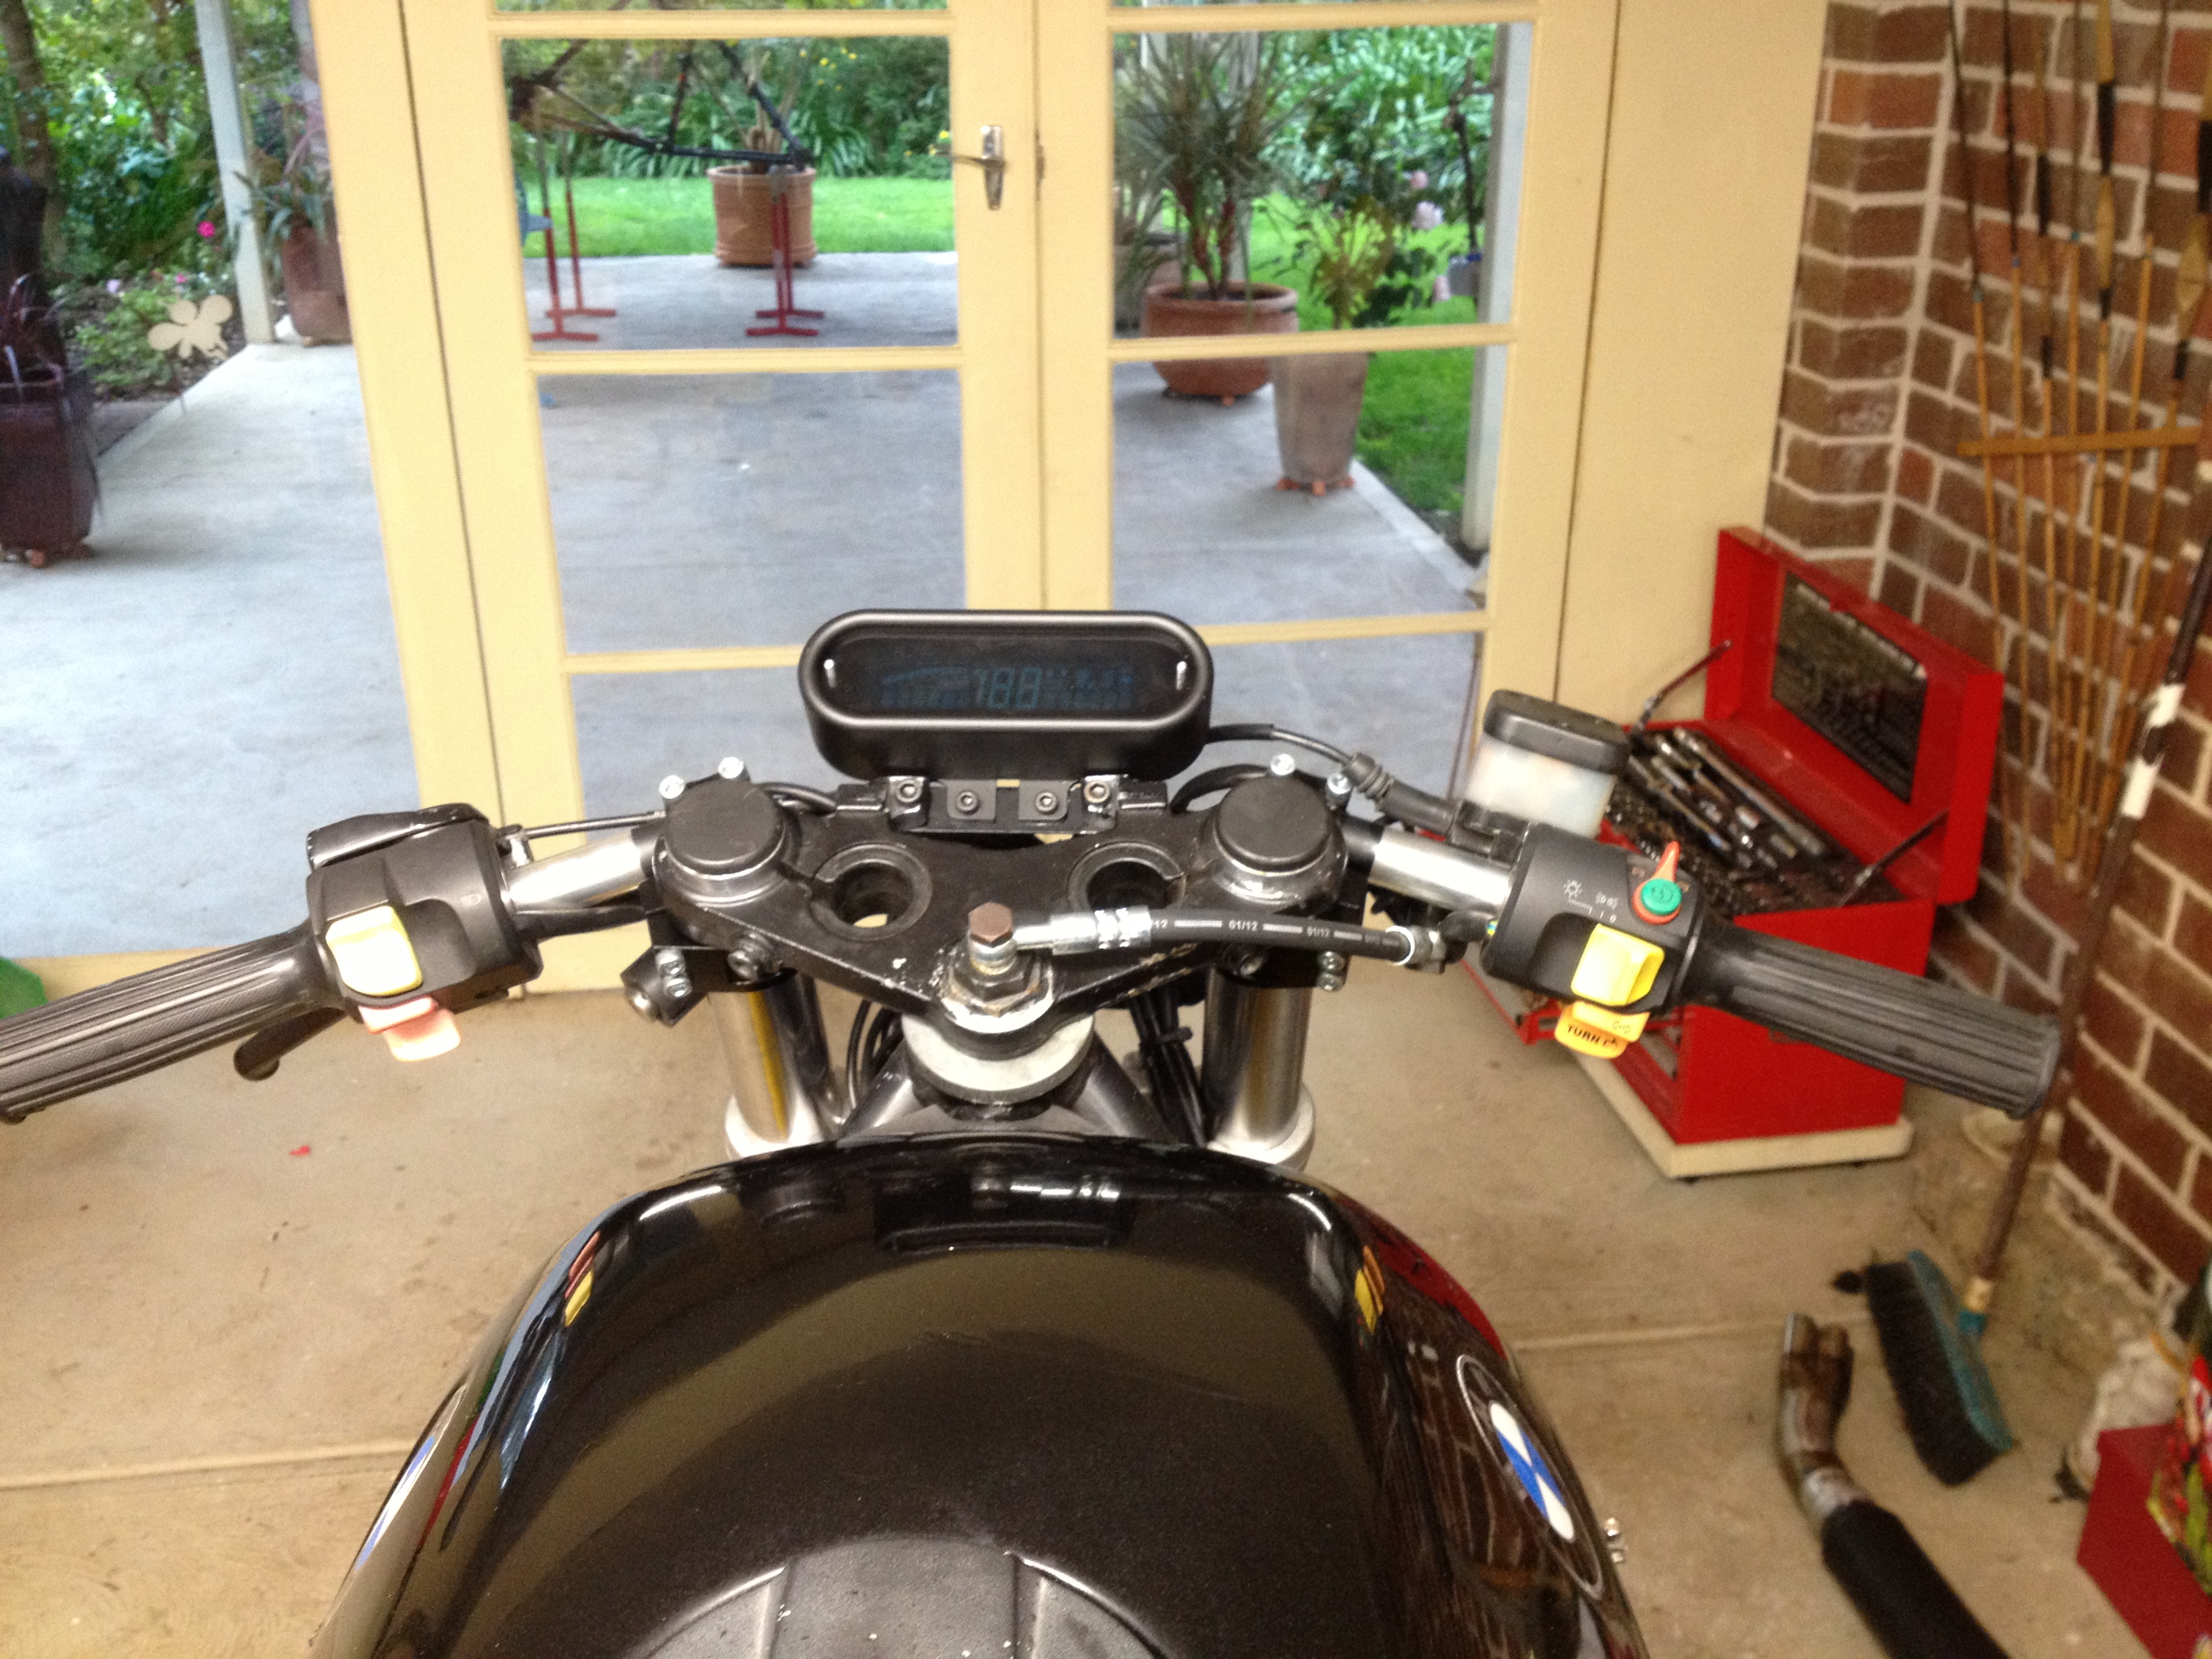
The Speedo mount is done. Longer brake hose fitted.
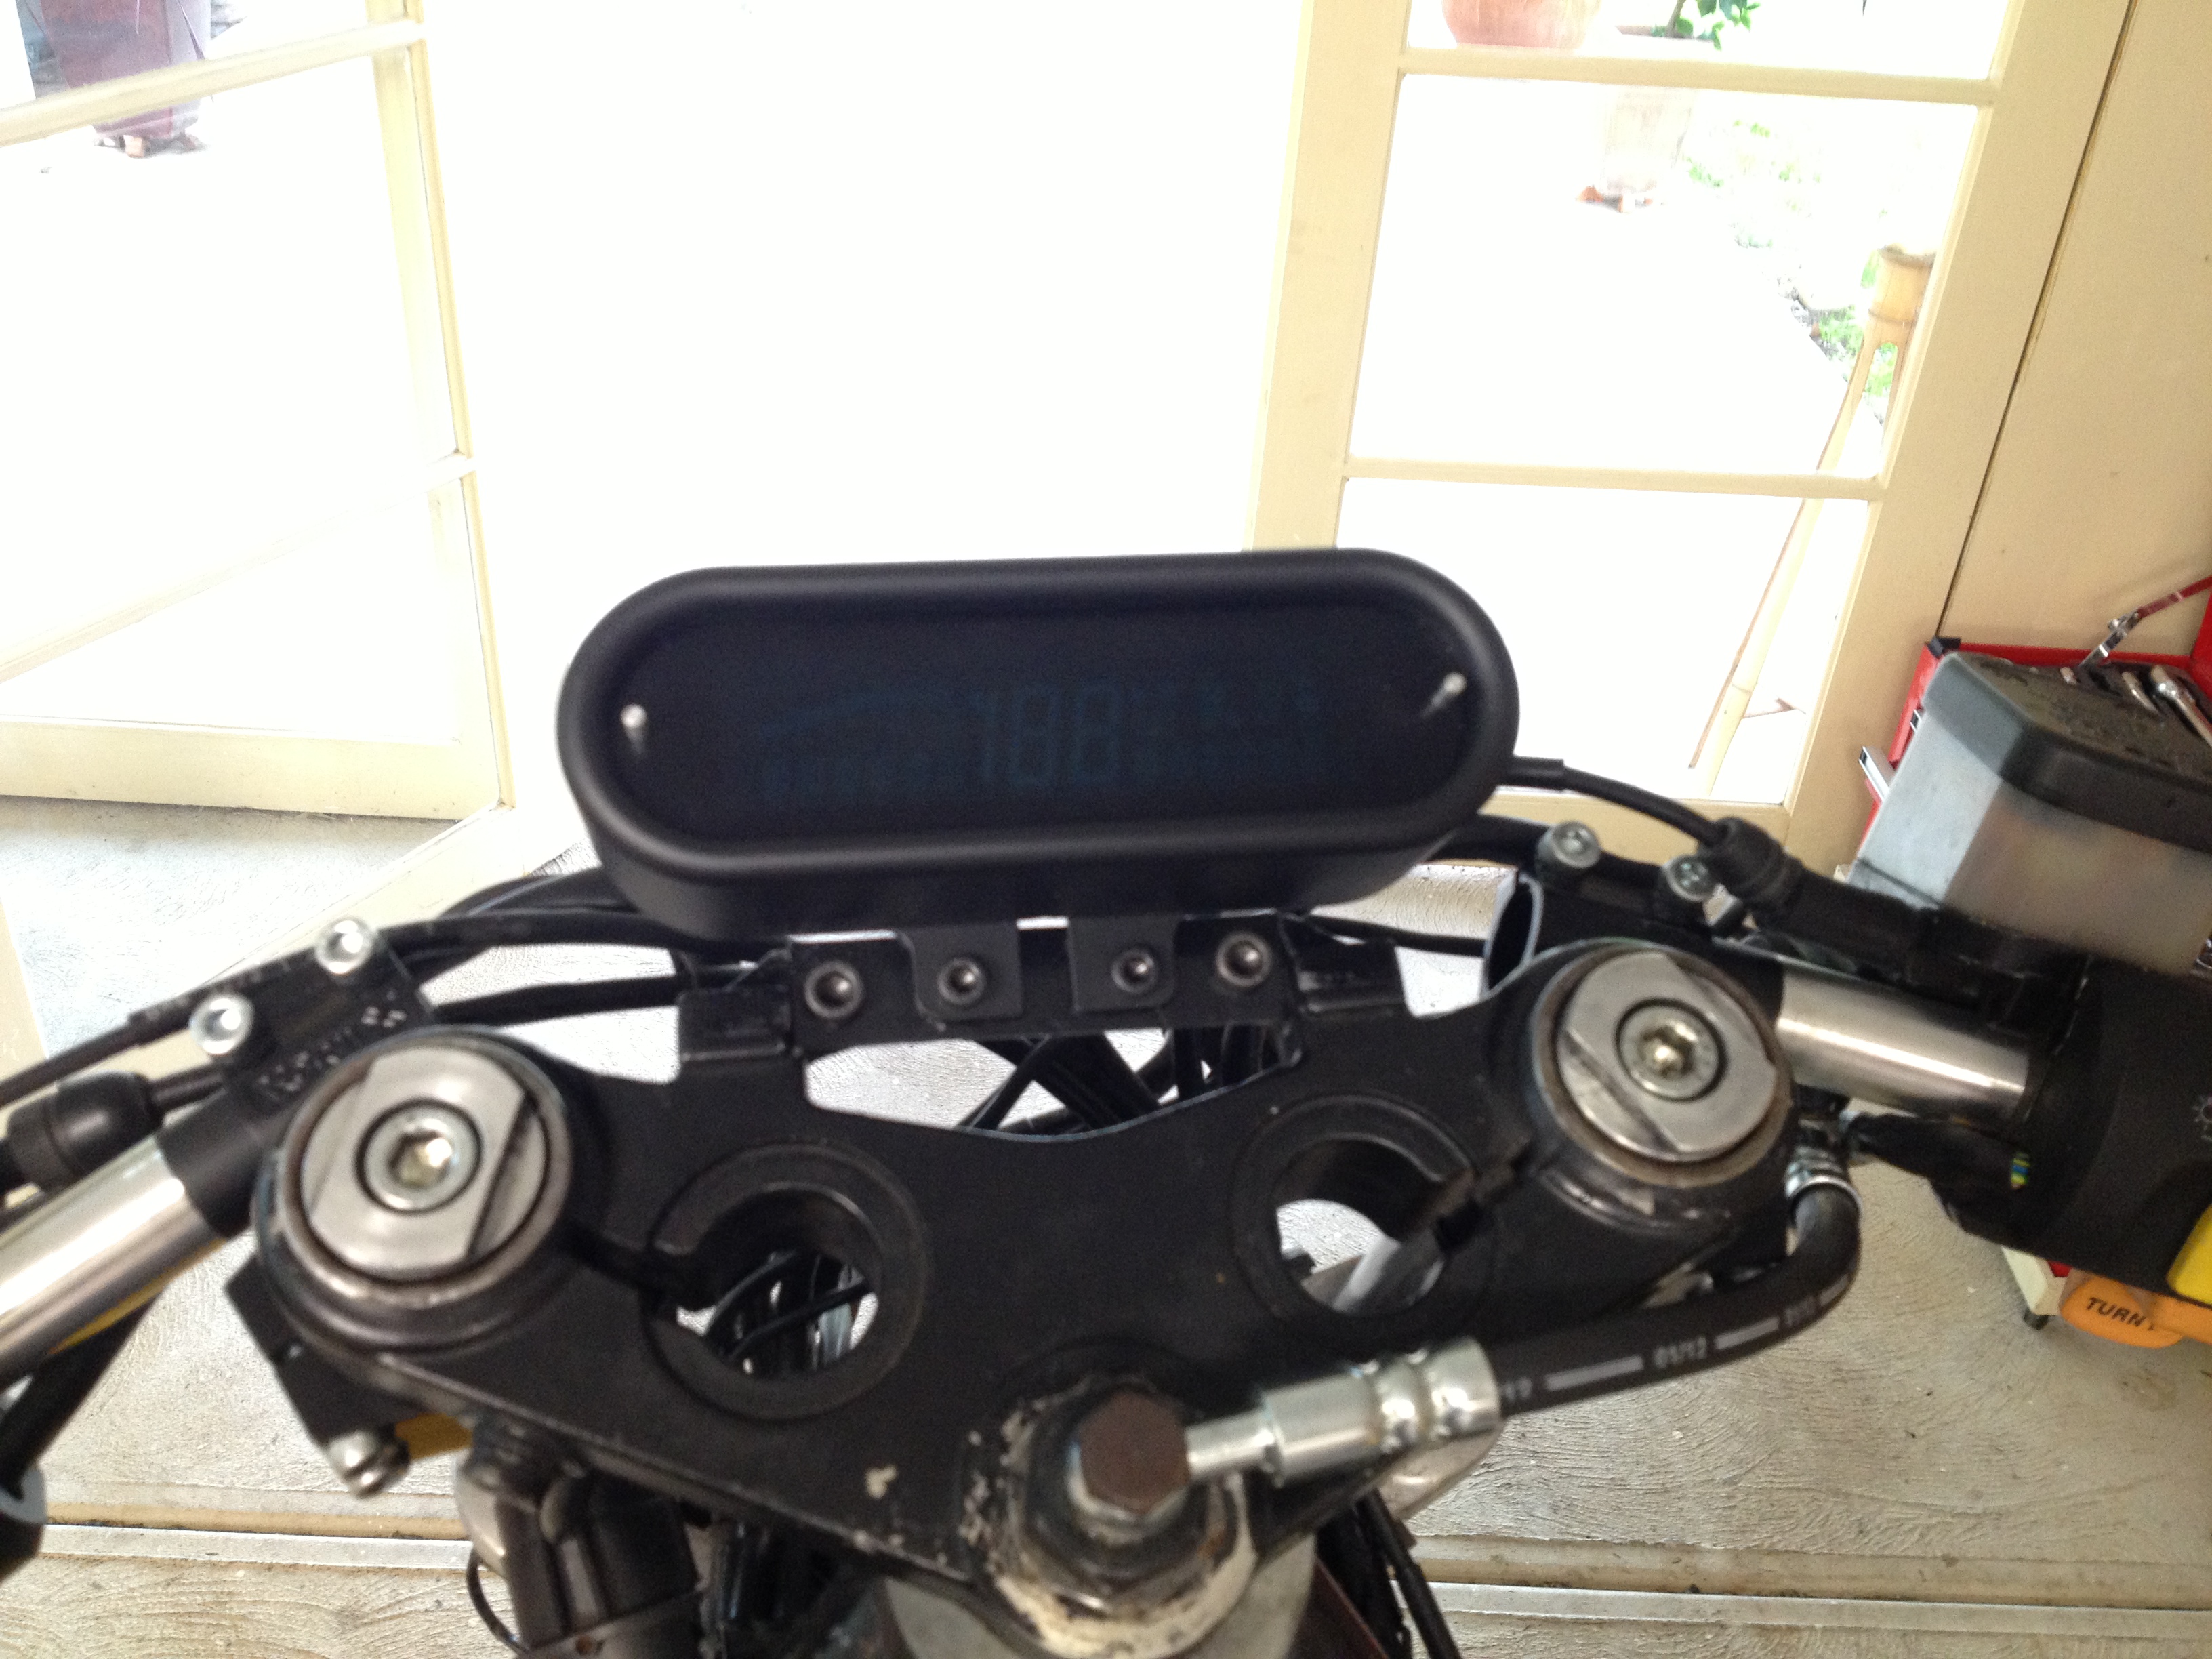
Lowered the speedo a bit, happy with it now

Decided to only use one horn. Made a bracket and mounted it on the left, behind the radiator.

Rear brake reservoir mounted.

Getting rid of the last of the frame tags.

Bike is now off to Valley Engineering for some surgery.


Mick (on the right) is going to do the tasks I can’t do at home.
– Hone out the hole in the upper triple clamp to hold the ignition block.
– Fabricate an exhaust hanger.
– Cut and brace the sub-frame.
– Manufacture the seat unit and tail piece.
Mick has form, turning his Ducati Monster SP into a café racer with the radiator moved to under the sub-frame!
One week later …………………………………………………..


Extra bracing of the sub-frame.

The smaller battery is now enclosed.

The ignition now fits in the clamp,

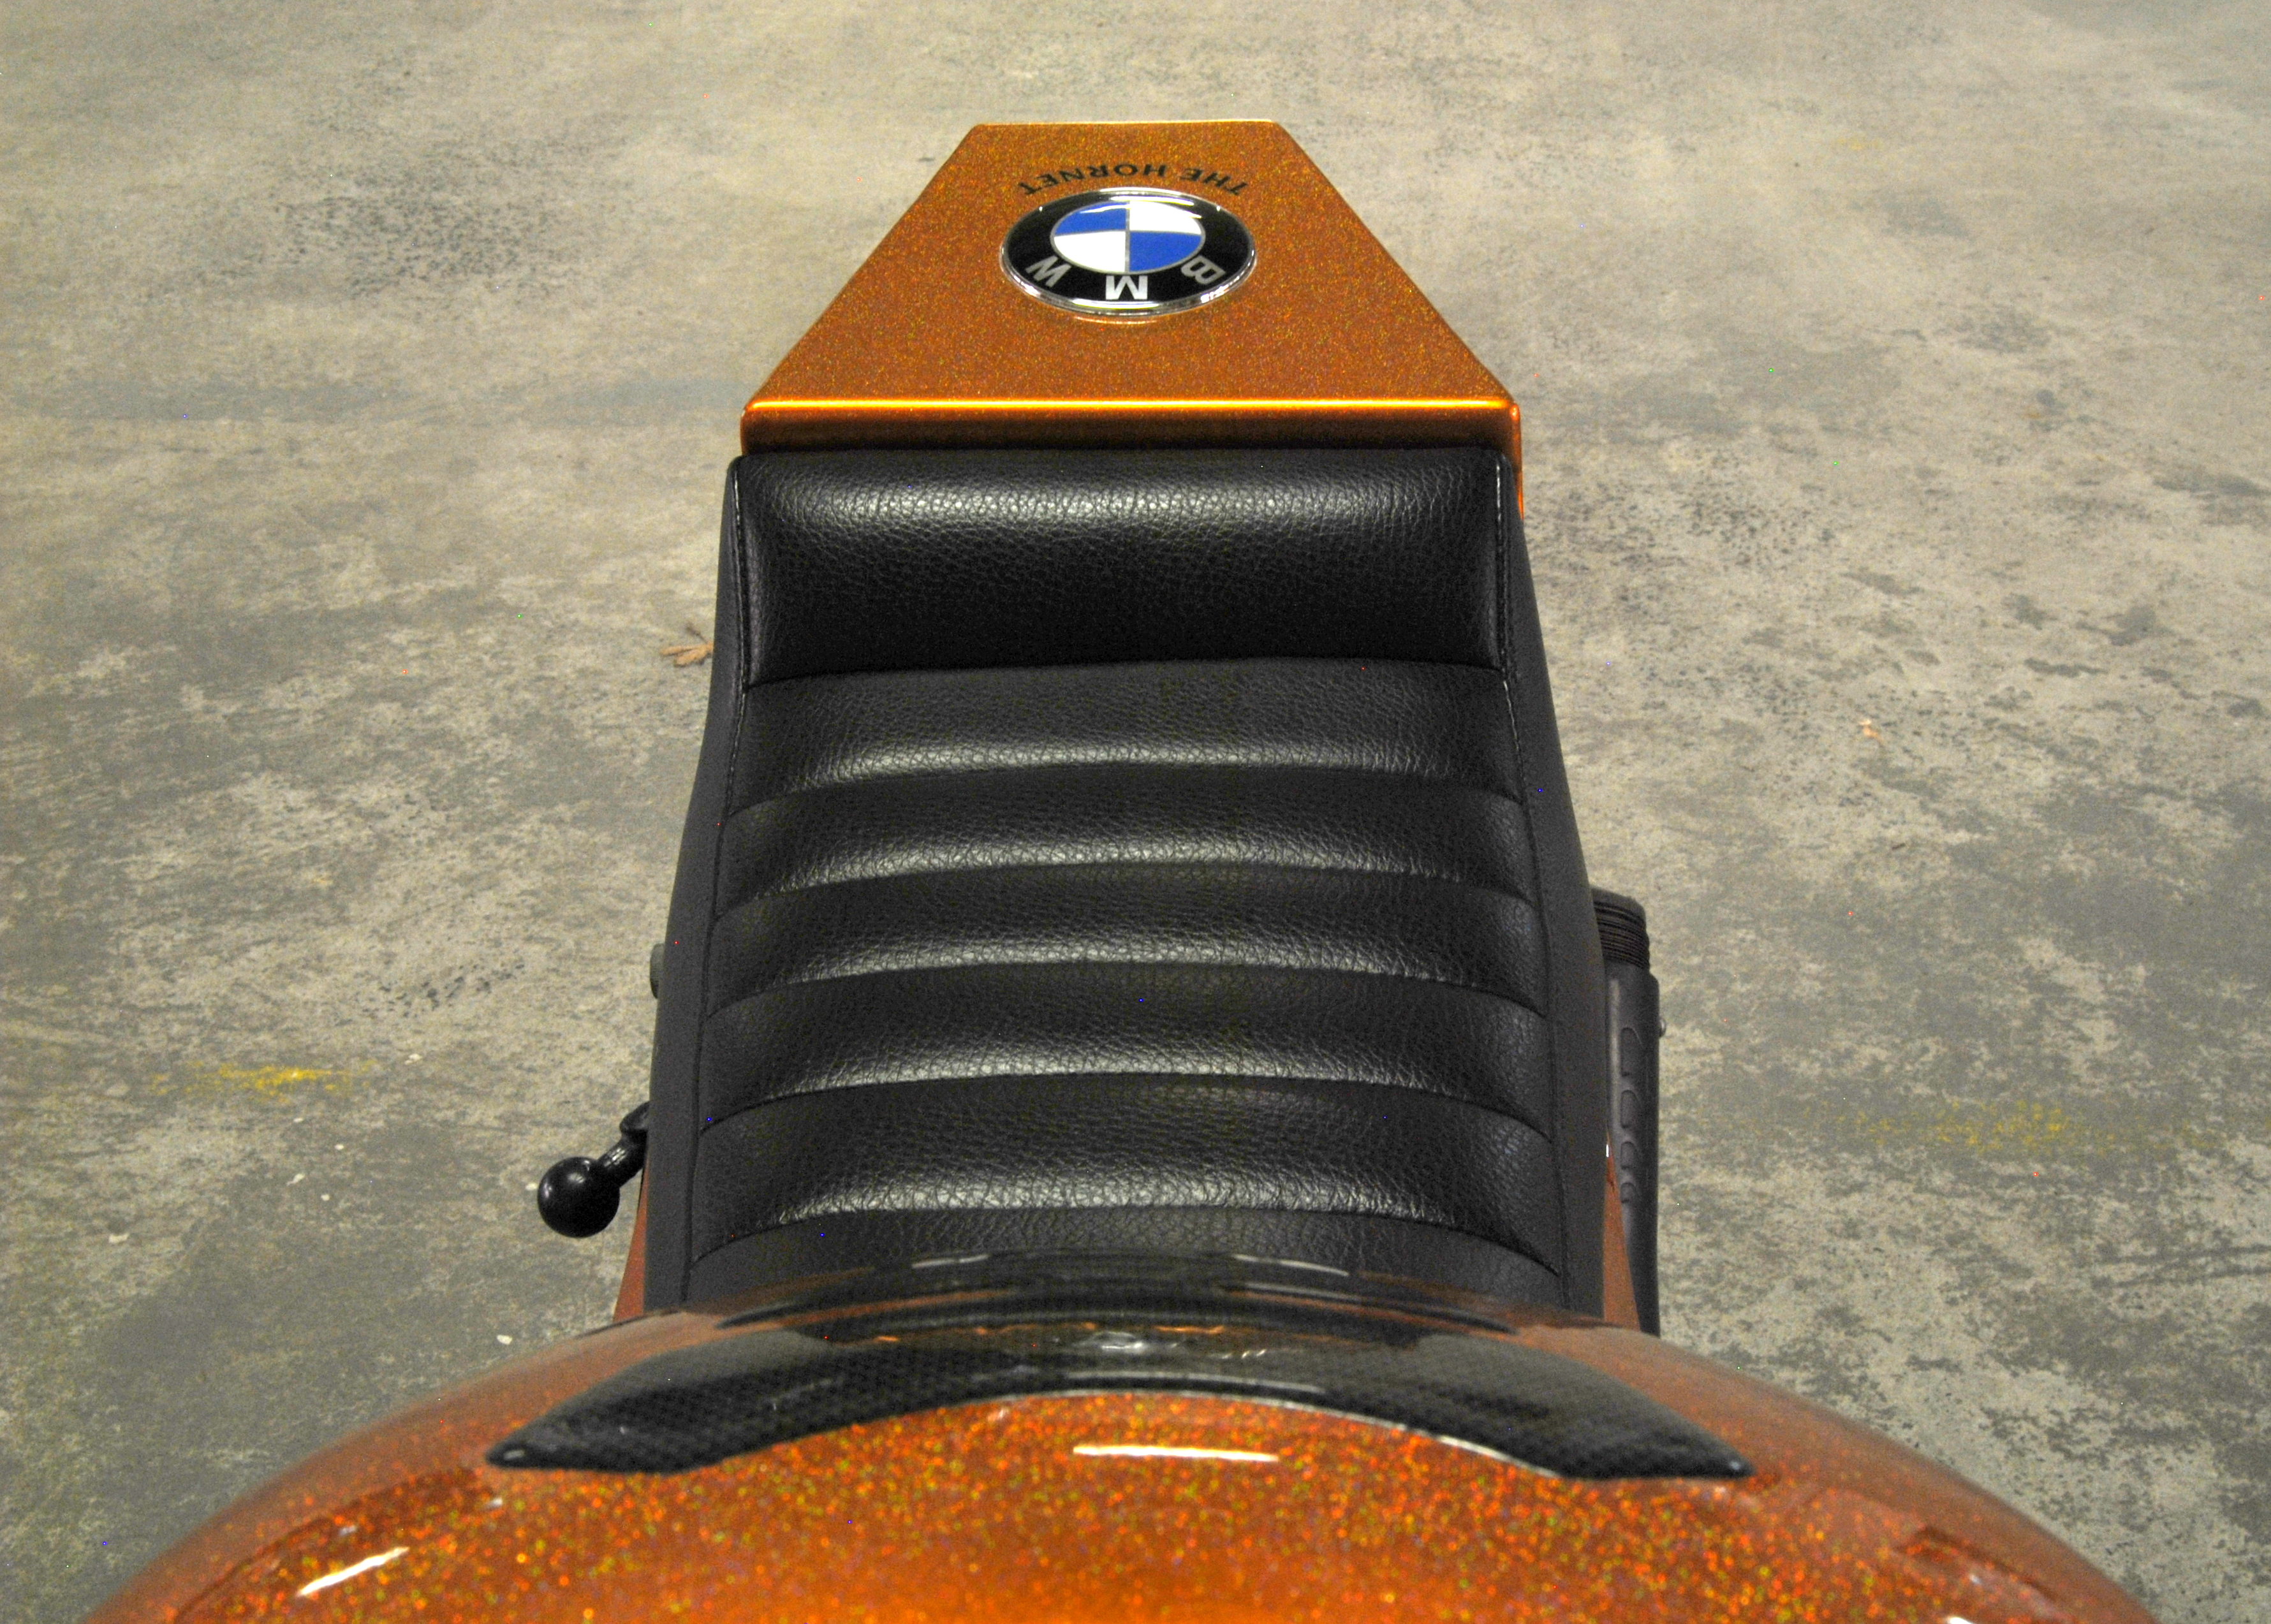
The seat unit is just how I wanted it. It continues the line from the tank, and the frame.

Fortunately, I provided accurate drawings, and a scale mock up to work from!

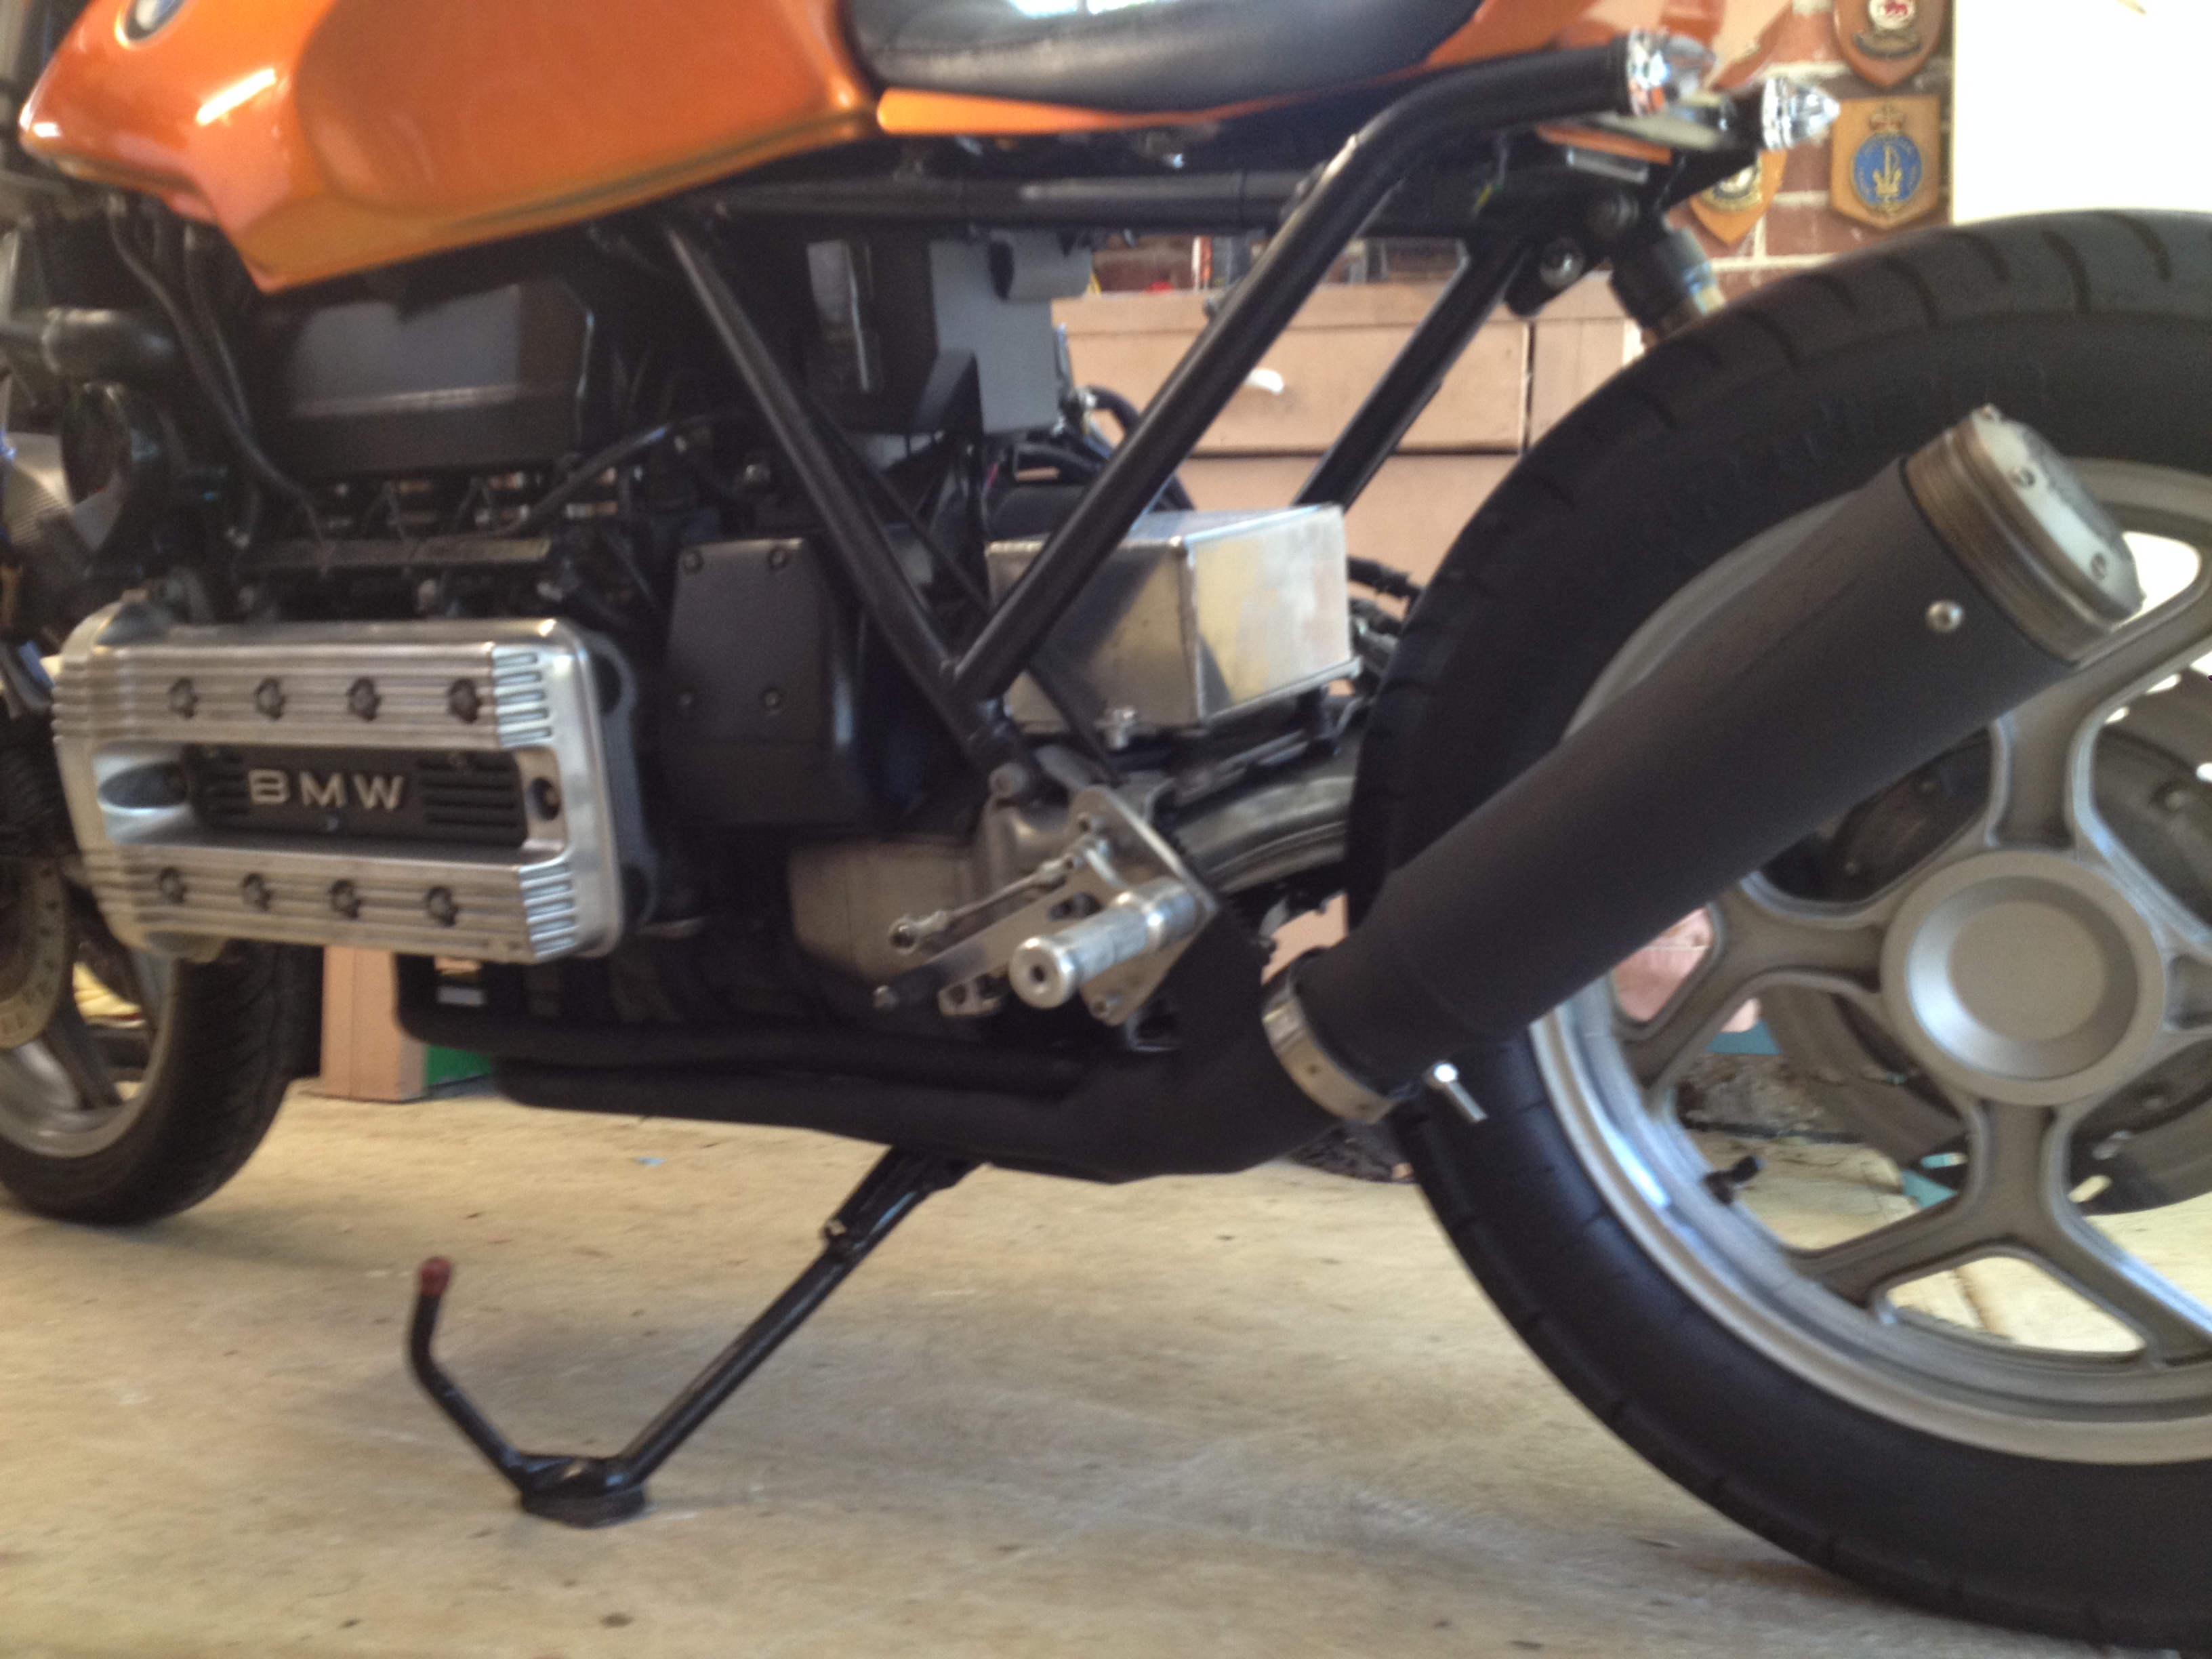
The exhaust is now finished!

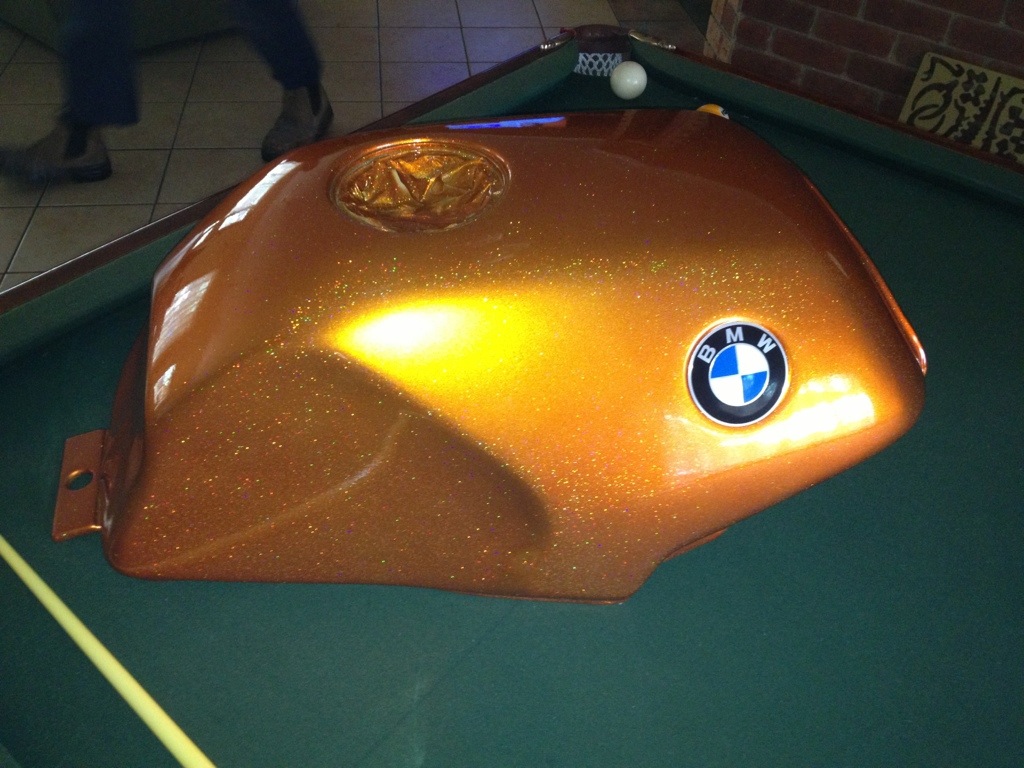
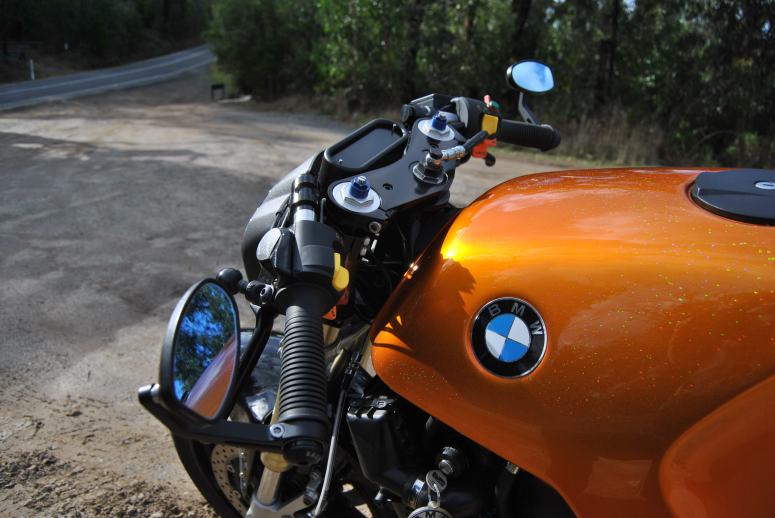
The tank and seat unit are off again for painting. My mate Pete of Peter’s Panels has offered to do the job for a couple of bottles of scotch! On the condition I do the preparation work. The colour is from a new range called ‘vibrance’. It is a nod to the BMW 1970’s colours, but with metal flake.


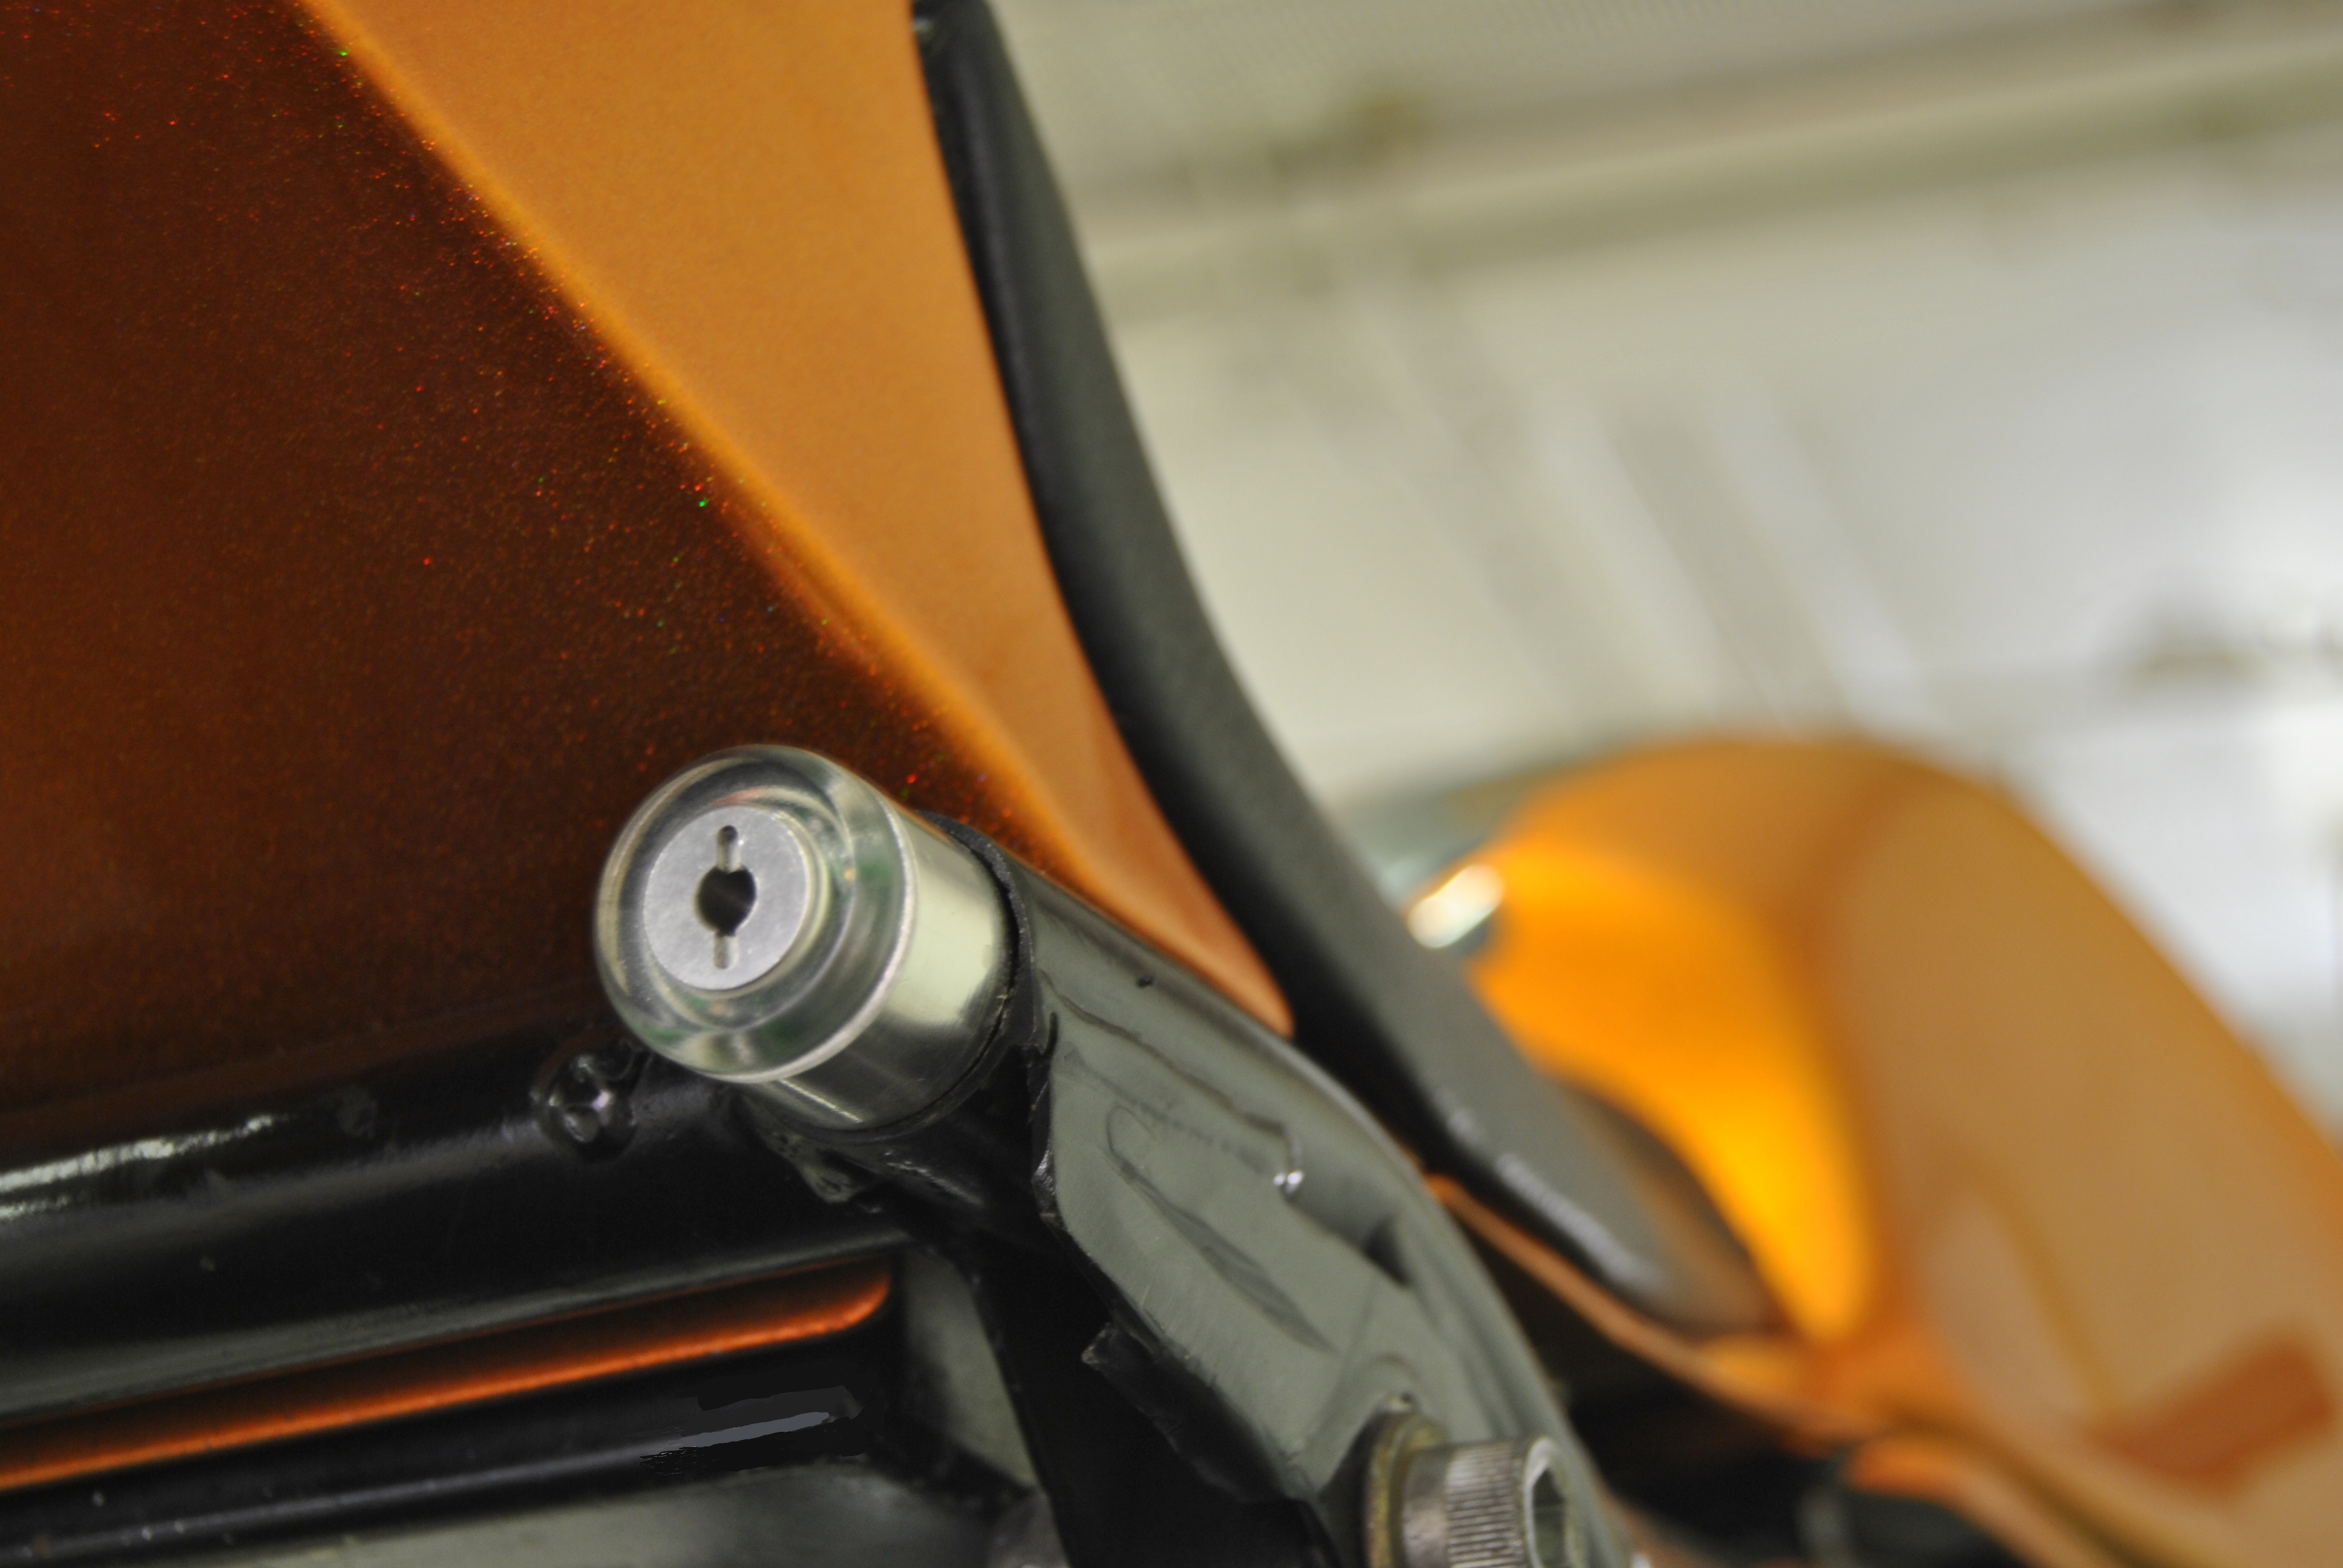
I bought some bar end indicators off eBay to use in the frame holes. Internal wiring was an interesting job!
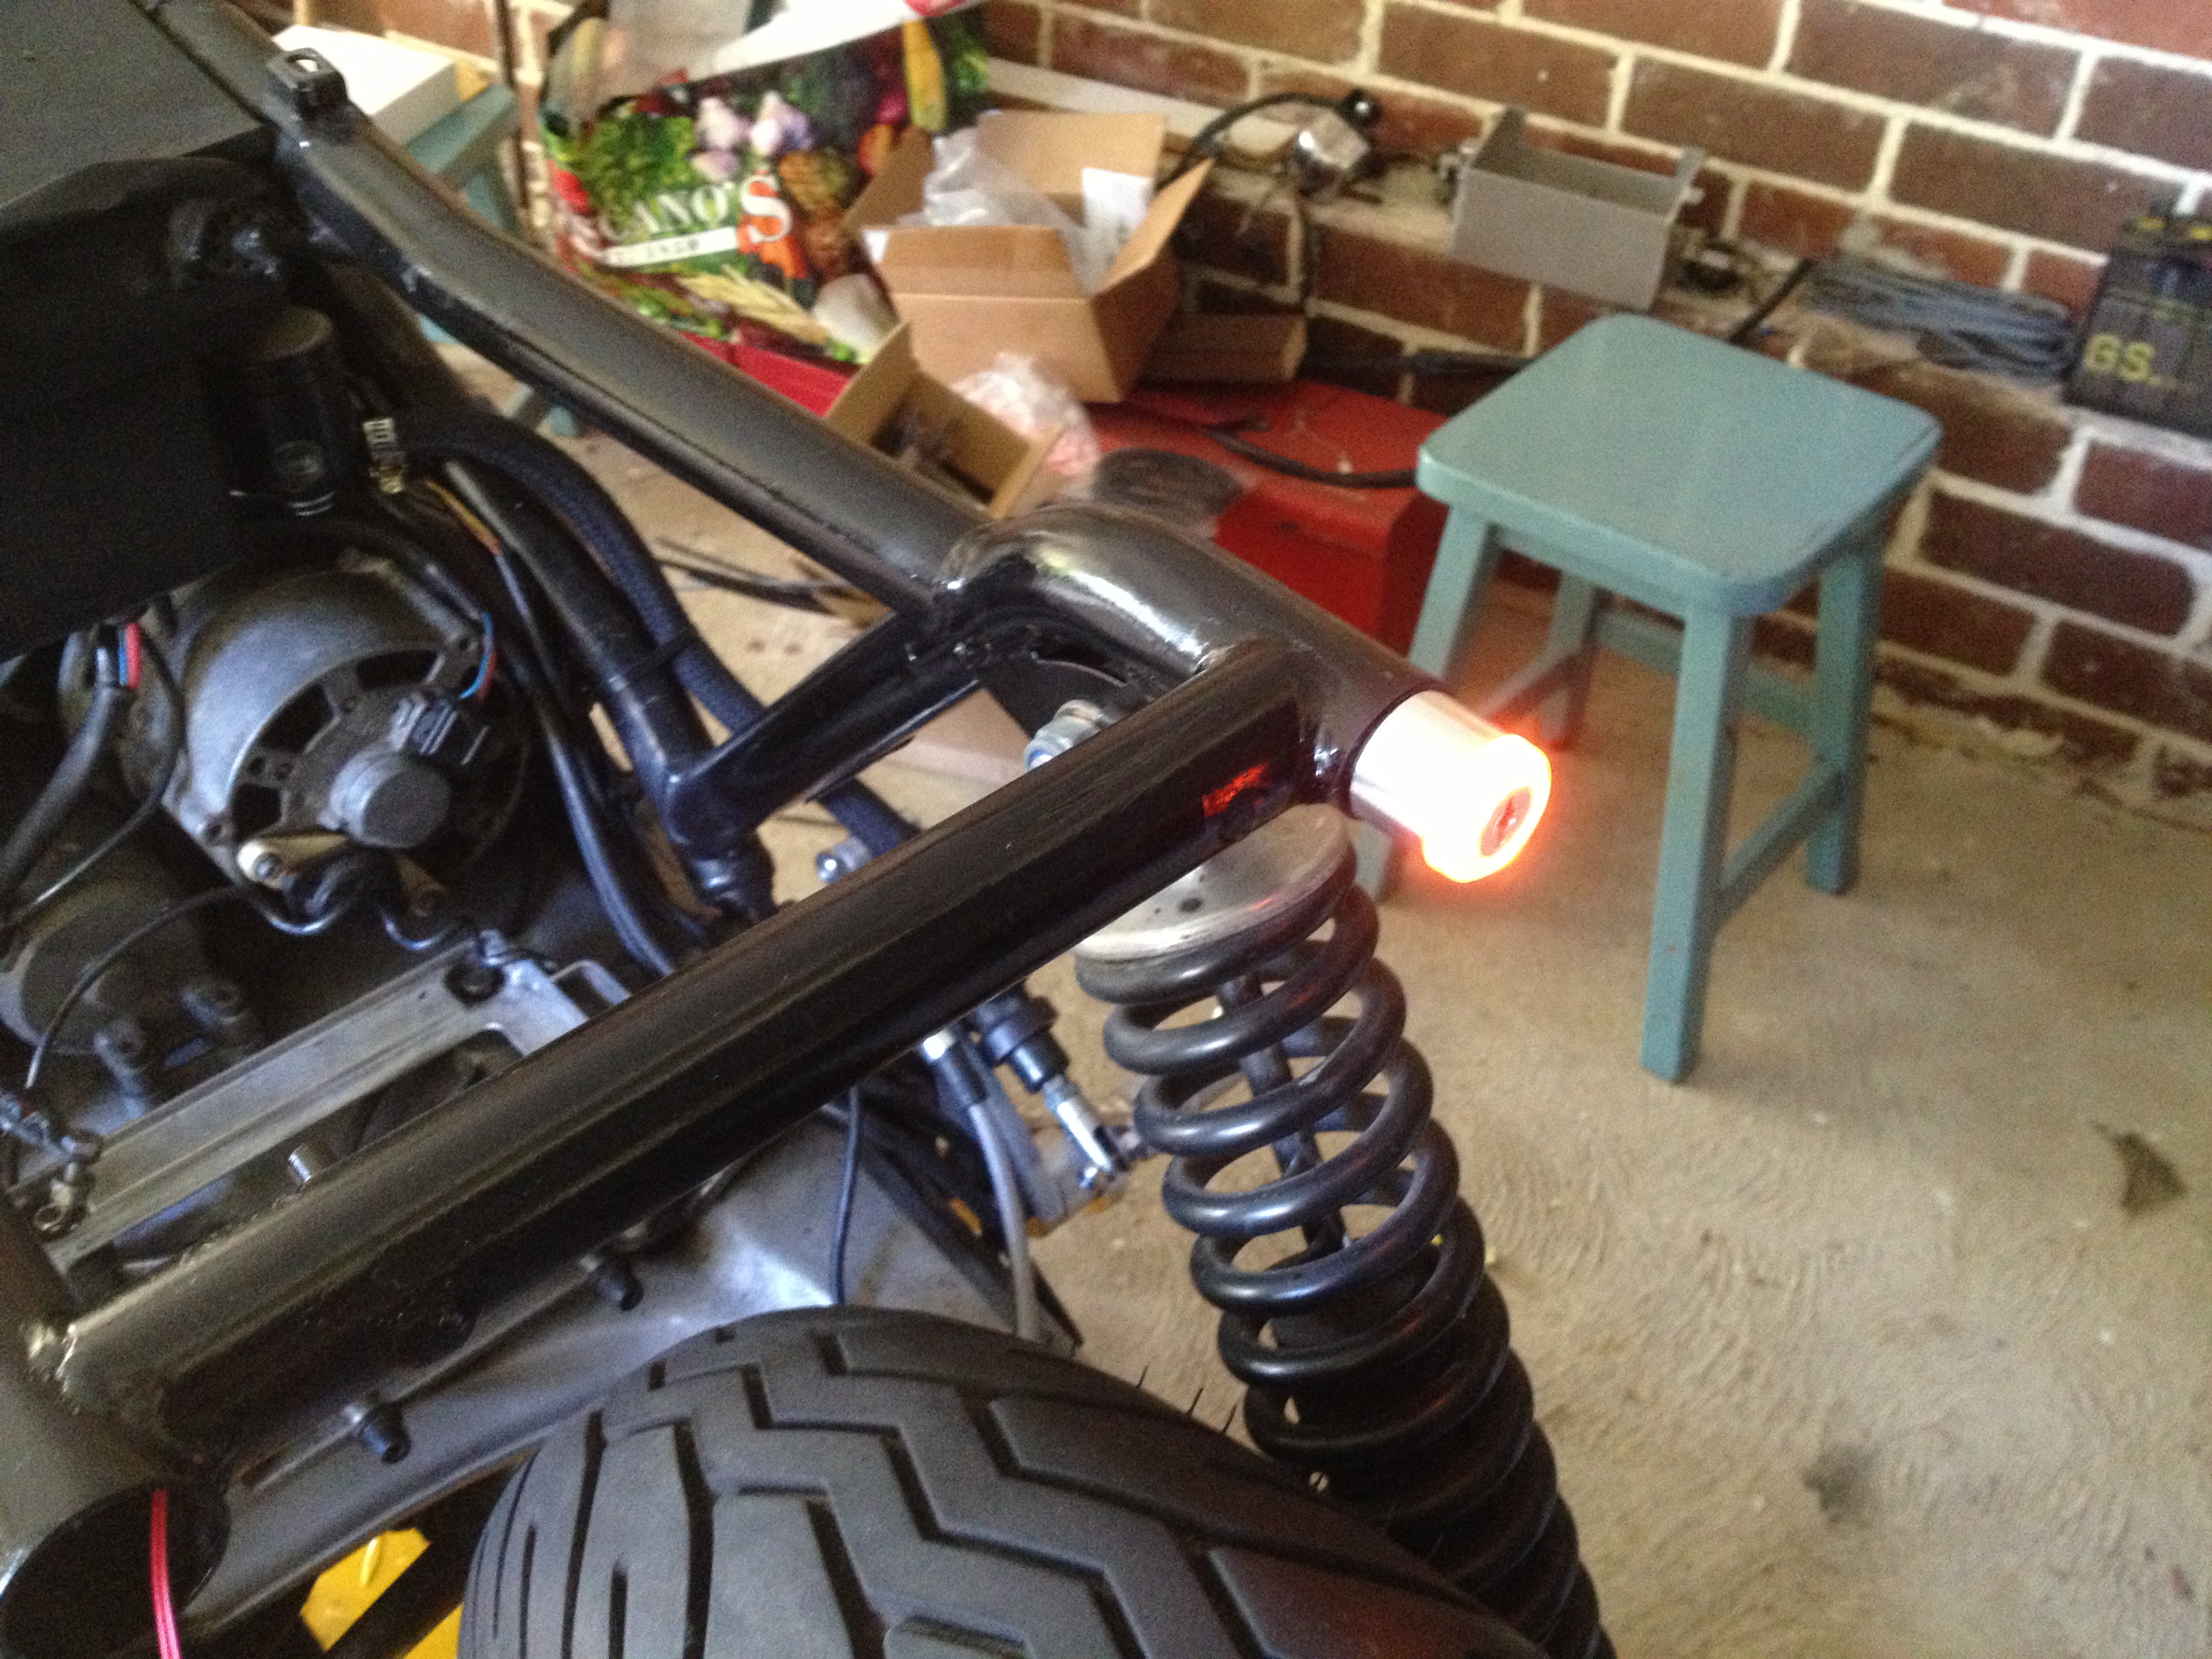
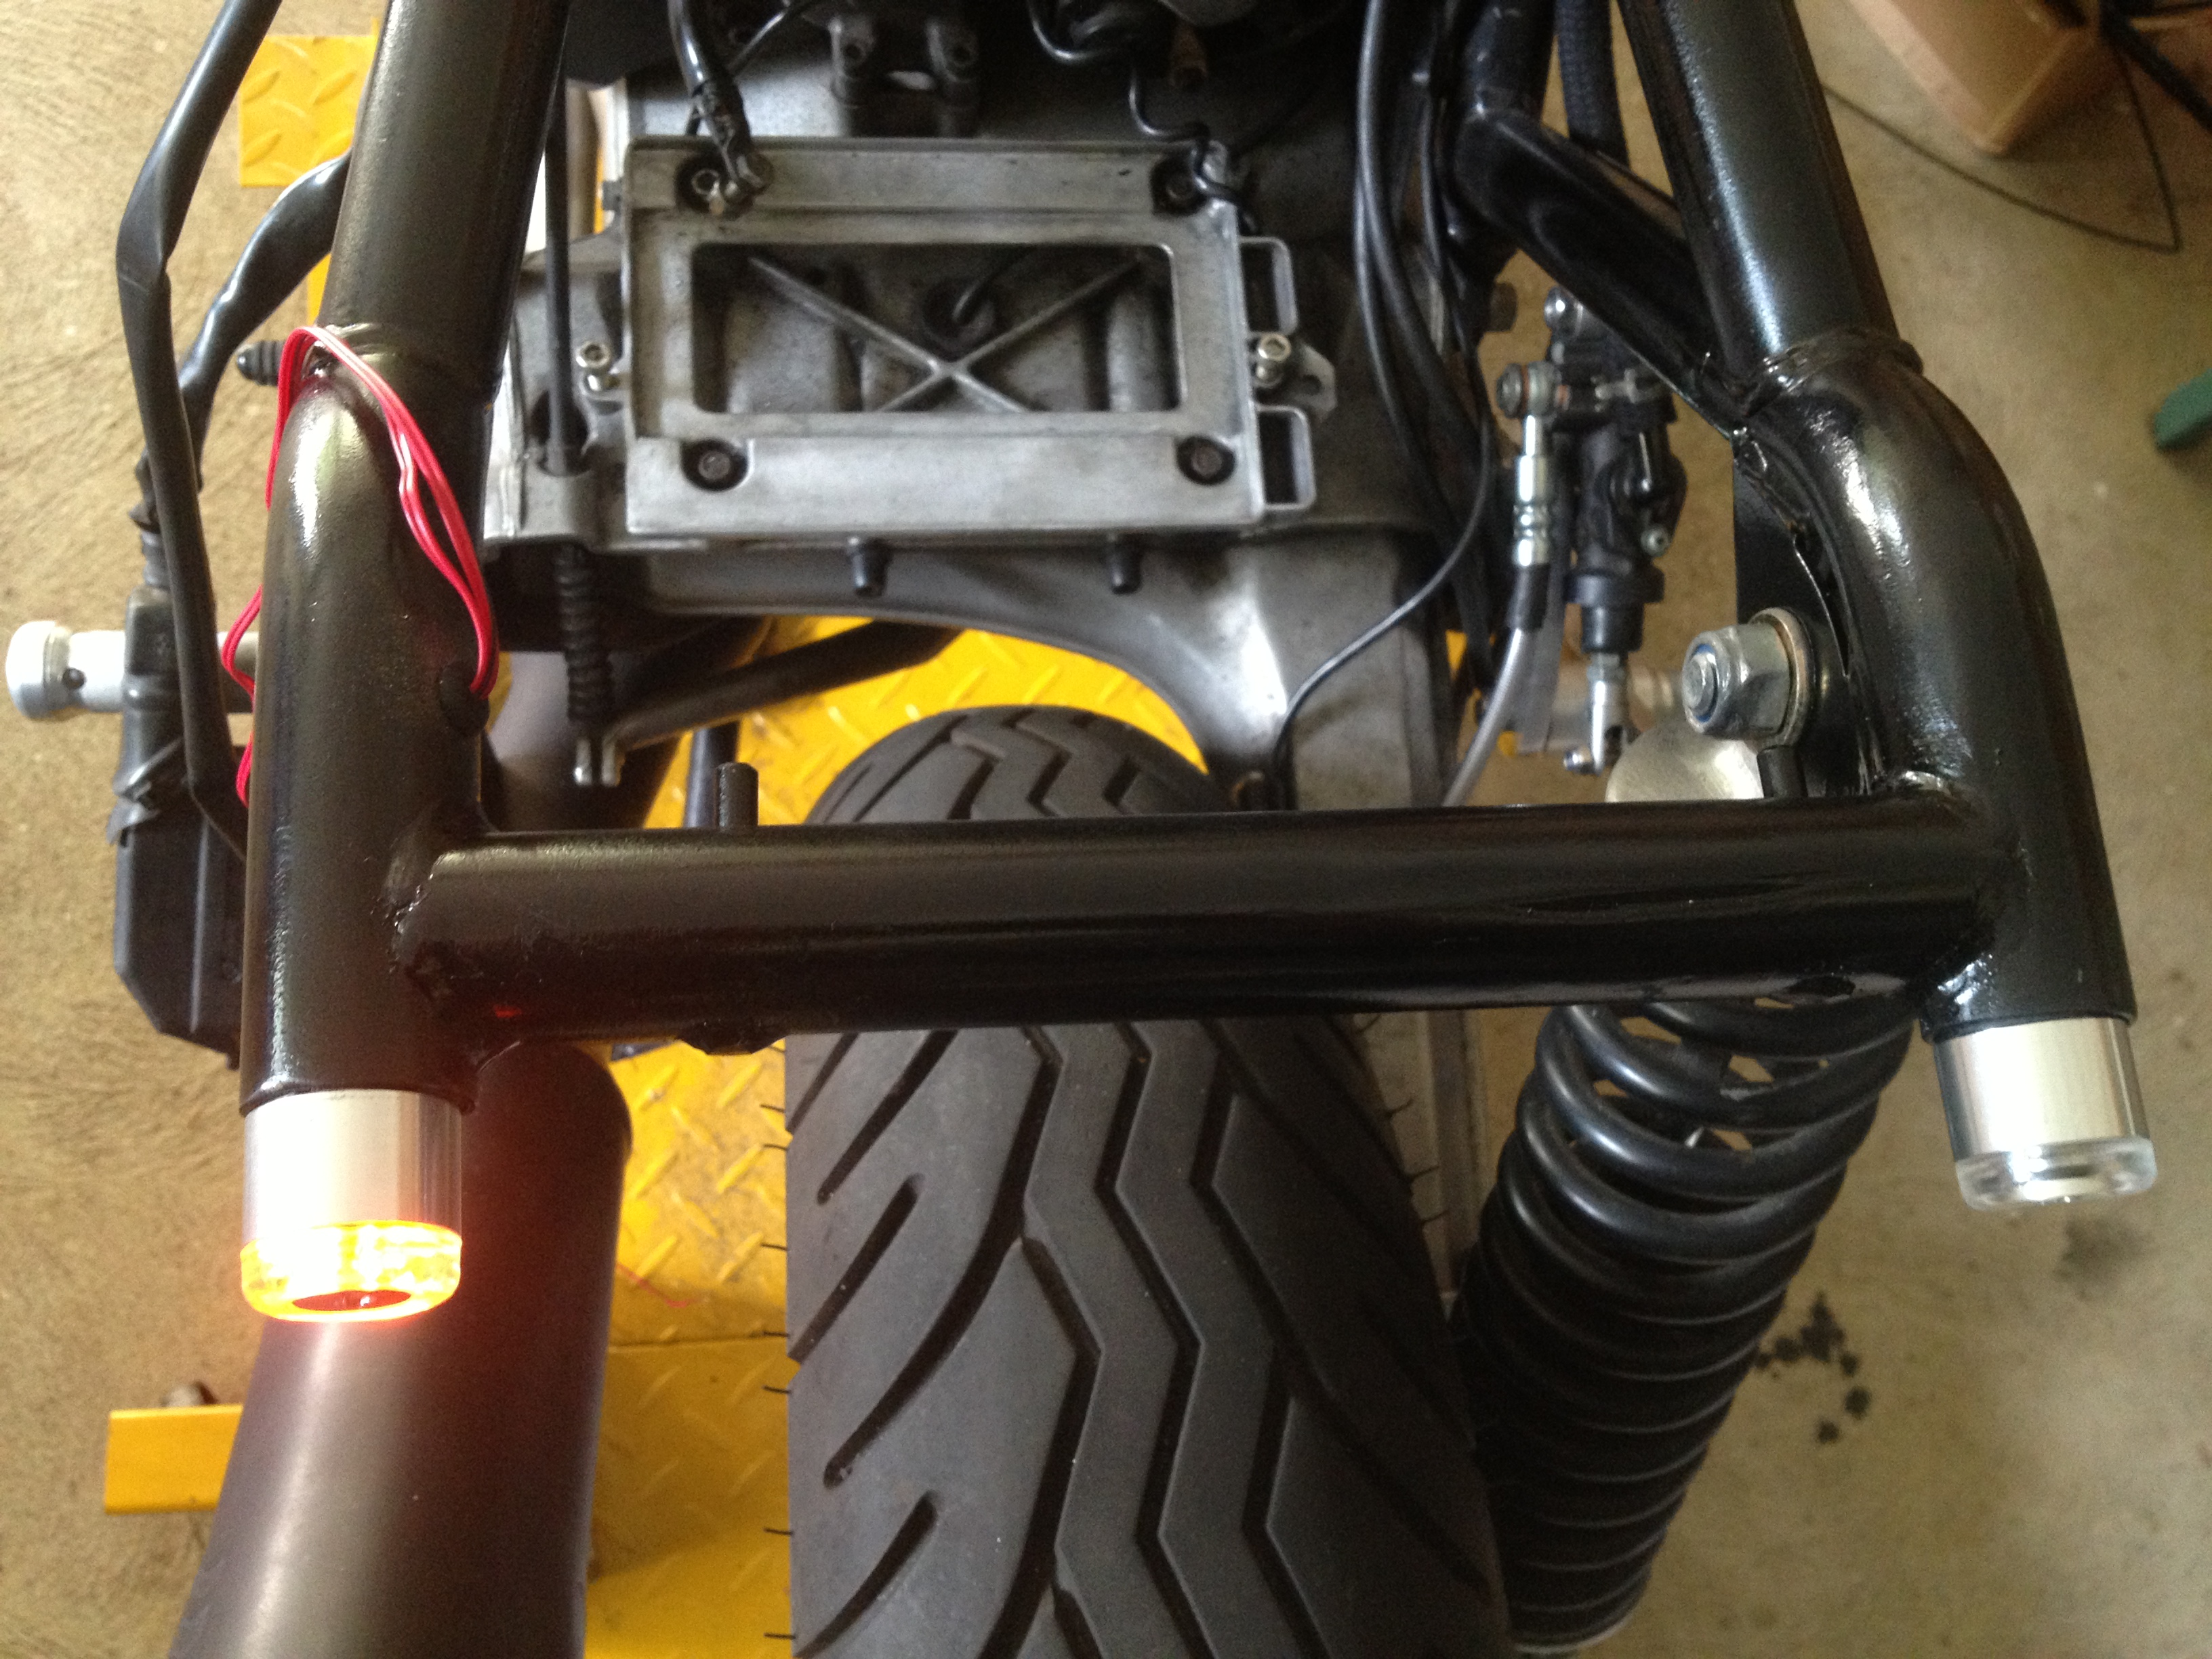
Front fender now covered with 3M carbon fibre wrap.

Battery connected and installed in custom made box.

Now for the part I’ve been dreading!

We have ignition!
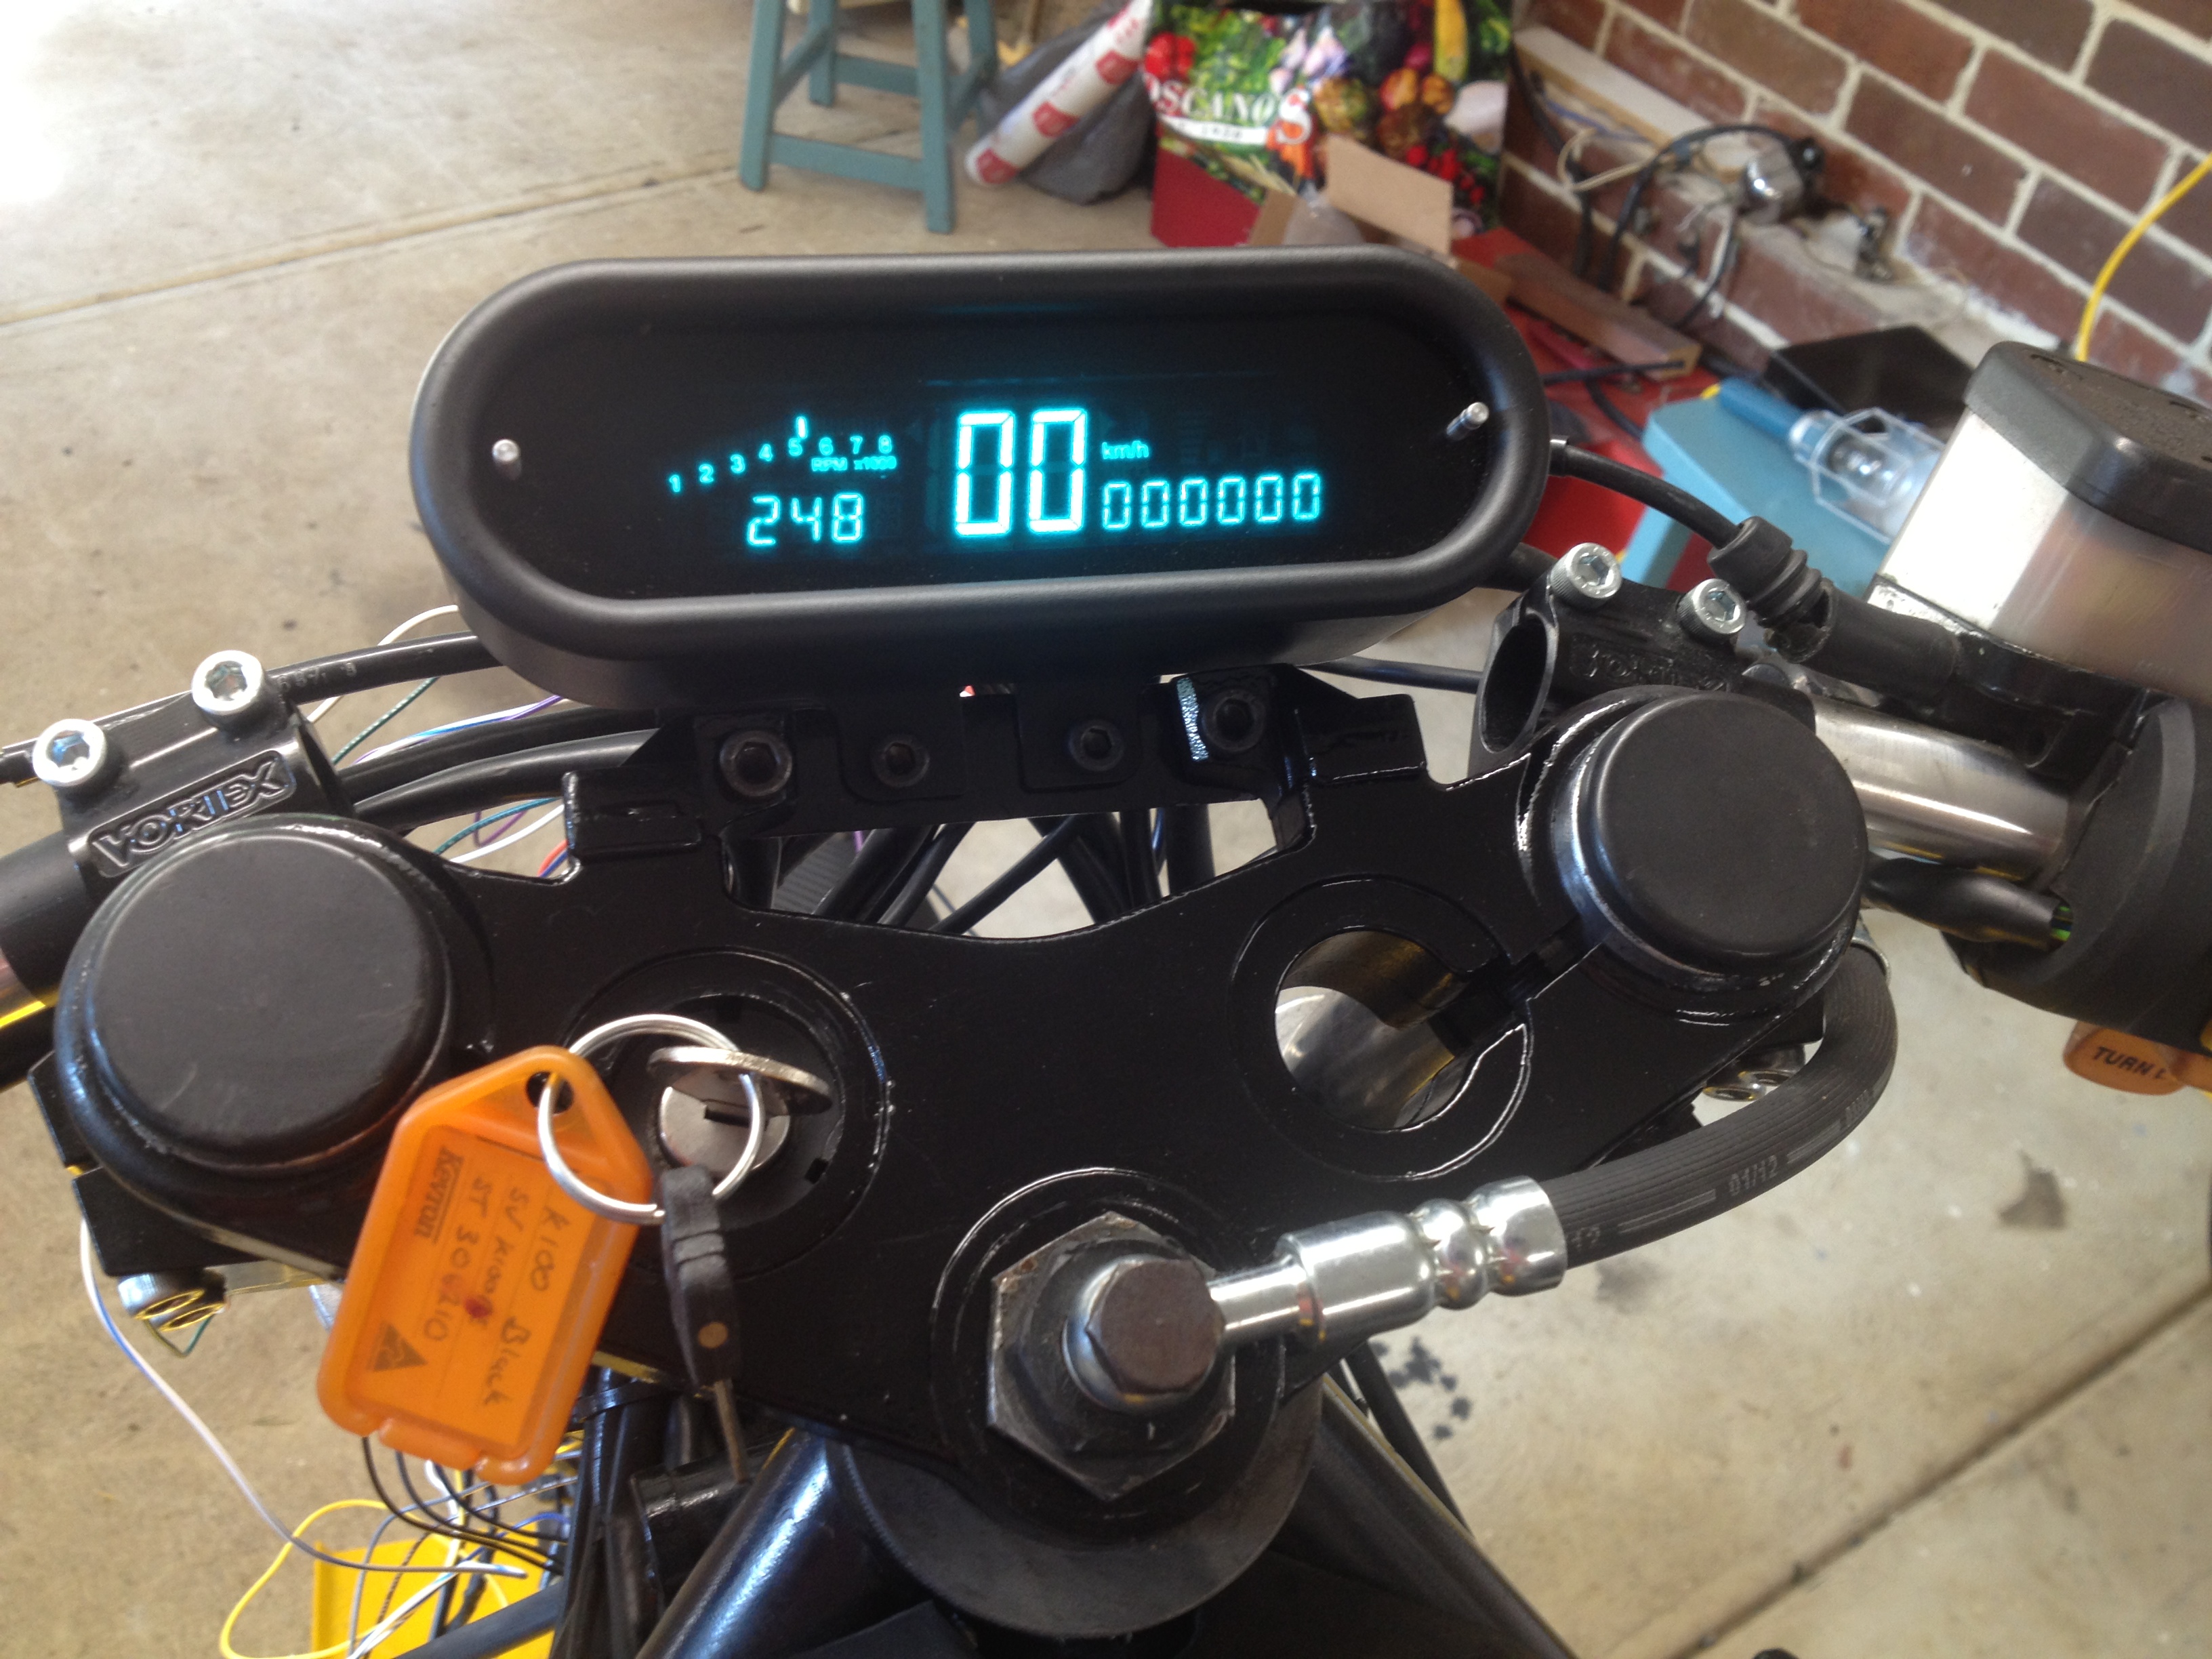
I’ve managed to get most of the cautions working, I can’t get the neutral light working for some reason. I need the tank and seat unit back to run the engine to check tacho. Then to see if the OEM speedo signal will work……… nope!
I ended up getting a sensor unit from Dakota Digital and mounting it on the front wheel. It counts the wheel studs.

The master at work, putting on the base silver coat.

The paint job by Pete is flawless!

The wiring is coming along. Yellow spaghetti! Thank you self closing braided line!


I’m away for work the next week, will book in the seat fabricator when I return. Reassembled to get the seat done.


Got the seat back, great job! Put the bike together and added the headlight to preview the finished bike.


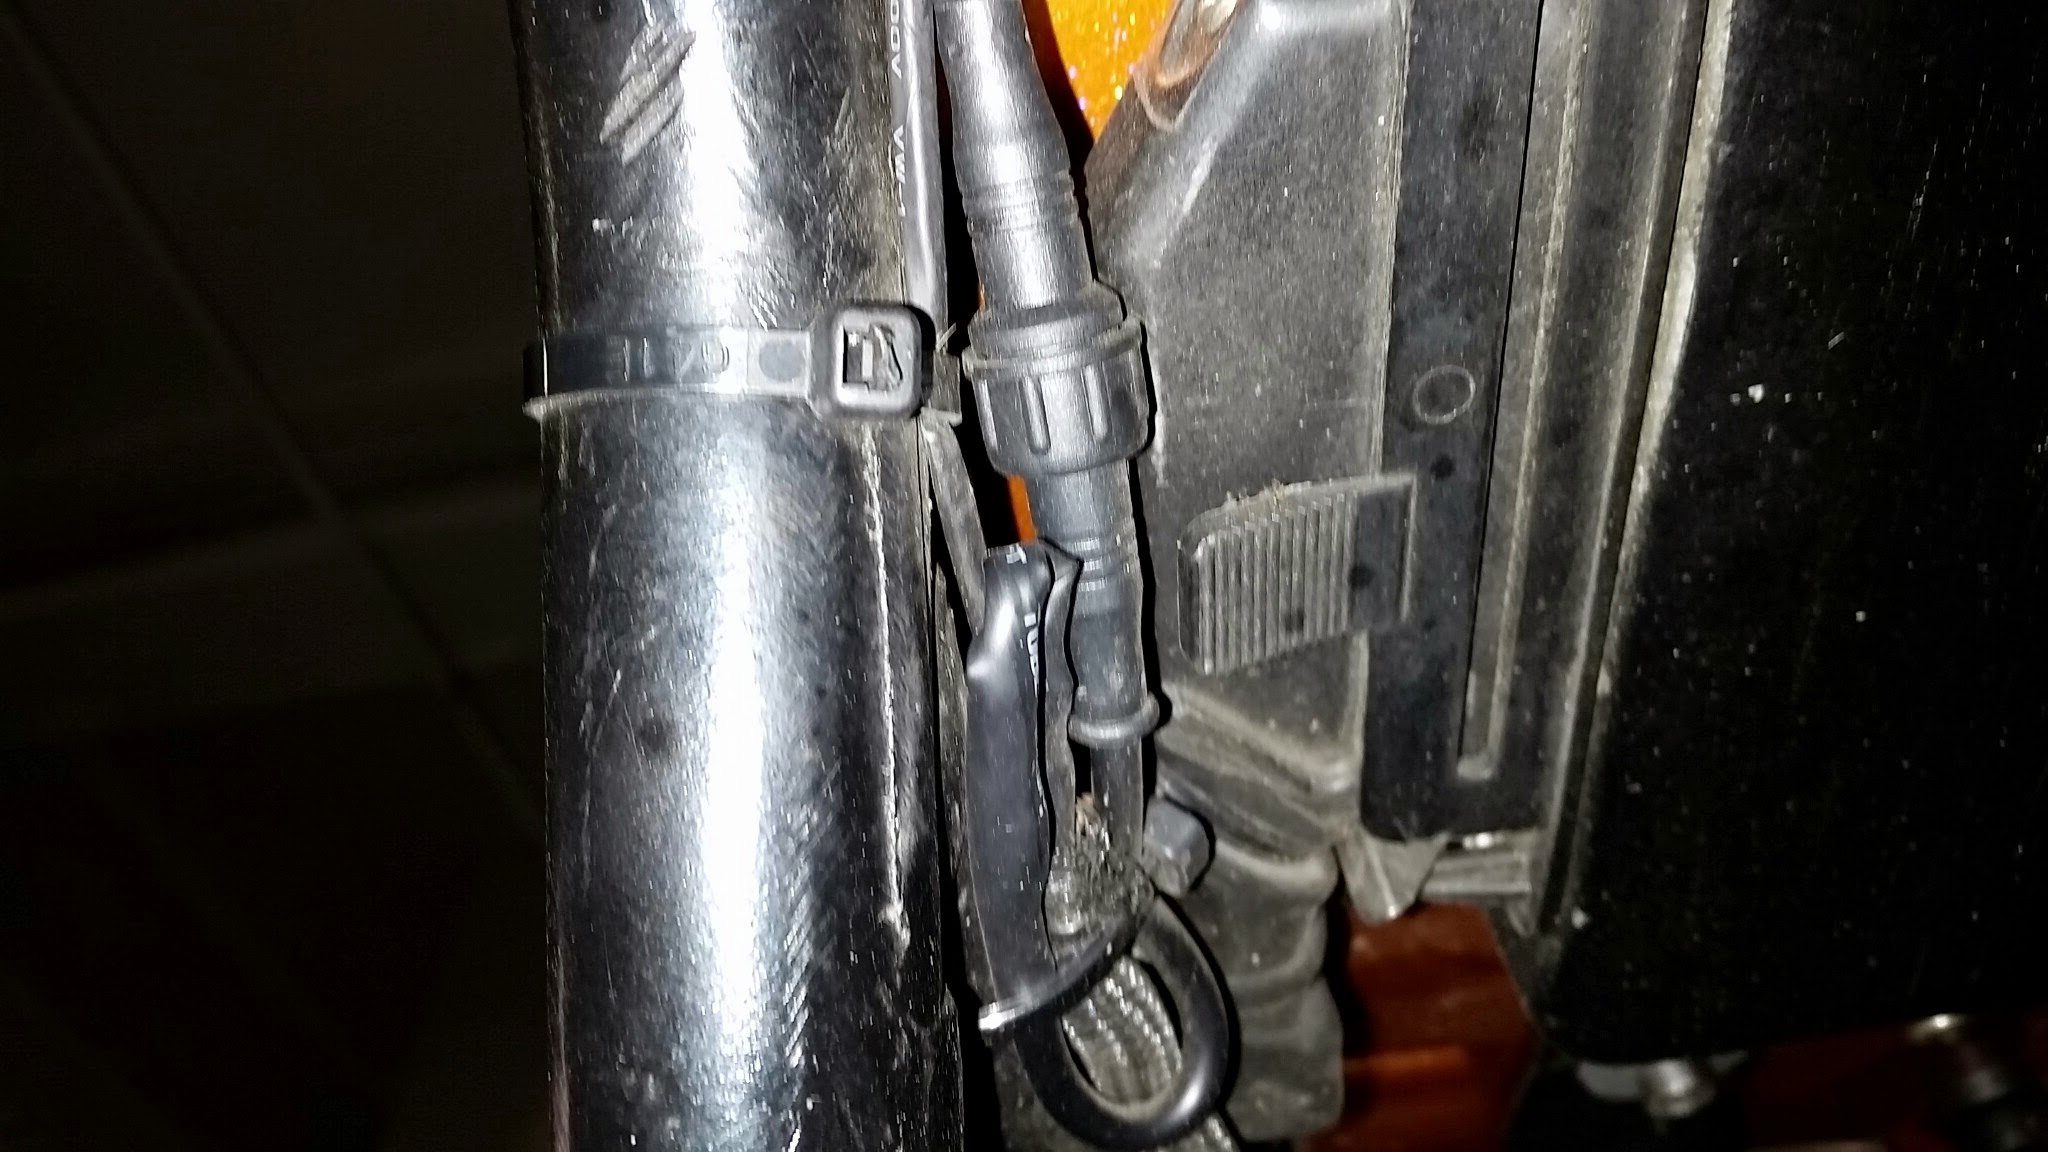
After 6 days work, back into the wiring. This is a boring picture, but it is satisfying to get it right. Now have a waterproof quick release connector for easy seat removal. 
I later changed to a smaller, completely waterproof connector.
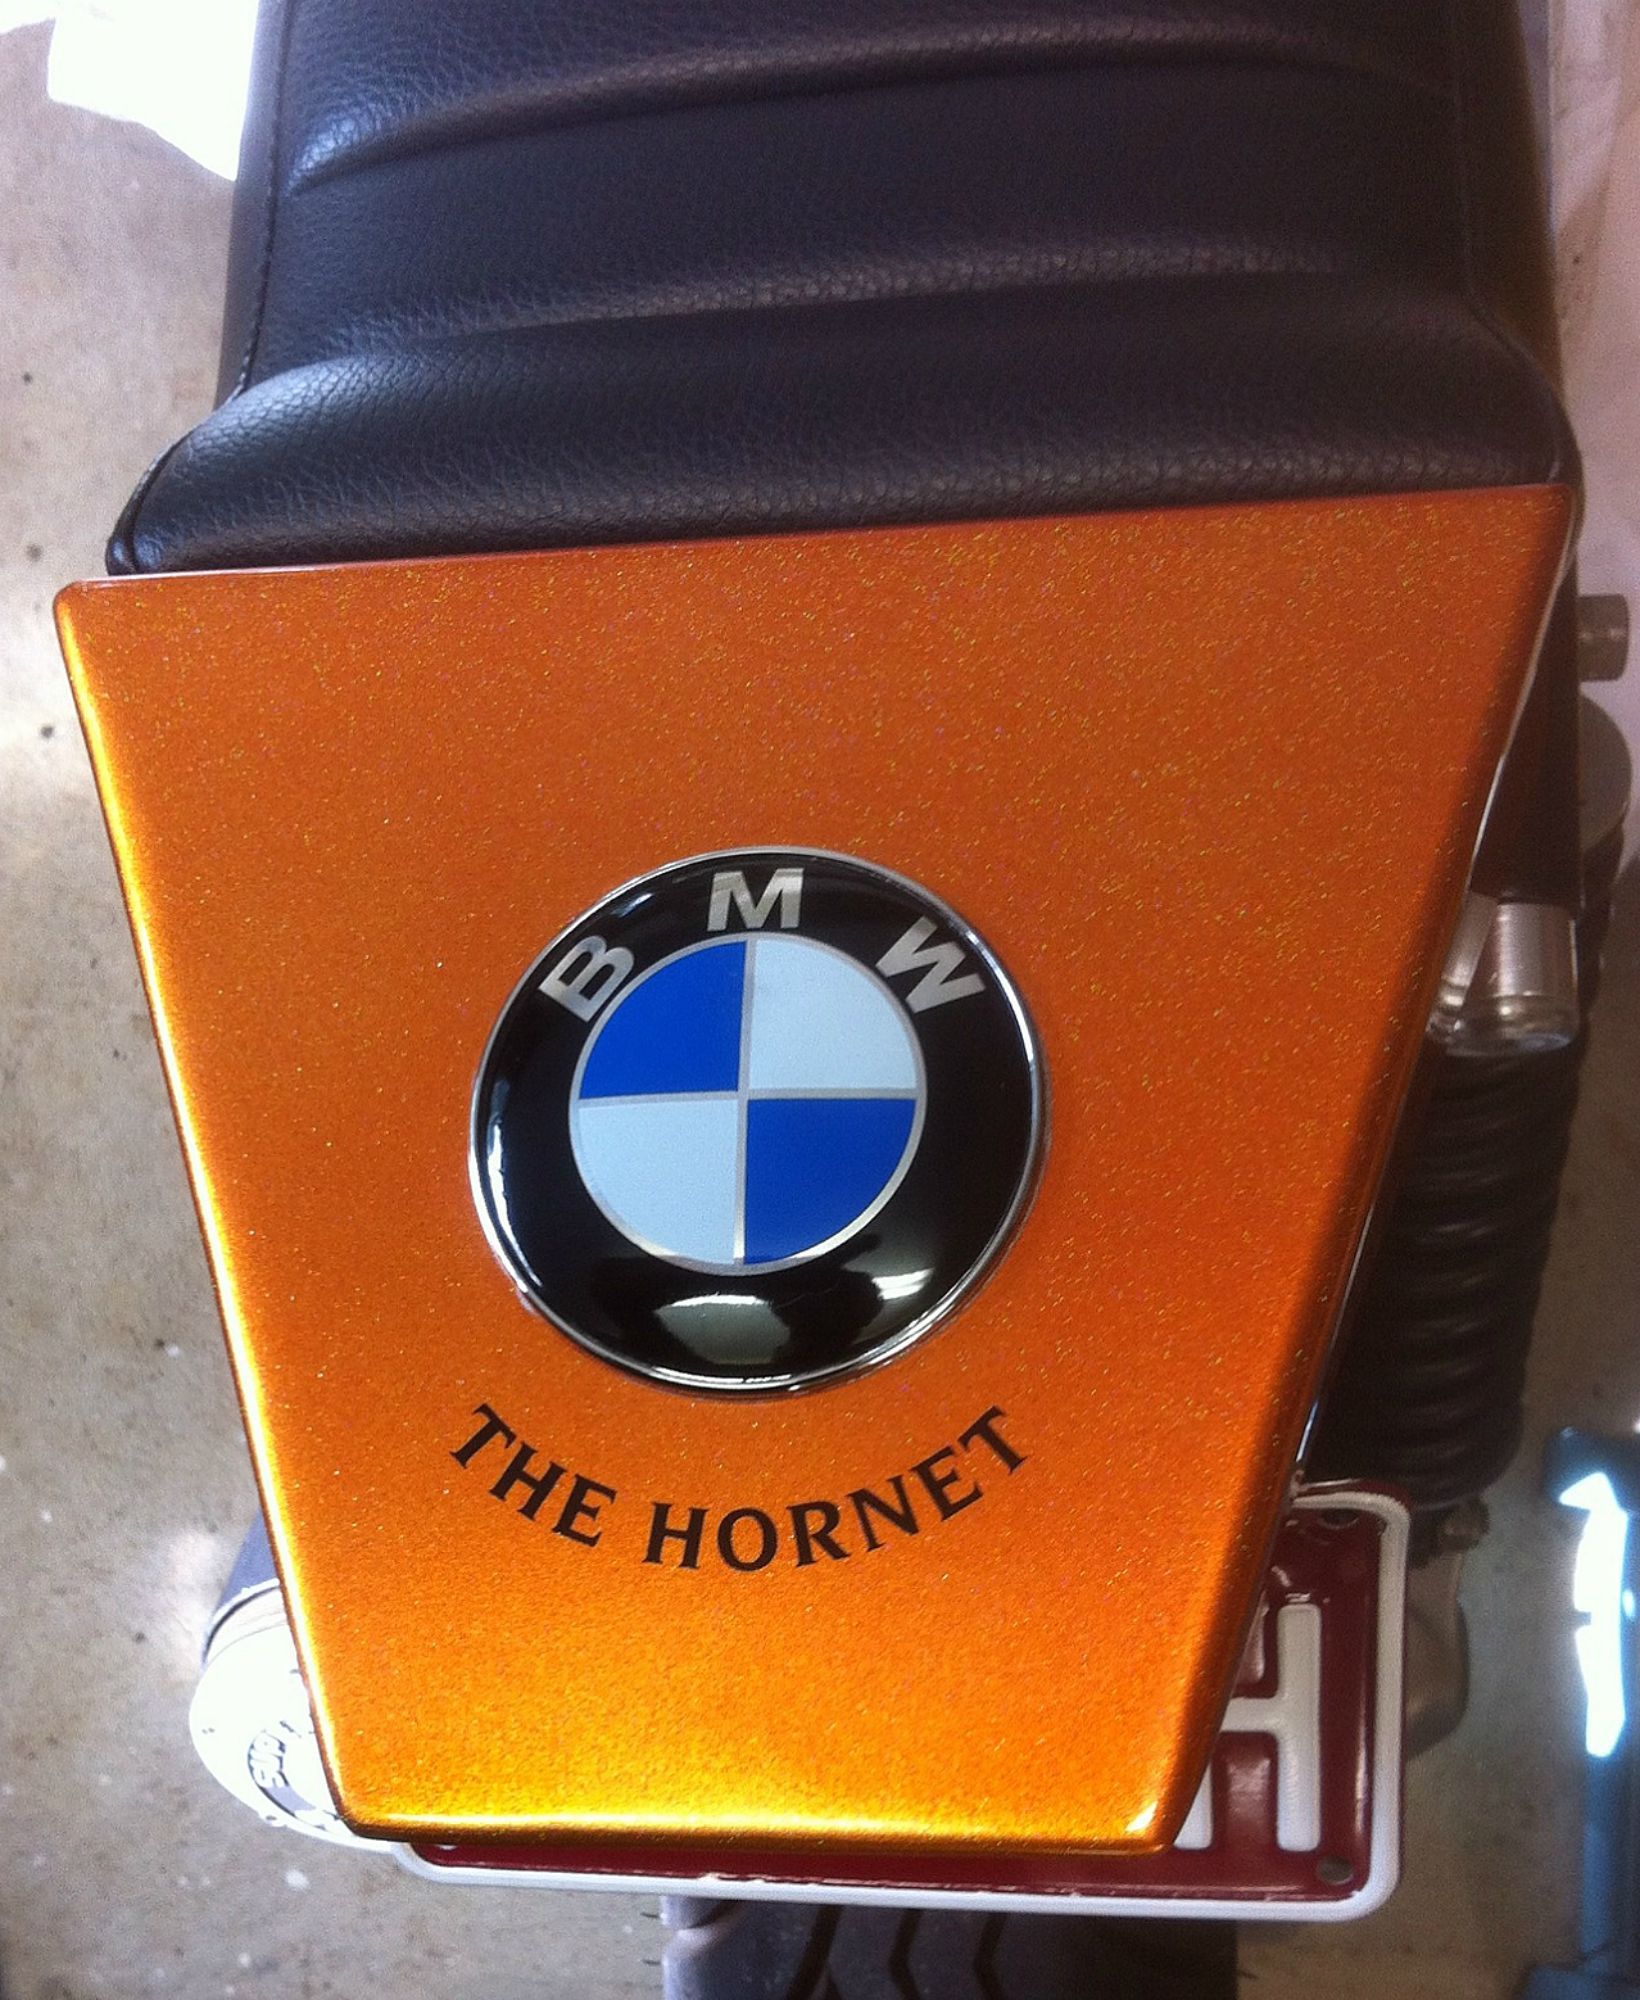
I took the tank and seat back to Pete for a final touch up today. Pete surprised me with a sticker he’d got made up. It turns out the colour I chose is called “hornet orange”. Since I flew hornets in the RAAF, Pete had the sticker made. The bike now has a name!
I’m now just waiting on a couple of 12ohm resistors from eBay. They need to be installed next to the flasher unit under the tank so the LED indicators work properly. While waiting I’ve changed the oil, oil filter, fuel filter, bled the brakes, and done some polishing.

I’ve got the indicators working, tank and seat back on. Given it a start up. Almost done!


After initial rough running and stalling (I think it was air in the lines due fuel filter change), it settled down and ran smoothly. The exhaust is surprisingly not much louder than stock! Programmed the gear indicator and calibrated the speedo. The weight loss was apparent from the first crank of throttle! It is a bit of a reach to the bars, but at 100km/h the weight comes off the wrists and it should be good for longer rides. I still have few things to do. The rear mud guard looks like it can be chopped into a small fly screen to cover the instrument wiring.
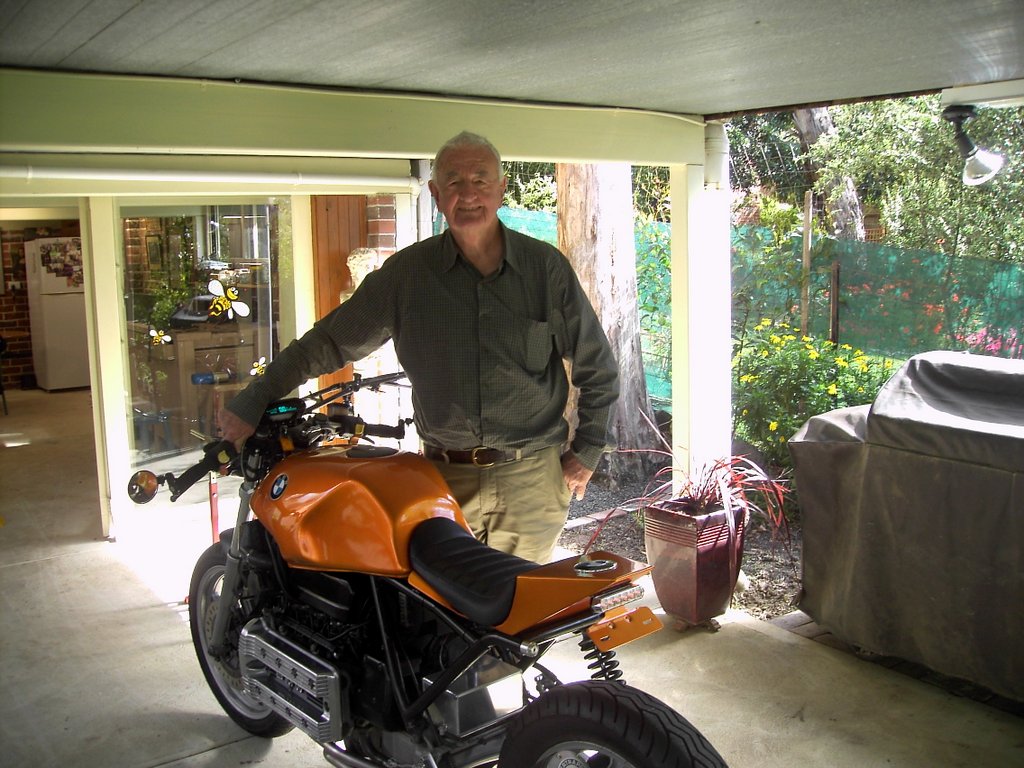
I have been a bit remiss by not acknowledging my co-builder, dad. He provided the workshop, tools, and lots of unwanted advice (some of which was useful)!
I did not like that the speedo wiring was visible (even though it was covered in black shrink wrap). The removed rear mud guard was made of plastic. I thought it looked about the right width. Cut to shape, then covered it in carbon fibre wrap. No more visible wires and cables!


I also took off the centre stand to tidy up under the bike.

The rear shock was on it’s last legs. Bit the bullet and installed a Hyperpro.
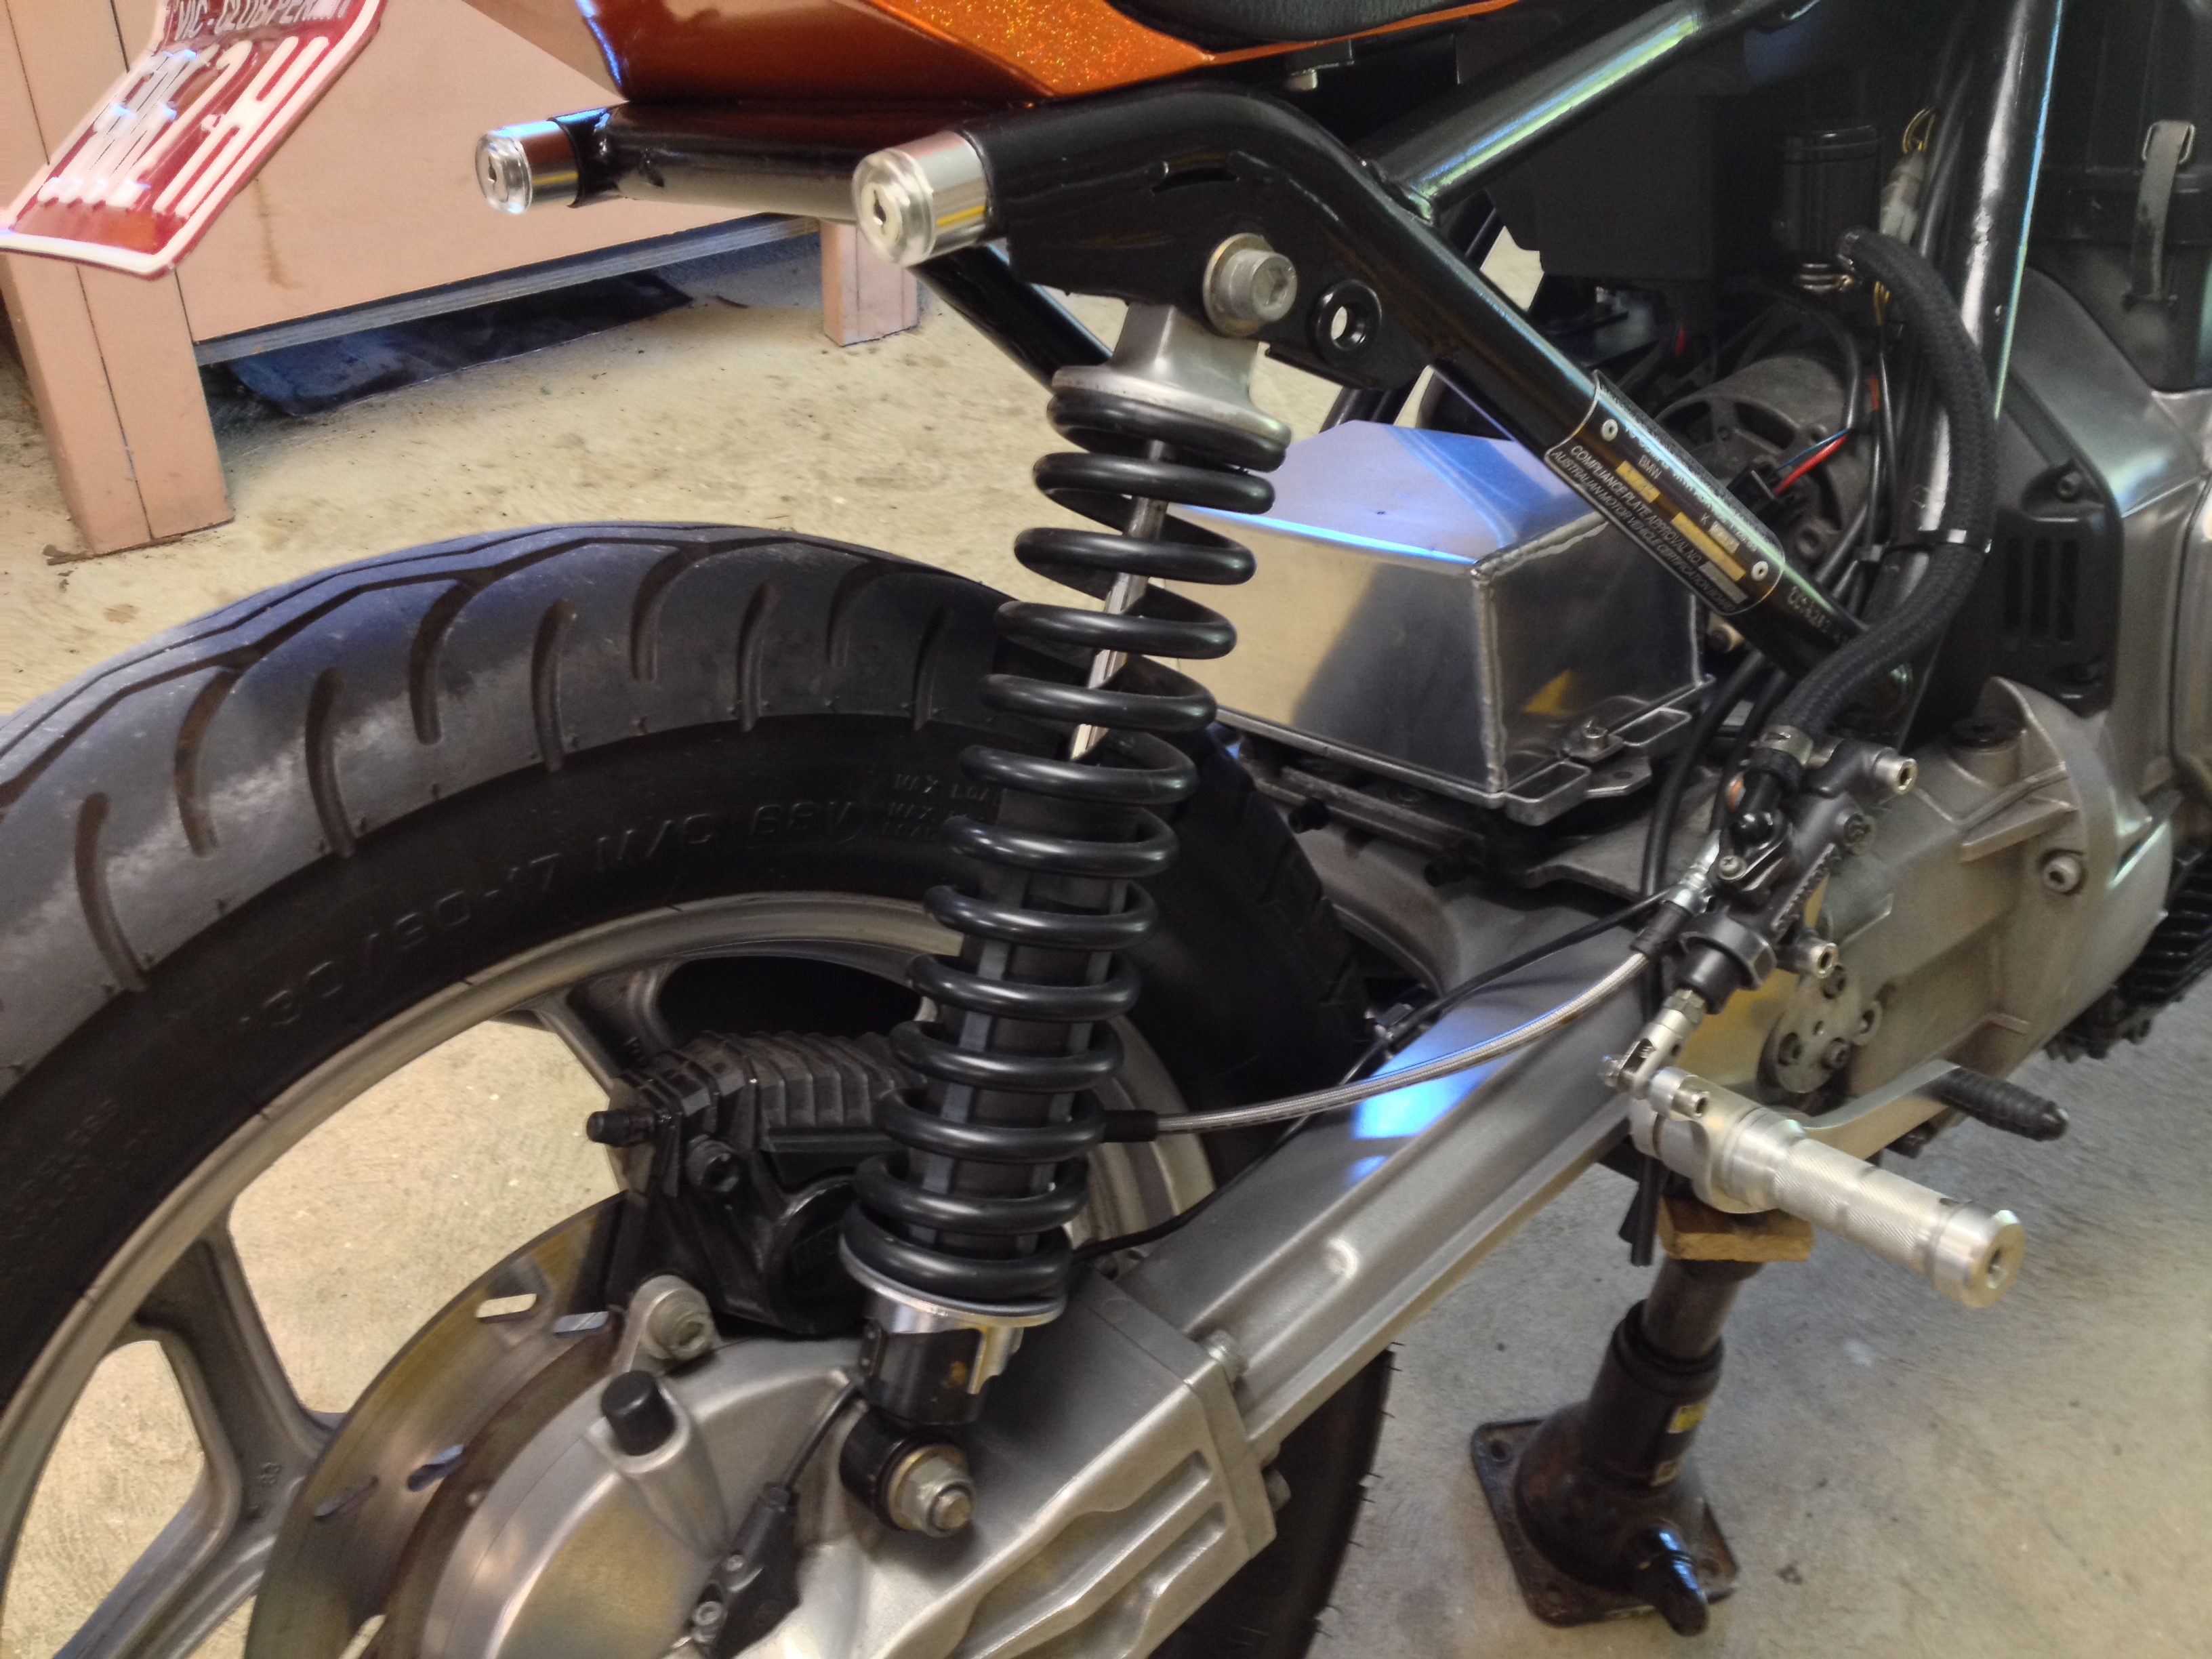

I took the bike to get the shock dialled in. Bad news is that it has lost so much weight I need a lighter spring! Going to get it resprung and revalved for the new weight.
Couldn’t only do the rear, so the forks are off for some White Power springs and oil change.

New springs and oil. I think I can now say it is finished! Cleaned up and ready to go.


I had been working towards entering it in a bike show in Melbourne called “Oil Stained Brain”. It turned out it did not make the cut, and I only finished it 2 days before the show. The weekend of the show, without a decent test ride, I took it on 1000km loop into the snowy mountains with some mates! The only glitch was having to tighten the folding mirrors when they folded back at 170km/h! 


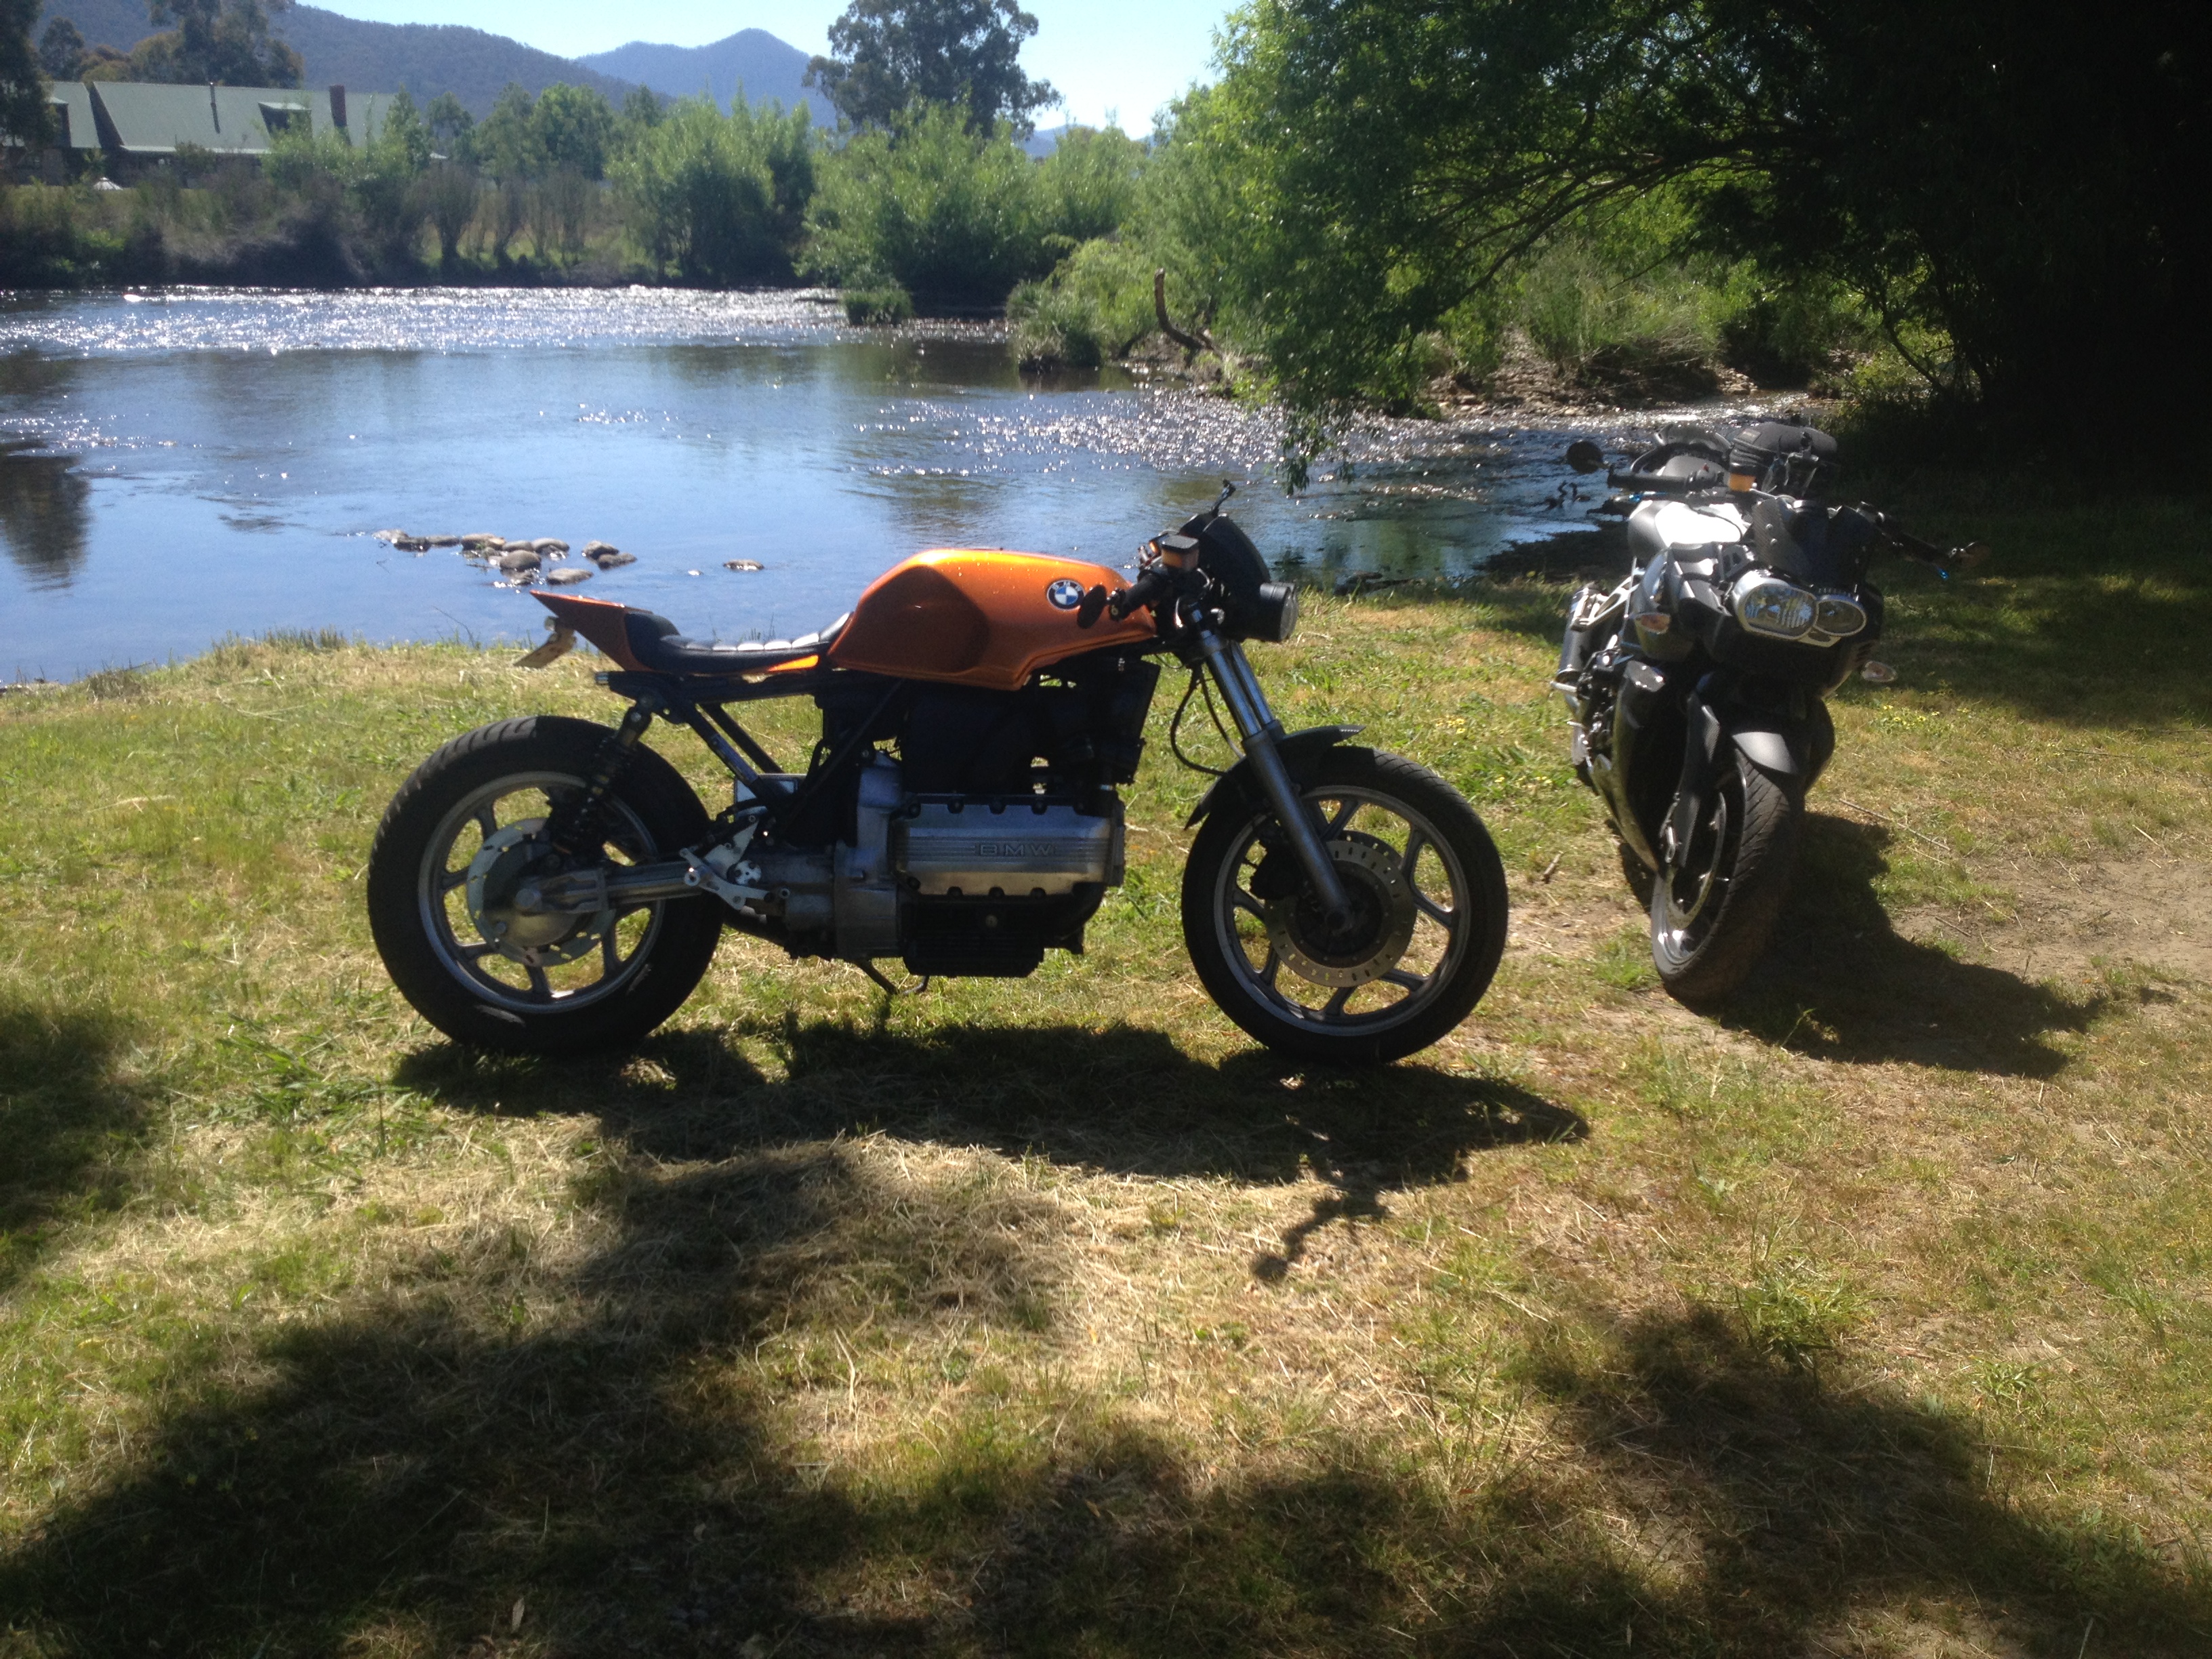

After the loss of weight, and suspension work, it was as fast as my K1200R in the tight stuff! I’m still tinkering. Was not happy with the quality of the mirrors, so have changed to these. 
I finally took some photos with a real camera (instead of my phone).


I have found the rear indicators not bright enough in direct sunlight. Santa made a late delivery of these beauties! 

Definitely bright enough!
The baby bottle idea for the radiator overflow turned out to have insufficient volume. I have replaced it with a 500ml stainless steel drink bottle. 
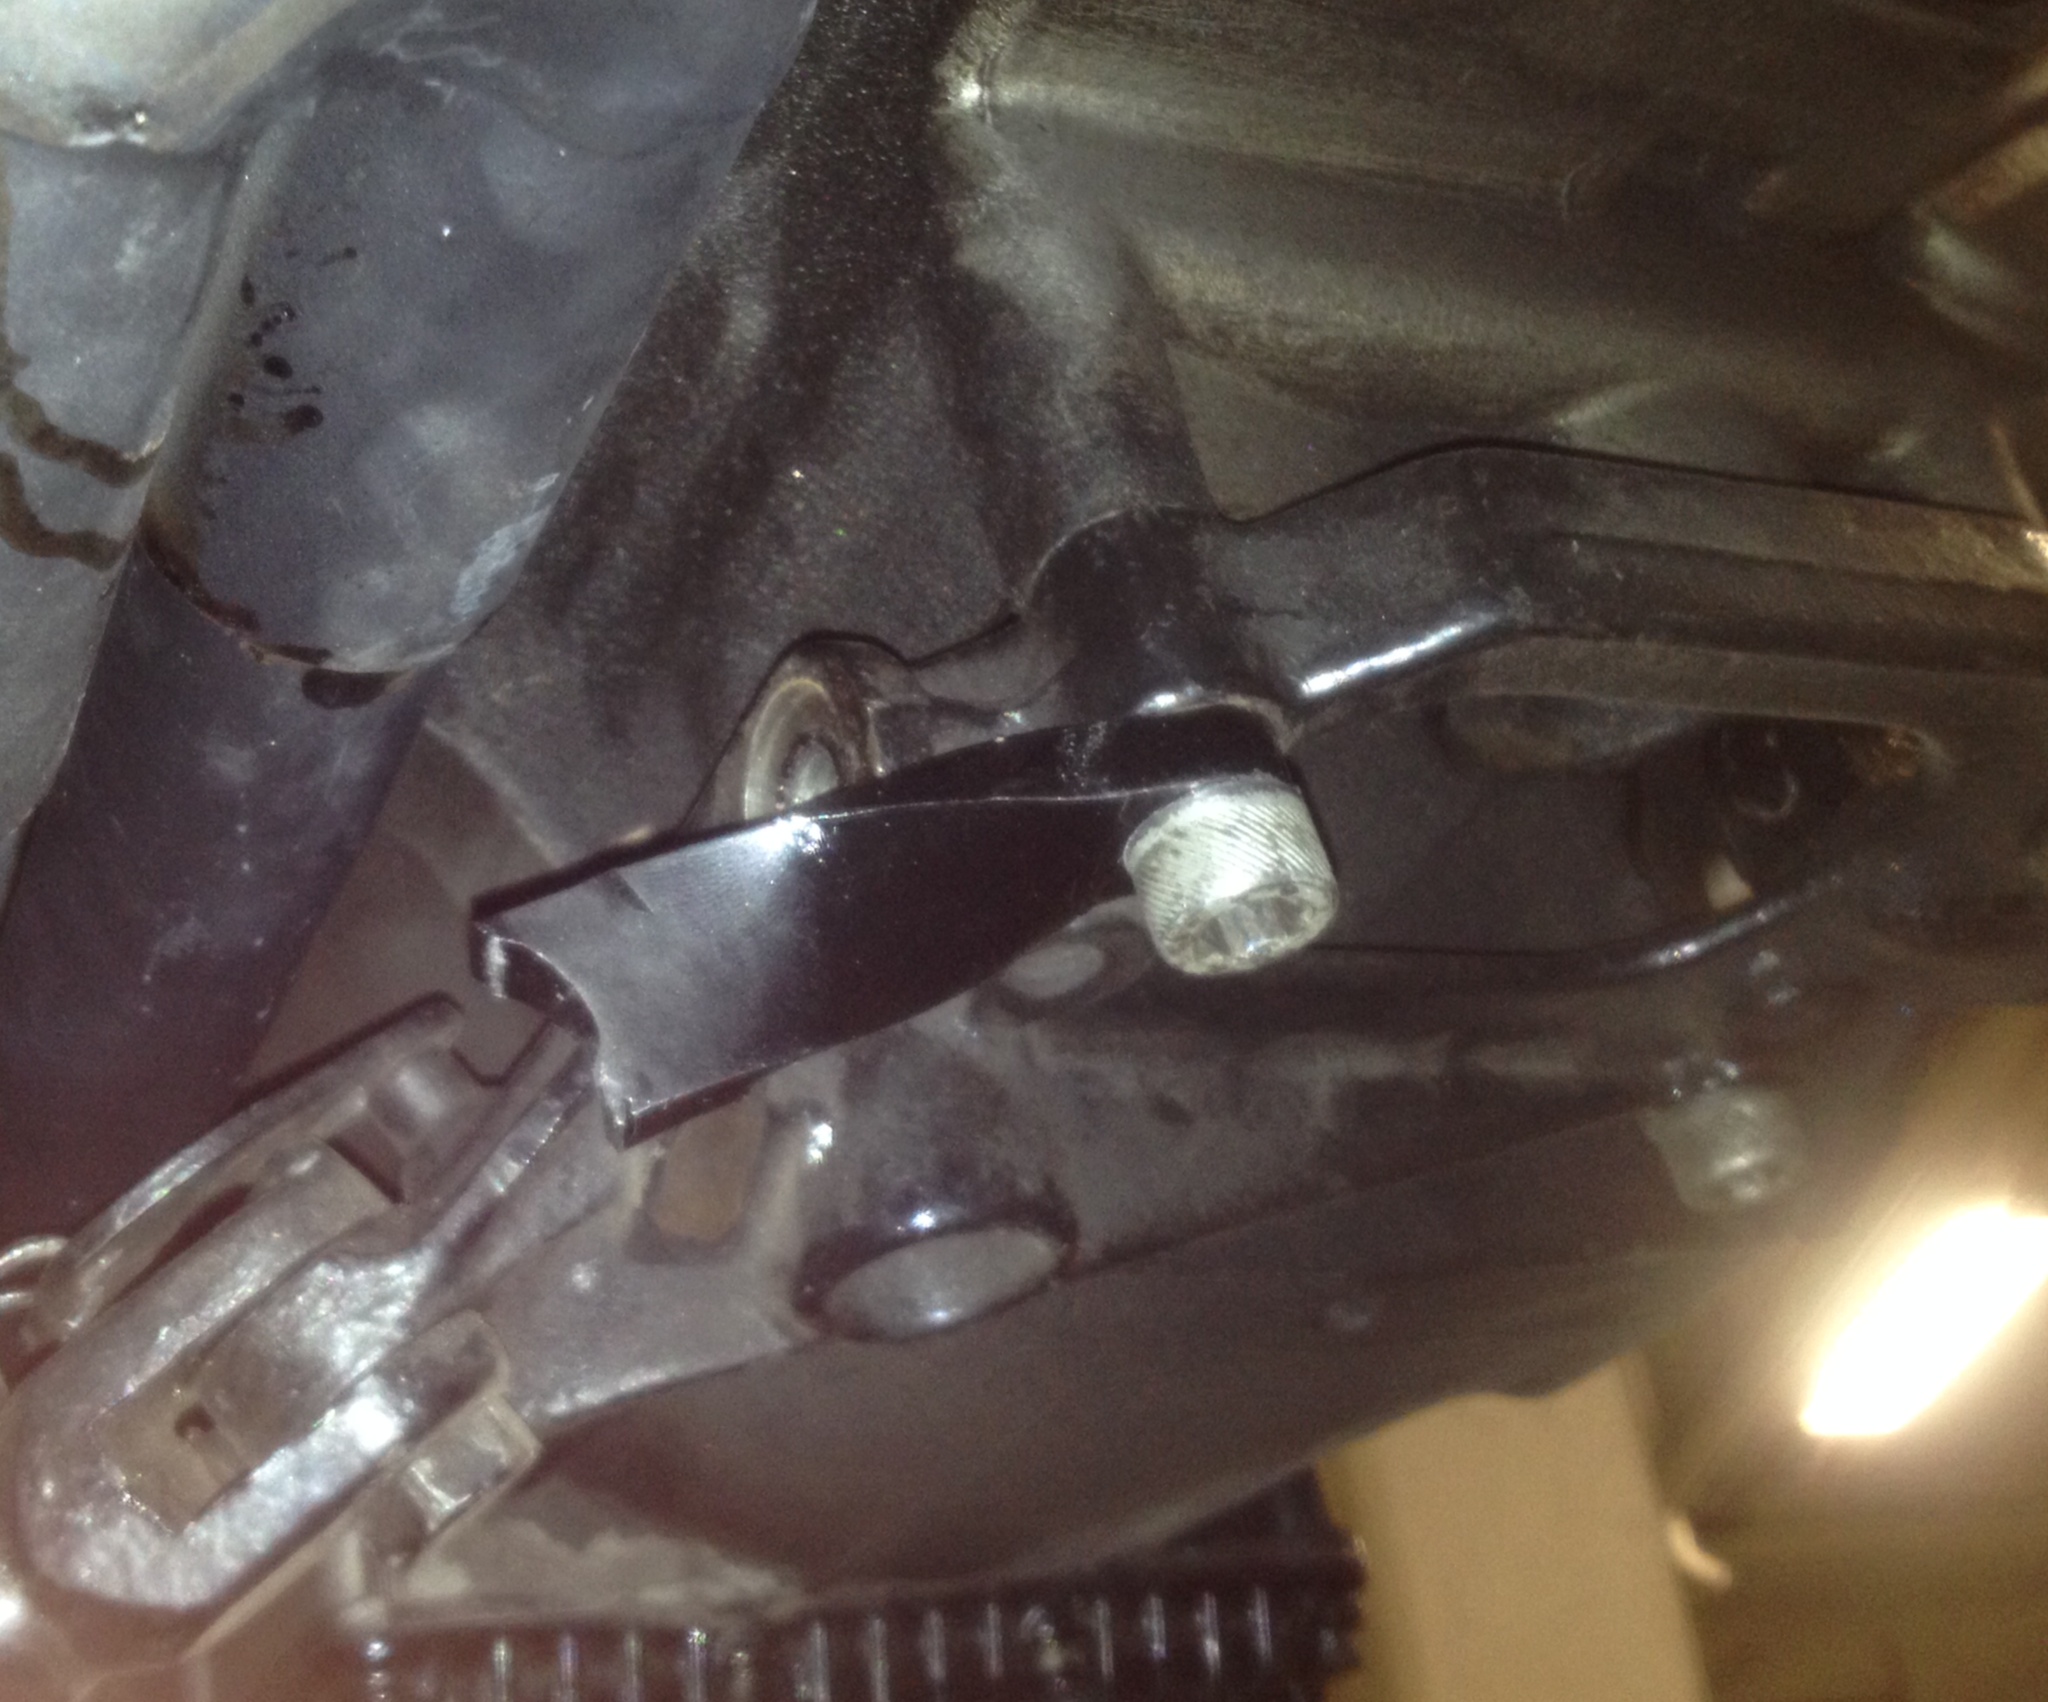
The join between the steel collector and the aluminium exhaust has never been ideal, continually working loose due to different expansion rates. I think I now have a solution using a V-clamp. It also makes for easy exhaust removal (needed to remove rear wheel).

I took the opportunity to paint the header pipes black. The paint needed baking, so I used the BBQ. 
All done!
I will take it on a decent test ride as the Hornet is going to Tasmania for a 7 day extravaganza the end of Feb!
The seat pan is attached to the frame by two pins at he rear, and one central bolt at the front. I have occasionally noticed a small amount of seat pan flex, which I have decided to fix. I found these plastic lugs in the cupboard (I can’t remember where they came from).

I drilled the centers so they would fit snugly onto the alan head bolts that hold the rear tank mount. I had to shape the tops to match the seat pan, then paint them black. 
Rock solid now, ready for Tassie!

Day three of riding the great roads of Tasmania, my mate Kev lost the front end under brakes. The resulting low side caused too much to continue. Tank, engine casing, foot pegs, gear shift, left bar and switch block. I thought I had finished this blog, I guess not!


Shannons Insurance were great in getting it home, after several stressful hours when they were threatening to write it off and leave it in Tasmania!……………………
After recovering the bike to Melbourne, the Shannons assessor decided my poor bike was a write-off!
The good news is I’m going to fix it myself. I’ll take the opportunity to do some upgrades, stay tuned!! I’ve got my bike back in the workshop, build number 2 can commence!
THE HORNET MACH II
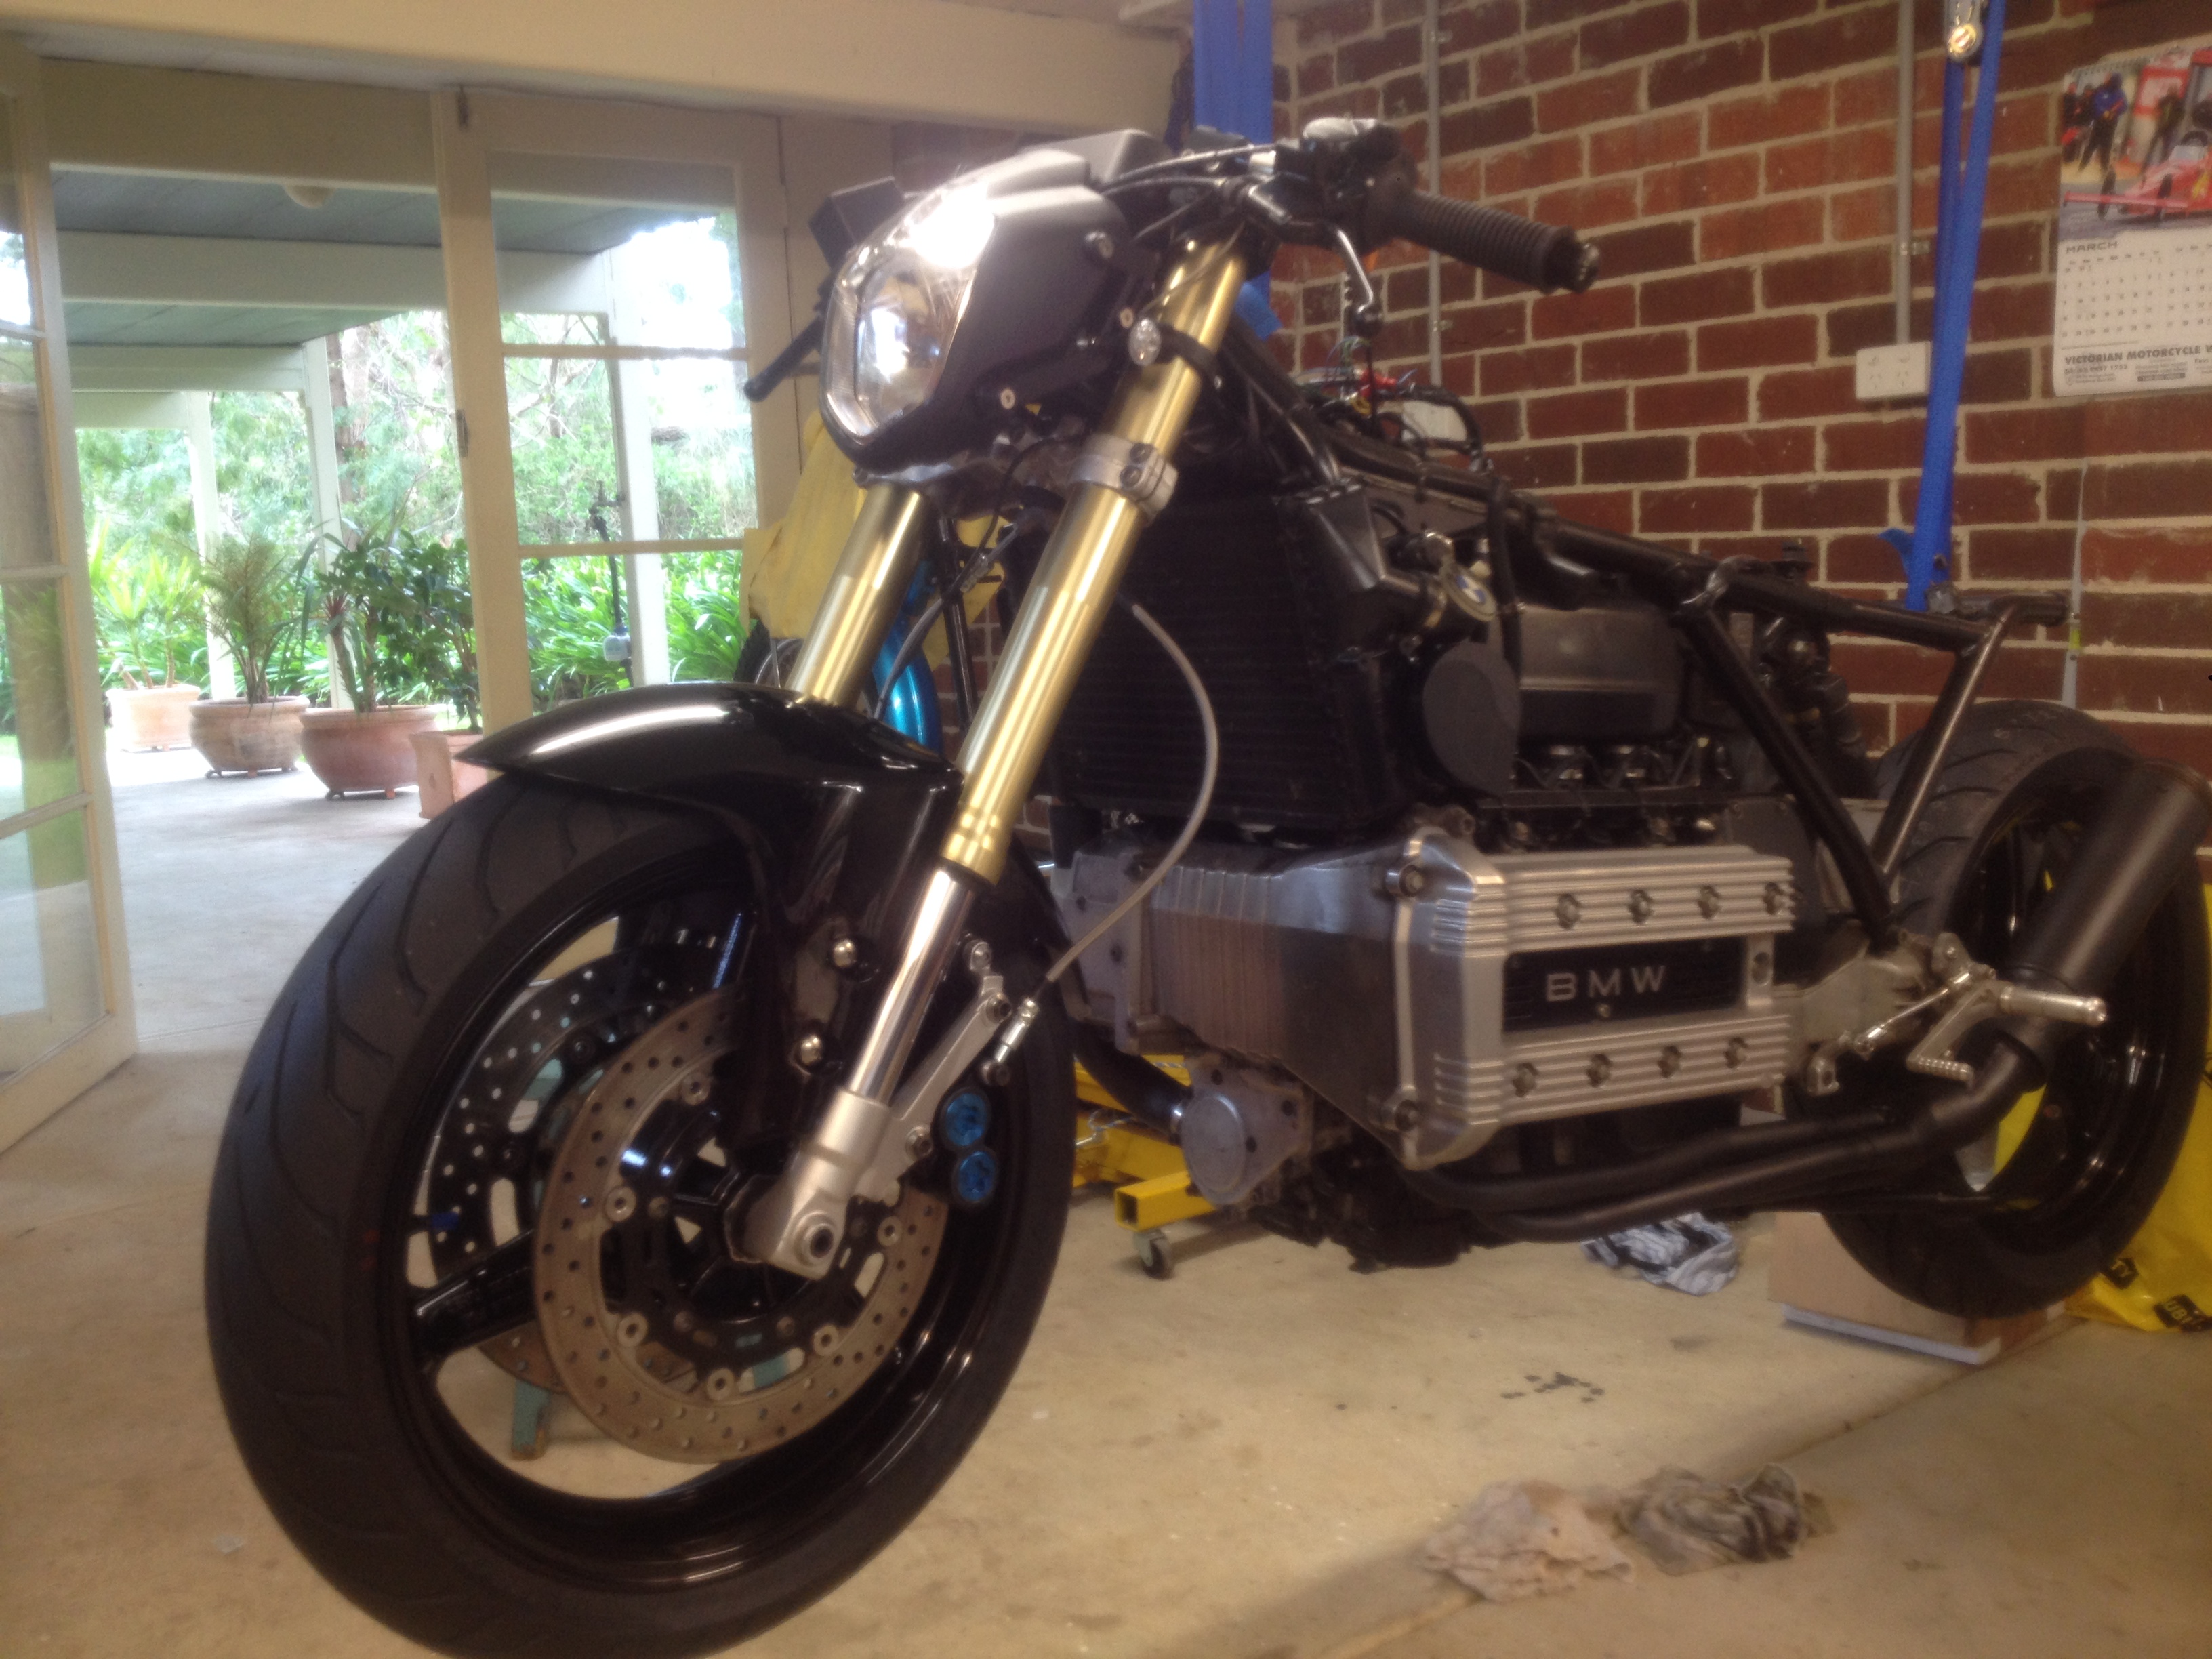
I considered repairing the bike back to pre-crash condition, but it seemed a waste of money and effort to do all the work and end with the same bike. Having learned so much in the first build, I thought about what I could improve. The bike was a weapon in the corners, but I never had much faith in the tires (Kev, even less so now!). To run radial rubber, wider wheels are needed. A K1100 wheel bolts easily onto the rear. I know it is possible to bolt on a K1100 front end, which gives 4 spot calipers. I thought, but why take the front end 5 years into the future, why not 20 years? Old bikes with USD forks also look the biz!! 
I’ve sourced some parts. Found a decent tank for $150.

The Valve cover will require bead blasting.


I spent several hours at the wreckers looking for some USD forks in good condition. I needed a 3 spoke front wheel to match a K1100 rear wheel. The best solution was from a 2000 Yamaha R1. I put a deposit on the front end so I could take the triple clamps. I wanted to see if it was going to work before I paid the full amount!… I’ve got the triple clamps at Valley Engineering getting assessed for the transplant! The BMW post needs to be mated to the Yamaha clamps. If the R1 plan doesn’t work, I’ve sourced a BMW K1100 front end. In either case, I will need another solution to for the ignition key mount. I’ve decided to remove it from the triple clamp to clean up the dash. I was scratching my head for a mounting solution when I spied the surviving mirror from the crash…. 
Angle grinder and drill converted it to an ideal bracket for side mounting the ignition block! 

The R1 clamps are now fitted to the BMW shaft. Not cheap, but bolted up perfectly! Will now collect the rest of the front end and see how it fits. 


Like a glove!

Collected the engine covers after cleaning by sand rolling at Competition Coatings. He did the valve cover for free, to see if I liked the finish!

The new rear-sets have arrived, slightly redesigned, now with knurled levers instead of rubber. Nice!

I’ve used an angle grinder to remove the ignition mount and other tag from top triple clamp.

Will use a bench grinder to tidy it up….. All done, and sent to get powder coated.

The exhaust system is back after being ceramic coated front to back!

I’ll leave the can off for now, as the new wheel is still getting painted. The wheels are back from the paint shop. BMW K1100 rear, Yamaha R1 front, shod in Pirelli Angel GT tires.

Lisa, trying to distract me from those sexy wheels!

The rear bolted on no problem. Good clearance on both sides.

I used the damaged rear-set plate to fabricate the speedo mount. I had a small altercation with the bench grinder during the process!

Good result though, wanted it flush with top clamp.


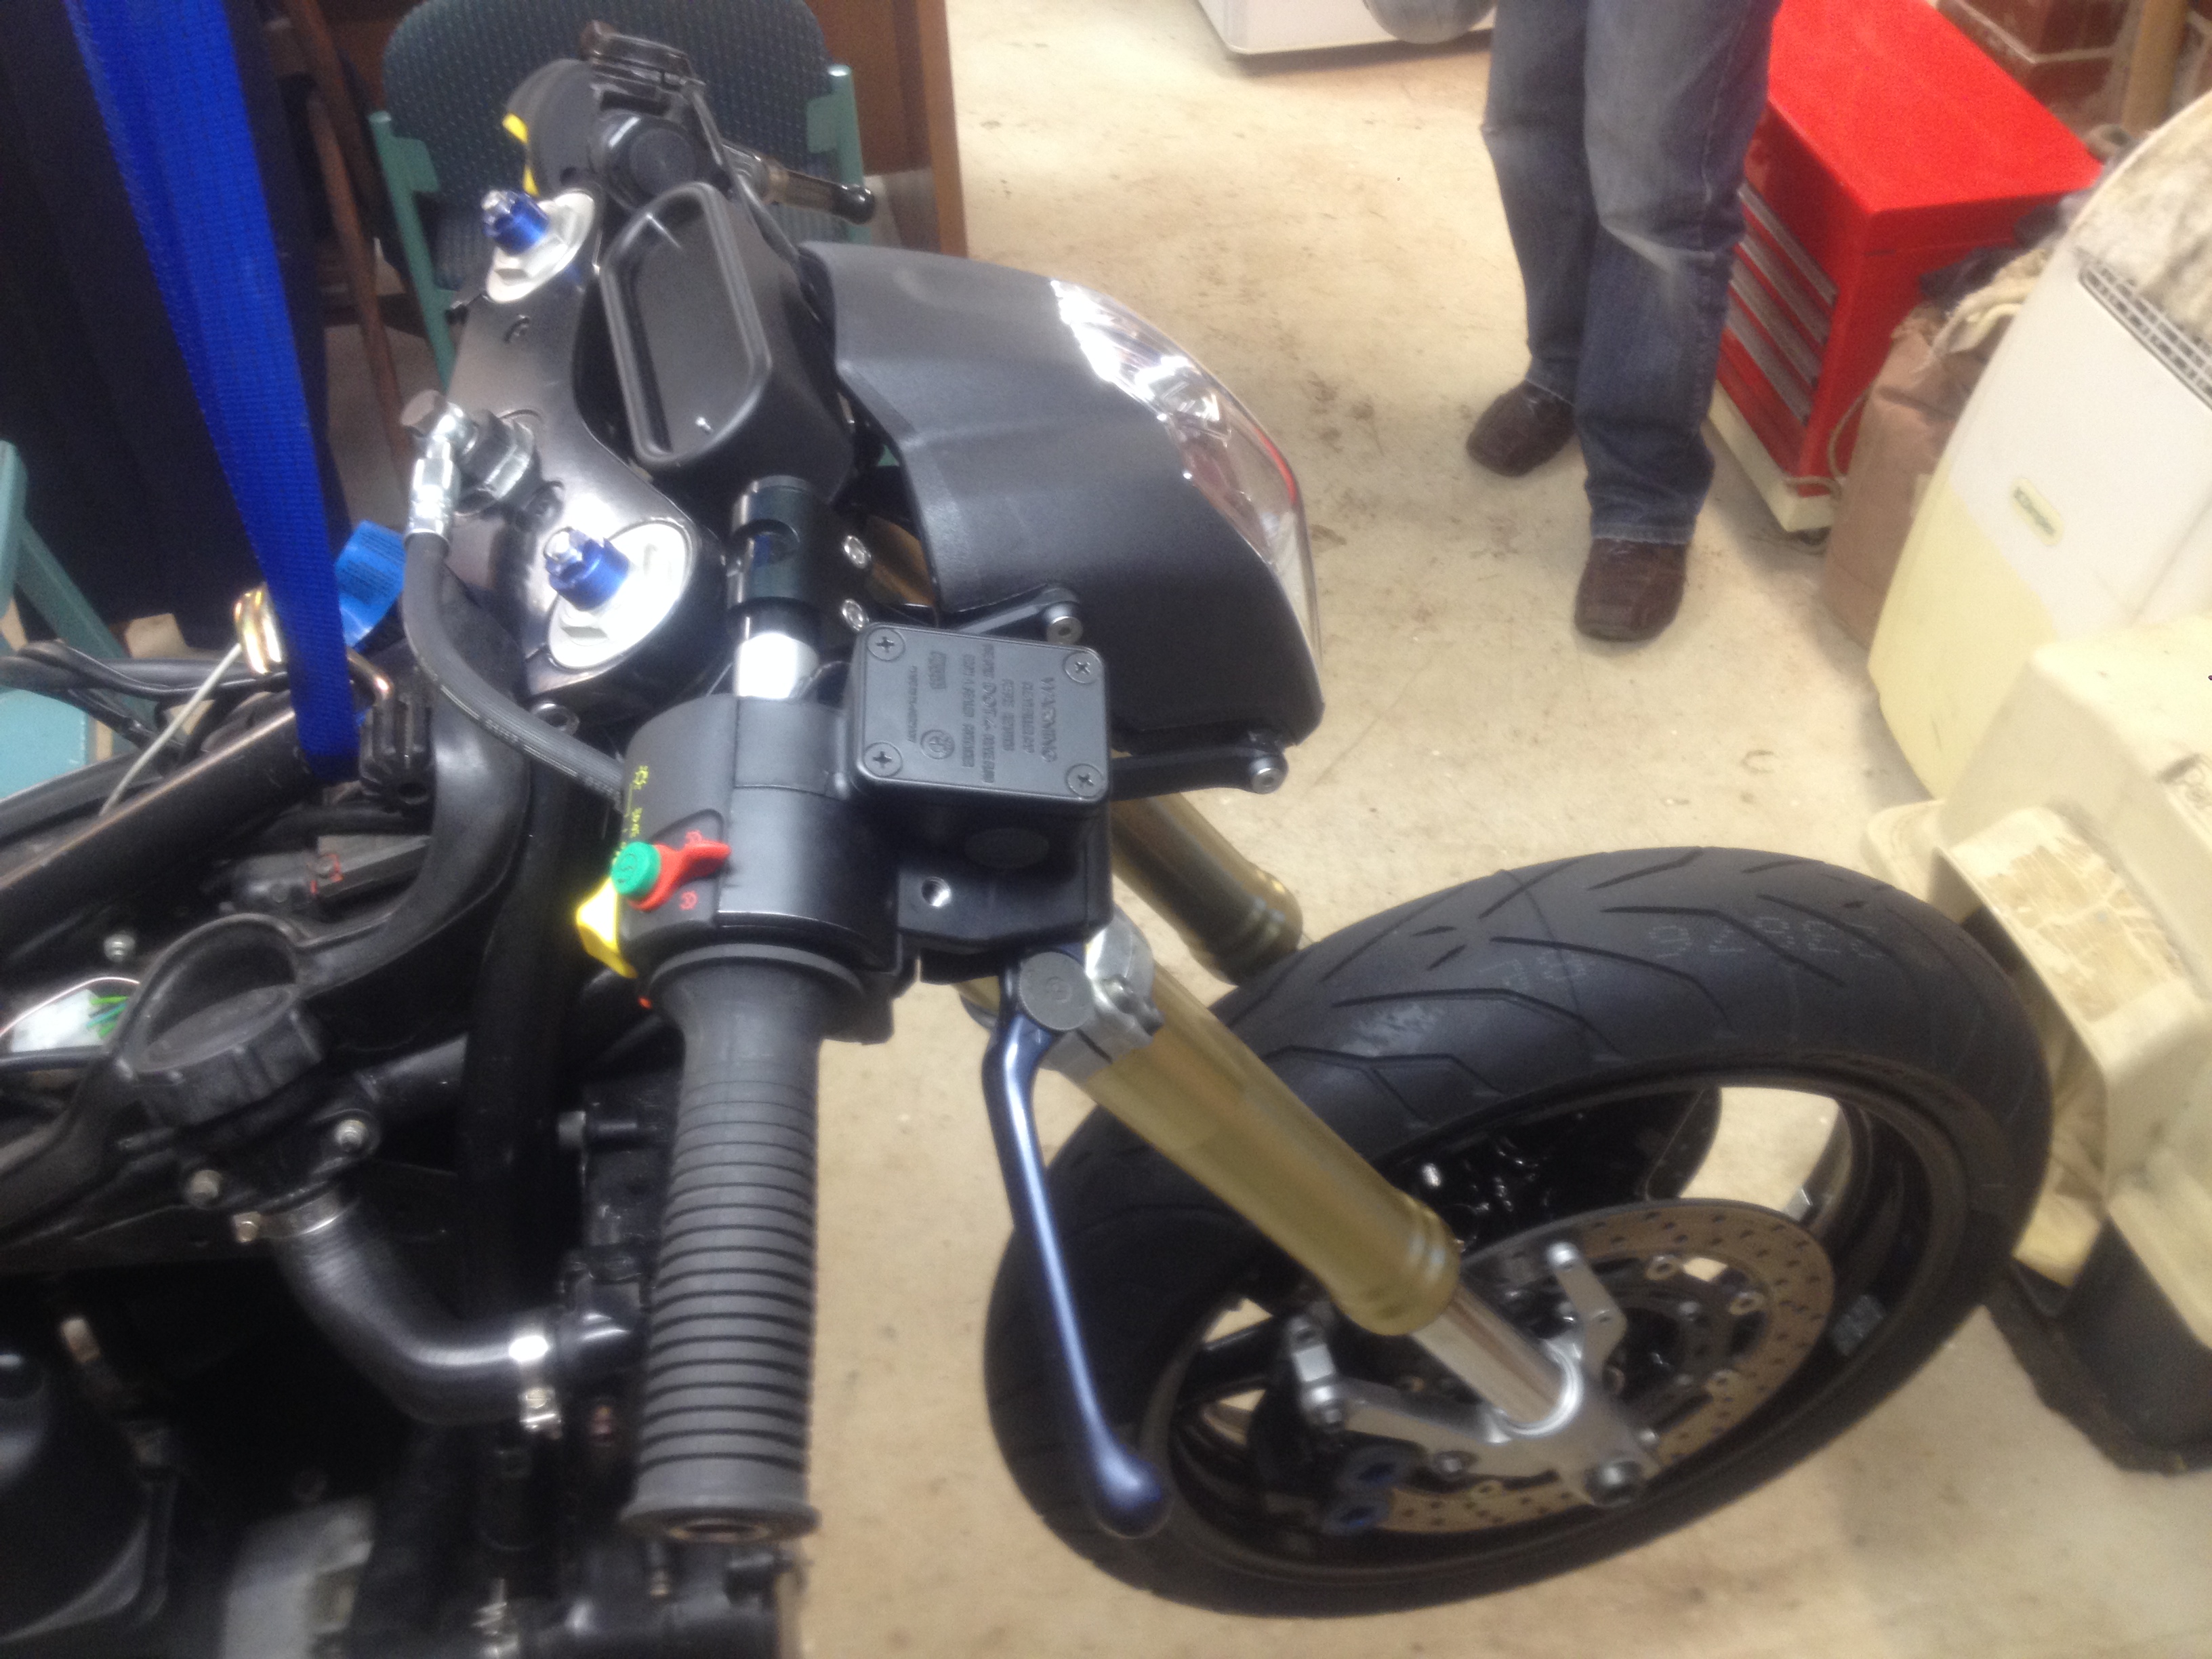
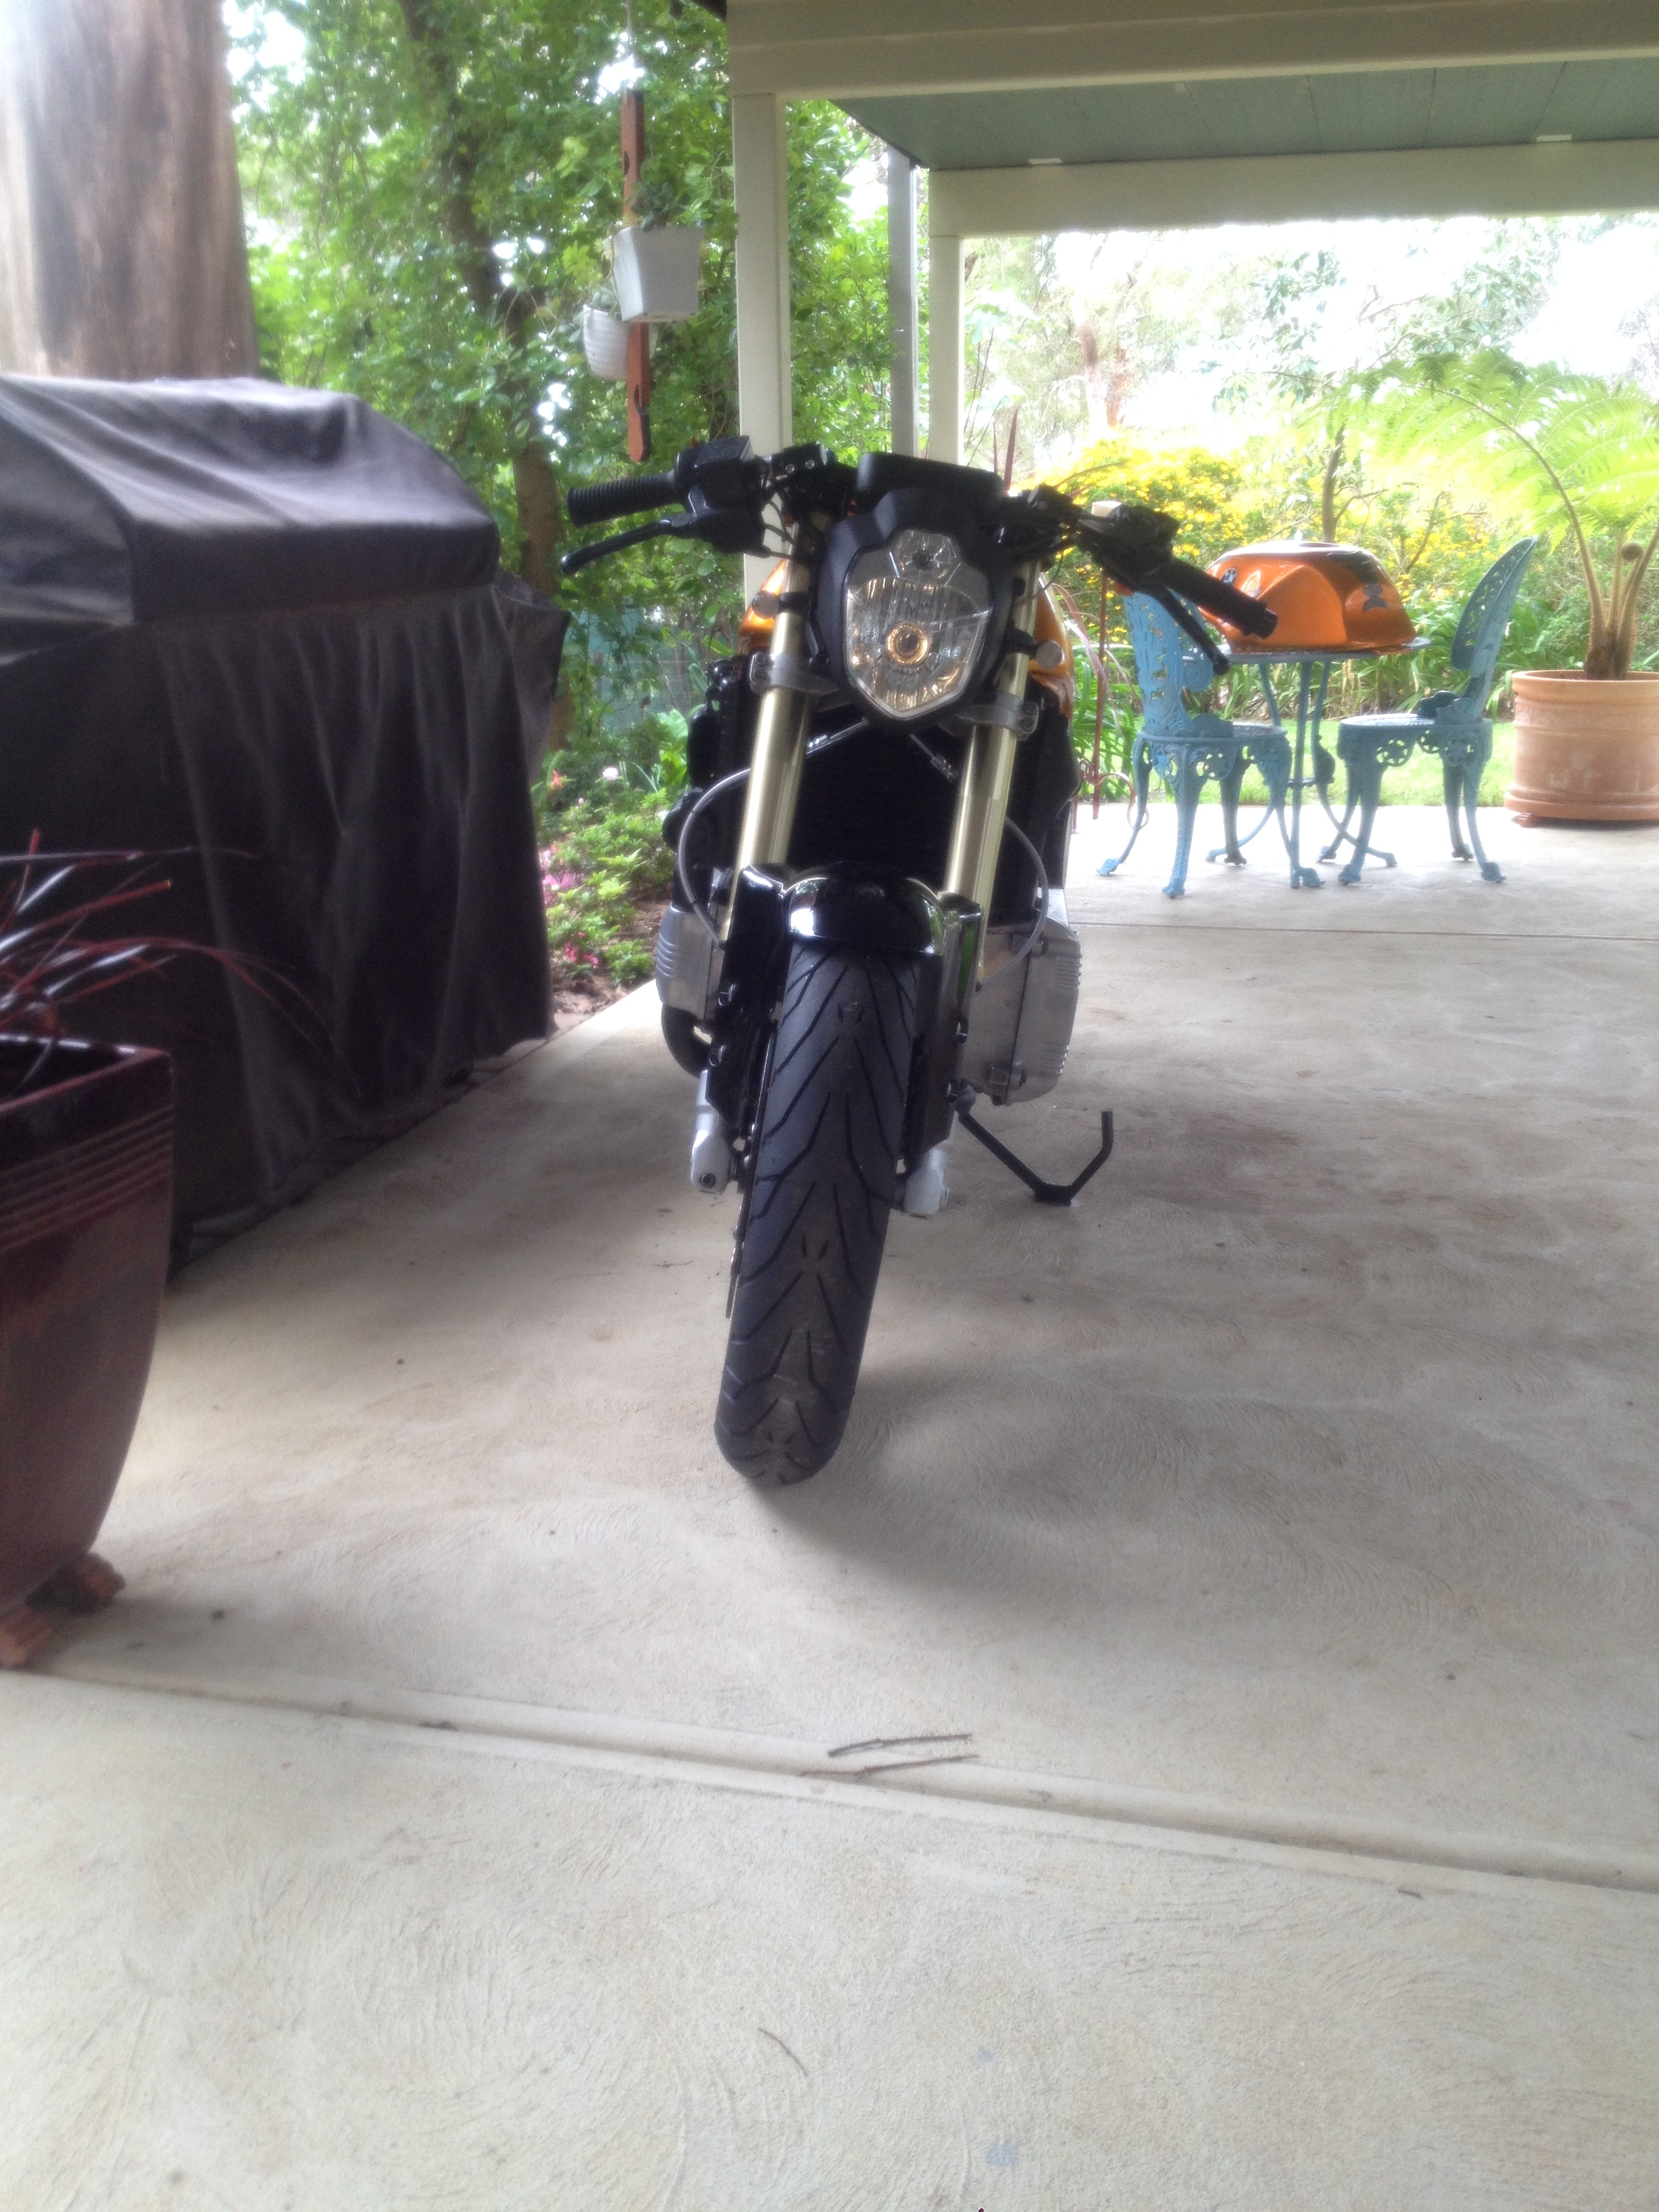
Have decided to change the headlight to the MT-03 unit.


I like it, but will have to see bike complete to be sure.
A whole new throttle quadrant was required. The K100 master cylinder is 13mm in diameter. This is OK for the original brakes, but would struggle to operate the R1 calipers. A K1100 (20mm) master cylinder is up to the task, but can only be fitted by replacing the whole quadrant. This necessitated a throttle cable change also.
I was going to re-route the front brake line to keep the top clamp clean, but I like the K100 design.

The bar controls all done, just need to get some brake hoses fabricated.
I had to modify the K1100 hubcap to fit the K100 hub. Found the carbon fiber badge on eBay.

A rat tail file allowed the headlight bracket to take the indicators.

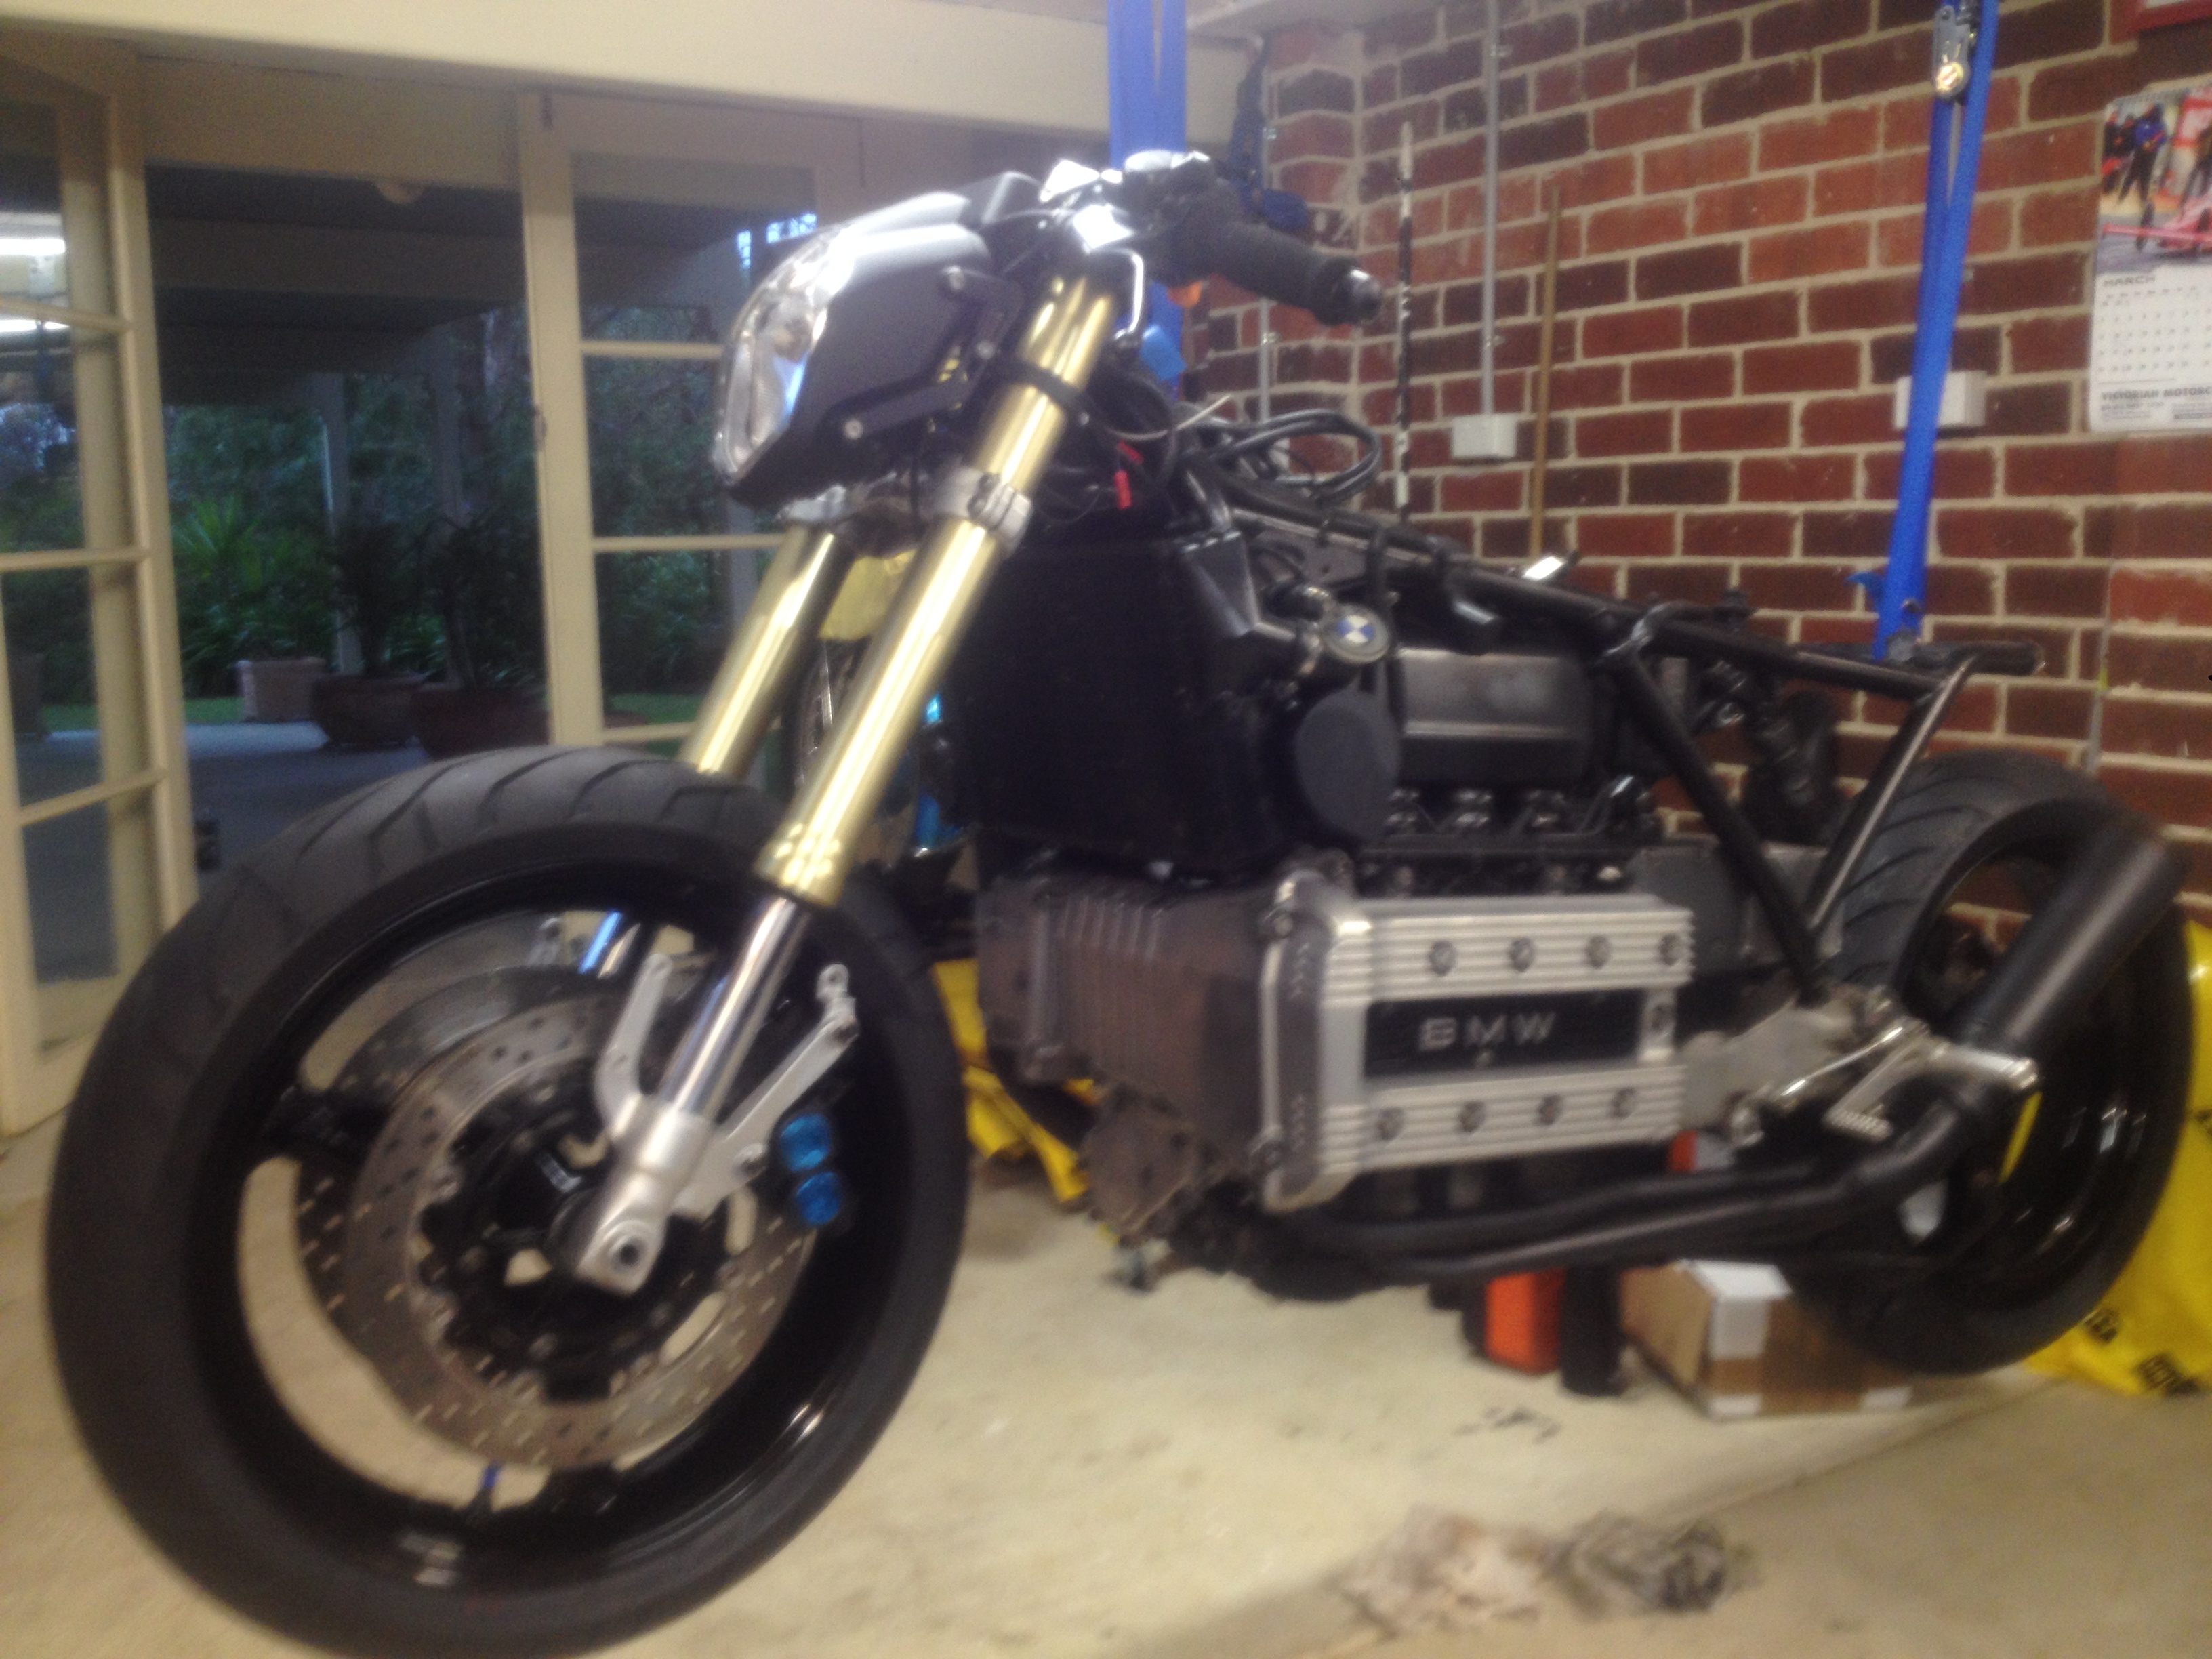
The front end is now complete!
I got the tank and seat from the paint shop today. The paintwork is exceptional!!

The fuel pump mount was broken in the old tank. A new part tomorrow, then final assembly……..

I was concerned the modern front end might not flow visually into the rest of the bike, but I couldn’t be happier!


I used the remains of the bent gear shift as a stopper so the stand doesn’t hit the exhaust.
I took the bike for it’s first proper ride through the hills yesterday. With the new front end and Pirelli rubber, it now feels like a modern sports bike. It is much more planted to the road, and the brakes are now comparable to my K1200R. I can now say the blog is complete (17-05-2014). The rebuild took just under 2 months.
Thanks for checking it out! It has now featured on The Bike Shed, twice, Pipeburn, and Silodrome.
I was also contacted by BMW Australia who featured it on their website, then I was incredibly stoked to have it feature on the international BMW Motorrad website!


My bike was accepted into the 2014 Oil Stained Brain bike show.


I finally got around to weighing it!
It now weighs 215kg fully fueled. Stock bike is 249kg, so it has lost 34kg. Distribution is 51/49 front/rear.
UPDATE
I haven’t updated this post for a long time now. After 4 years of trouble free riding, I’m considering letting the Hornet go. If you are interested, drop me a message.

Paul,
Awesome buuld! I’m searching rear wheels on ebay for K1100’s and see listings for both 17″ & 18″ diameter. Do you know if both were available from BMW or if those are misprints. I would like to run the widest 17″ I can fit on my K100 (along with a R1 front swap). Any insight?
Hi Jon,
The K1100 had a 18×4.5 wheel, and on later models a 17×5.0 wheel. You can run a 5.0″ wheel, but will have more offset. This shouldn’t be a problem. Check out http://www.bskspeedworks.co.uk/k-parts.html
They race a K100 with a 17×5.0″ rim
Great bike man its beautiful, I’m buying a k75s and i really want to do a build my self do you thing you can give me like a rough estimate on cost for like parts and paint this will be my first build ever I’m in the US
Hi Paul,
I am currently in the midst of a K1100LT conversion and was wondering how you handled the removal of the catalytic converter?. I am in Perth WA so the same ADR should apply. Is it a requirement to retain the cat converter or is it OK to remove it.
Love the bike by the way.
Cheers
PG
Not sure sorry. Pretty sure there was no cat on bike (1984)
Hi Paul,
I am Gerold from Germany. Your bike is perferct ! I try to do the same in Germany. But it is not easy because we have the TÜV in Germany. I will buy 2 Kineo spoke weels. Lets see what will be the result.
Best regards
Gerold
Goog luck! Spoke wheels will look great.
Hi Gerold, Kineo is awesome, is there a Kineo model for K100?
Regards,
Alexandre.
Hi Alexandre,
No, they dont produce for the K75/K100 any wheel. I use a USD from 2000 Yamaha R1 (RN04) and Kineo has no wheel this front end, but they produced a wheel for a RN 12. This wheel fitts also in a RN04.
The rear wheel they will manufacture the frist time for my bike !
I am so happy !
Best regards from Germany
Gerold
Hi Gerald,
Thanks for your Feedback.
Hi, Thanks for your help about the battery, another quick question, where did you source the longer front brake hose from? Thanks.
I got the hose made at a local brake shop.
Awesome looking bike
Was there much drama fitting the R1 forks? Did you have to make any mods to the triple clamp?
Thanks Adrian,
If you look through other comments, I have given some detailed answers to this question. Lower clamp needed mods to accept BMW post. The upper clamp also was machined to fit the upper knurled clamp.
Paul
Hi Paul
We are based in London UK and work on airheads mostly, but have been approached to work on K series now. The digital speedo on the gold bike looks nice could you tell us who its from?
Have a look at what were doing in the UK, Facebook.com/curiositymoto and http://www.curiositymoto.com
Great stuff keep it coming…..
Mark P
Hi Mark,
Love your work!
The speedo is Dakota Digital
http://www.dakotadigital.com/index.cfm/page/ptype=product/product_id=510/category_id=544/home_id=-1/mode=prod/prd510.htm
I bought it on Amazon for about $400 U.S.
Hi Paul
Glad you like what we do, we do….(Pigs in Poo)
Thanks for giving us the heads up on the speedo, did you have any fitting/connection issues???
I`m sure we can cross over business, if you need anything get in touch.
Cheers
Mark
I had to run a front wheel pick up for the speedo. Being made for a Harley, it has no temp gauge. Good luck!
Hello Paul,
Great job on the bike! I have a k1100, and I would like to mod the exhaust. Where did you source your collector?
Thanks,
John
Hi John,
I was lucky to find it on Gumtree, being sold as part of an after market system.
If you’ve got the cash,
http://www.bskspeedworks.co.uk/k-collector.html
Hi, just to be sure, from which year came your rear wheel? did you kept the disk and caliper from the k100 or you switched some part of the red breaking system?
Thanks and have a nice day,
Hi,
I kept the K100 brake. The wheel is from a K1100, not sure what year.
Paul
Would really love to know whats a rough price on parts and paint to do something like this i really want to my self this month
hi Paul!
Your bike inspired me 🙂
I need to change the front with a r1 2000 in june and i would to ask you what i need to do.
Male some parts like the bolt maybe?
The front i buy come complete.
Platea,wheel,brake and fender.
Thanks
Gabriele
Hi Gabriele,
Read through the comments section, I have answered this several times. Some fabrication is required to make the swap possible.
Paul
Hello. Fantastic build, it’s very similar to what I want to achieve. I’ve tied to read and find out but I don’t suppose your mate who did the R1 fork fitment could knock up some mounts to fit it could he?
Regards lewis
Hi Lewis,
The clamps have to be modified, I suggest you find a local engineering company to assist you.
Paul
FYI
http://www.allballsracing.com/index.php/forkconversion
I swapped a GSXR1000 front end and it was a walk in a park with it.
Hi Francois
Wich year?
Could yous send me more details on my mail?
ERASE_MEranfagni.gabriele@gmail.comERASE_ME
Thanks
Gabriele
Hi Paul,
Quick question for you, Which bearing did you use R1 or K100 ? Thanks.
Hi,
K100 bearings
Nice , like the three spoked wheels, well done what a fun read and good pictures, thanks . Chris
👍🏼
Sweet job! Love what you did to the front end second time. Make it look much beefier and just filled out the gap between the frame and front end perfectly. I am just about to do a 1994 k1100lt mod. I wish I had all the knowledge you learned from doing that. It would help me immensely.
HibJack,
If you read all the comments section, I discuss the front end in detail.
Good luck
Hi Paul,
Adorable bike nice project!!
Can You give me a small information?
What size is your rear suspension 35cm
Or 38cm??
Thx in advance
Constantinos
Hi Constantinos,
My rear shock is 34cm, but the front is lower due to shorter front forks.
Paul
Hi Paul,,
Amazing job¡
I am in a middle of a conversion now using a R1 forks and K100 rear wheel too, and I wonder to know the measurements of the tires you used on both.
Thanks¡
Hi Diego,
The front is a 120/17 and rear 160/18. Pirelli Angel GT
Using a monolever transmission system? I can’t find the way how.
I have seen many k100 using 160 on the back, but thanks to a paralever transformation. Without it , yours is the first one I’ve seen, and really I wonder to know if perhaps it’s because the tire design?, othersway there is not space to place in more than a 140.
Thanks anyway and repeat , amazing job!
Thanks¡¡ then the rear wheel have to come from a K100RS, which is the only one allows that wide.
I have one located, will try to check if is possible to fit into my rear transmission system.
160 on the back with the monolever system of the K100? Can’t imagine the way how to do it.
I mean, I have seen on Internet many k100 using a 160 tire, but thanks to the paralever transmission system, which allow a wider tire, but only yours using it on a k100 with monolever one.
Check out
http://www.bskspeedworks.co.uk/bikes.html
You are right…. Is not the only one! Now I am even more interest on this!
Many thanks again!
Hi Paul – currently doing my own K100 scrambler (https://kettenritzel.cc/2015/09/15/daniel-dollers-bmw-k100-scrambler/). I am curious about the Supertrapp exhaust. Can you give me the model number / name?
Many thanks,
Stein
Ottawa, Canada
Hi Stein,
Nice bike! I like the exhaust you have.
My muffler is
http://www.supertrapp.com/product_sections/cat.asp?CatID=34
Paul
Many thanks Paul. Was performance affected in anyway, given that the ECU can’t be remapped? I’ve read you just take your chances in selecting an exhaust for this reason and I was concerned, so your recommendation helps me out a lot.
The bike runs great
Thanks again Paul. Looked into the product a bit more and now realize that it is somewhat tuneable with the supertrapp disk system, so I’ll get it!
Hi Paul,
i really like you project and you inspire to start my first one.
I am in Sydney and i am not sure if by cutting the frame i will make a problem in my registration. i did not really have an answer from the RTA in here, so i was wondering on how did you manege it.
Thank you so much
Cheers
Daniel
Hi Daniel,
I’m surprised the RTA couldn’t help you. To do it all above board, you should get an Engineering Certificate for frame mods. Try joining Sydney Cafe Racers on Facebook. You should be able to get some advice from those guys on where to go.
Paul
Thank You 🙂
Lovely Work you have made. I Got a BMW k100 from 1992. I Want the samt front end AS yours.. Can you please tell me which fit the bike !? Yamaha R1 from which year ? And it fits perfect on ?
Regards
Rasmus from Denmark.
Rasmusduelund@gmail.com
Hi Ramus,
Please read through the other comments on blog page. I have answered this many times
PJH you live in the UK?
Melbourne, Australia
Hi
I’ve just found your website.
Congrats for your work this is very nice.
It convinced me to choose the K100 for a cafe racer base model.
Thanks for all your details and photos !
Regards
Quentin (France)
Paul, I have spent so much time on your blog the last couple years, I feel as though I have done holiday at the Papa J Hotel. Fantastic work sir! I am installing M Blaze on the rear as you have and I would appreciate your input on addressing the diameter difference of the frame. Cheers! Mark D.
Hi Mark,
I used some plastic garden irrigation pipe. Find some of similar diameter, cut it longitudinally to allow for expansion.
Hi Mate,
Asked you a few questions before but I’ve got another!
Currently looking at fitting a Street Triple Front end to my k100. Fitment is 30inner 52outer 16depth at either end. I’m aware the that K100 is 28 52 16 at either end. What would be involved in this fitting? I’ve checked allsballsracing and they’ve stated that it’ll fit, but im just not entirely sure how?
Thanks,
Tariq.
Hi Tariq,
Not sure I can help. I kept the K100 post and bearings, then modified the triple clamps to suit.
I would love to see thjis bike in person, i am on the lookout for a K100RS as a project build. This is very inspiring.
COME BACK again on your page man 🙂
I’ve finish today to put a TL1000S front end on the K1100 tomorrow i will do some drive test..
Congrats!
Hi I’m 17 and currently living in the united states and wondering how I should start my own bmw k100 cafe racer project, what i should suspect to pay for one, what problems I might encounter, and what the overall cost should be.
Hi, I’m not sure what you should pay for the bike in the USA, but the K100 is pretty bulletproof. How much you spend is up to you. If you do most of the work yourself, maybe a couple of grand? But my advice is to not skimp on components, and pay attention to the details. Make it tidy, no crappy exposed wiring etc. good luck!
Thanks and have a Merry Christmas
Hi there, very impressive job on the BM. With the speedo conversion, did you have to modify much in the way of the wiring. i noticed that without any speedo connected the engine will not even turn over. Did you have a similar issue?
Hi Ian,
Without the stock speedo you need to pull clutch lever in to activate the starter. Hope that works for you!
Hi Paul
Awesome build, your seat I assume is aluminium. I am from the uk would love to have some details on it sizes and cost.
A- to see how much it would cost to get one from your contact shipped to uk. Taxes if not to much.
B- to get one made here to the exact spec as yours.
Cheers
Andy
Hi Andy,
I’ll ask Mick if he’s interested in making one for you.
Hi Andy,
Mick said he is willing to make a seat unit for you. It’s been a couple of years since making the original, so I’ll have to give him mine to copy. Will give it to him next week and get back to you with a quote.
Paul
Beautiful job and I love the colour. One question on the Supertrapp exhaust. How many tuning discs are you running in it? Just would like to get a baseline for mine to start with and I’ll tune from there.
Thanks!
Jim
Hi Jim, I ended up running all discs. I then put small washers between the discs. It breaths freely, revs cleaner, and is not too loud. I’ve done 12,000km on it now.
I really like the open area where the battery, etc. is. Where did you put the electronics box?
Its bolted to underside of the seat unit
Thanks, that makes sense.. I will look at that solution. Did you use a LiPoFe battery to save space or a regular type?
I used a sealed lead/acid. It’s in the aluminium box
Just seen your bog great job, just a bout to start mine, have a k100rs 1984 31thouasnd MLS, can’t wait forit to take shape thanks for the inspiration
Good luck👍🏼
Hello – I am doing a 1986 RS 1000 I am putting the back wheel on, 4 studs and a cover should there also be a bearing?
Regards
Adam
The bearing is on the swingarm
No bearing. Just the wheel, bolts, spacer and cover. The bearing in in the final drive assembly
Nice bike, shame you friend crashed it, I would be gutted! good work on the rebuild though. I have just picked up a K100 today and am going to cafe it out. Where did you source your rear sets from? dit it come with master cylinder as well. yours look really nice. Im not looking forward to tackling the wiring, even though im an electrician. I think BMW has made this very complicated
Hi Mike,
It turned out Kev did me a favour, I like the second build way better!
There are hyperlinks in the blog for most of the bits I bought, but here is the rearset link http://www.bskspeedworks.co.uk/k-rearsets.html you can choose with or without master cylinder.
Paul
Ah yes I found these, damn they are good looking but expensive. Did you use the standard master cylinder for yours? I thought about cutting up the original mounts for now to keep the cost down. Im sure i will pick your brains later on. Cheers Paul
I bought the master cylinder with the rear sets. You can probably get one from the wreckers cheap
Greetings from San Rafael, Ca….
I stumbled across an 85 K100RT with only 13,000 miles on it… and then I stumbled across your blog as I did research for my scrambler conversion. This was an absolute joy to see your process and pitfalls. Thank you so much for sharing your fantastic journey. This was very inspiring.
Thanks for kind words. Good luck with the build!
Hello, great caferacer… you did a great job I really liked it…. i have done my caferacer BMW k 1100 RS but I can’t connect unversal speedomtr.. can you help me? thanks
Some of the electronics are located in the original speedo. You won’t get a neutral light without modification. Check out http://www.k100-forum.com/portal for a wealth of information.
Hi from Finland!
I’m building -83 K100 and really love that orange color. Spot on! Is it possible for you to share that exact paint code?
Hi, not sure of the code, but it was from a range called ‘vibrance’. The colour was called ‘Hornet Orange’.
Hey Paul my name is Ray, I have a 1992 K100RS and I am very interested in giving it the work it needs to take on a look like the hornet. I live in Encinitas so, very close to your shop. if I may, how much would a project like that cost? I don’t want to find myself with an unfinished bike.
Hi Ray, I am located in Melbourne Australia. Cost will depend on how much you do yourself. I outsourced the welding and paint, but did everything else myself. You can probably get away with $5000 for a decent result. I used high quality components.
Paul
Truly inspired. Your bike is a masterpiece.
Thanks 👍🏼
Hi Paul
Love the build. I am also currently in building a K100 and want to mount the ignition switch in the top triple clamp as you have done in your original build but i am having some issues.
What did you do to mount the ignition in the top triple clamp as the one i pulled out of the instrument cluster does not have any mounting points that i can see. I would appreciate any help you could offer or photos of how you mounted it.
Regards
Simon
Hi Simon, I had machinist enlarge the hole a bit to make it a snug fit for the ignition switch. It was then held in place when the clamp is tightened on the fork.
Paul
hi Simon, tx for sharing your invaluable information and pictures. You’ve made a beautiful bike, be proud! tx, rob stLouisMo
Thanks 🙏🏻
Hi, What are you doing for connect m unit on ECU motronic ?
Sorry for my english i’m french
See you later
Hi Remy,
Check the blog again, I have posted a wiring diagram of the harness I made.
Olala, like stomped to see the process and progress of modification of cafe racer-style bike with basic bikenya from BMW K100, the result is beyond reason, this is very amazing for me..
👍🏼 thanks
How Did you know what fork is compatible with your bmw?
It was not compatible. I had to make it fit!
G’day mate,
i love the build. The fact you kept the tank standard, really sells it for me (along with the slab of metal underneath it).
Just started my K1100 custom build. hoping for something similar to yours, but not that mental.
Did you get the neutral light working in the end?
Mark,
Melbourne
Hi Mark, I gave up on the neutral light. The K100 forum has info about how it can be done, but need some circuit knowledge
Didn’t bother. The K100 forum has information on how to do it. There is circuitry in original speedo cluster that needs to be replicated.