
I, like many bikers, had the idea of one day doing a project bike. Every bike I’ve owned has been modified to my personal taste, this is my K1200R which was dead stock when I got it.
I had talked about wanting to do a proper build for some time. My very supportive, beautiful wife asked me what I was waiting for? I stumbled across the following bike on the BIKEEXIF and got motivated!

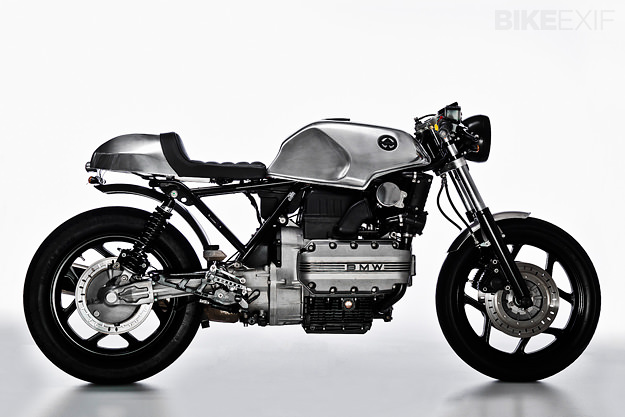
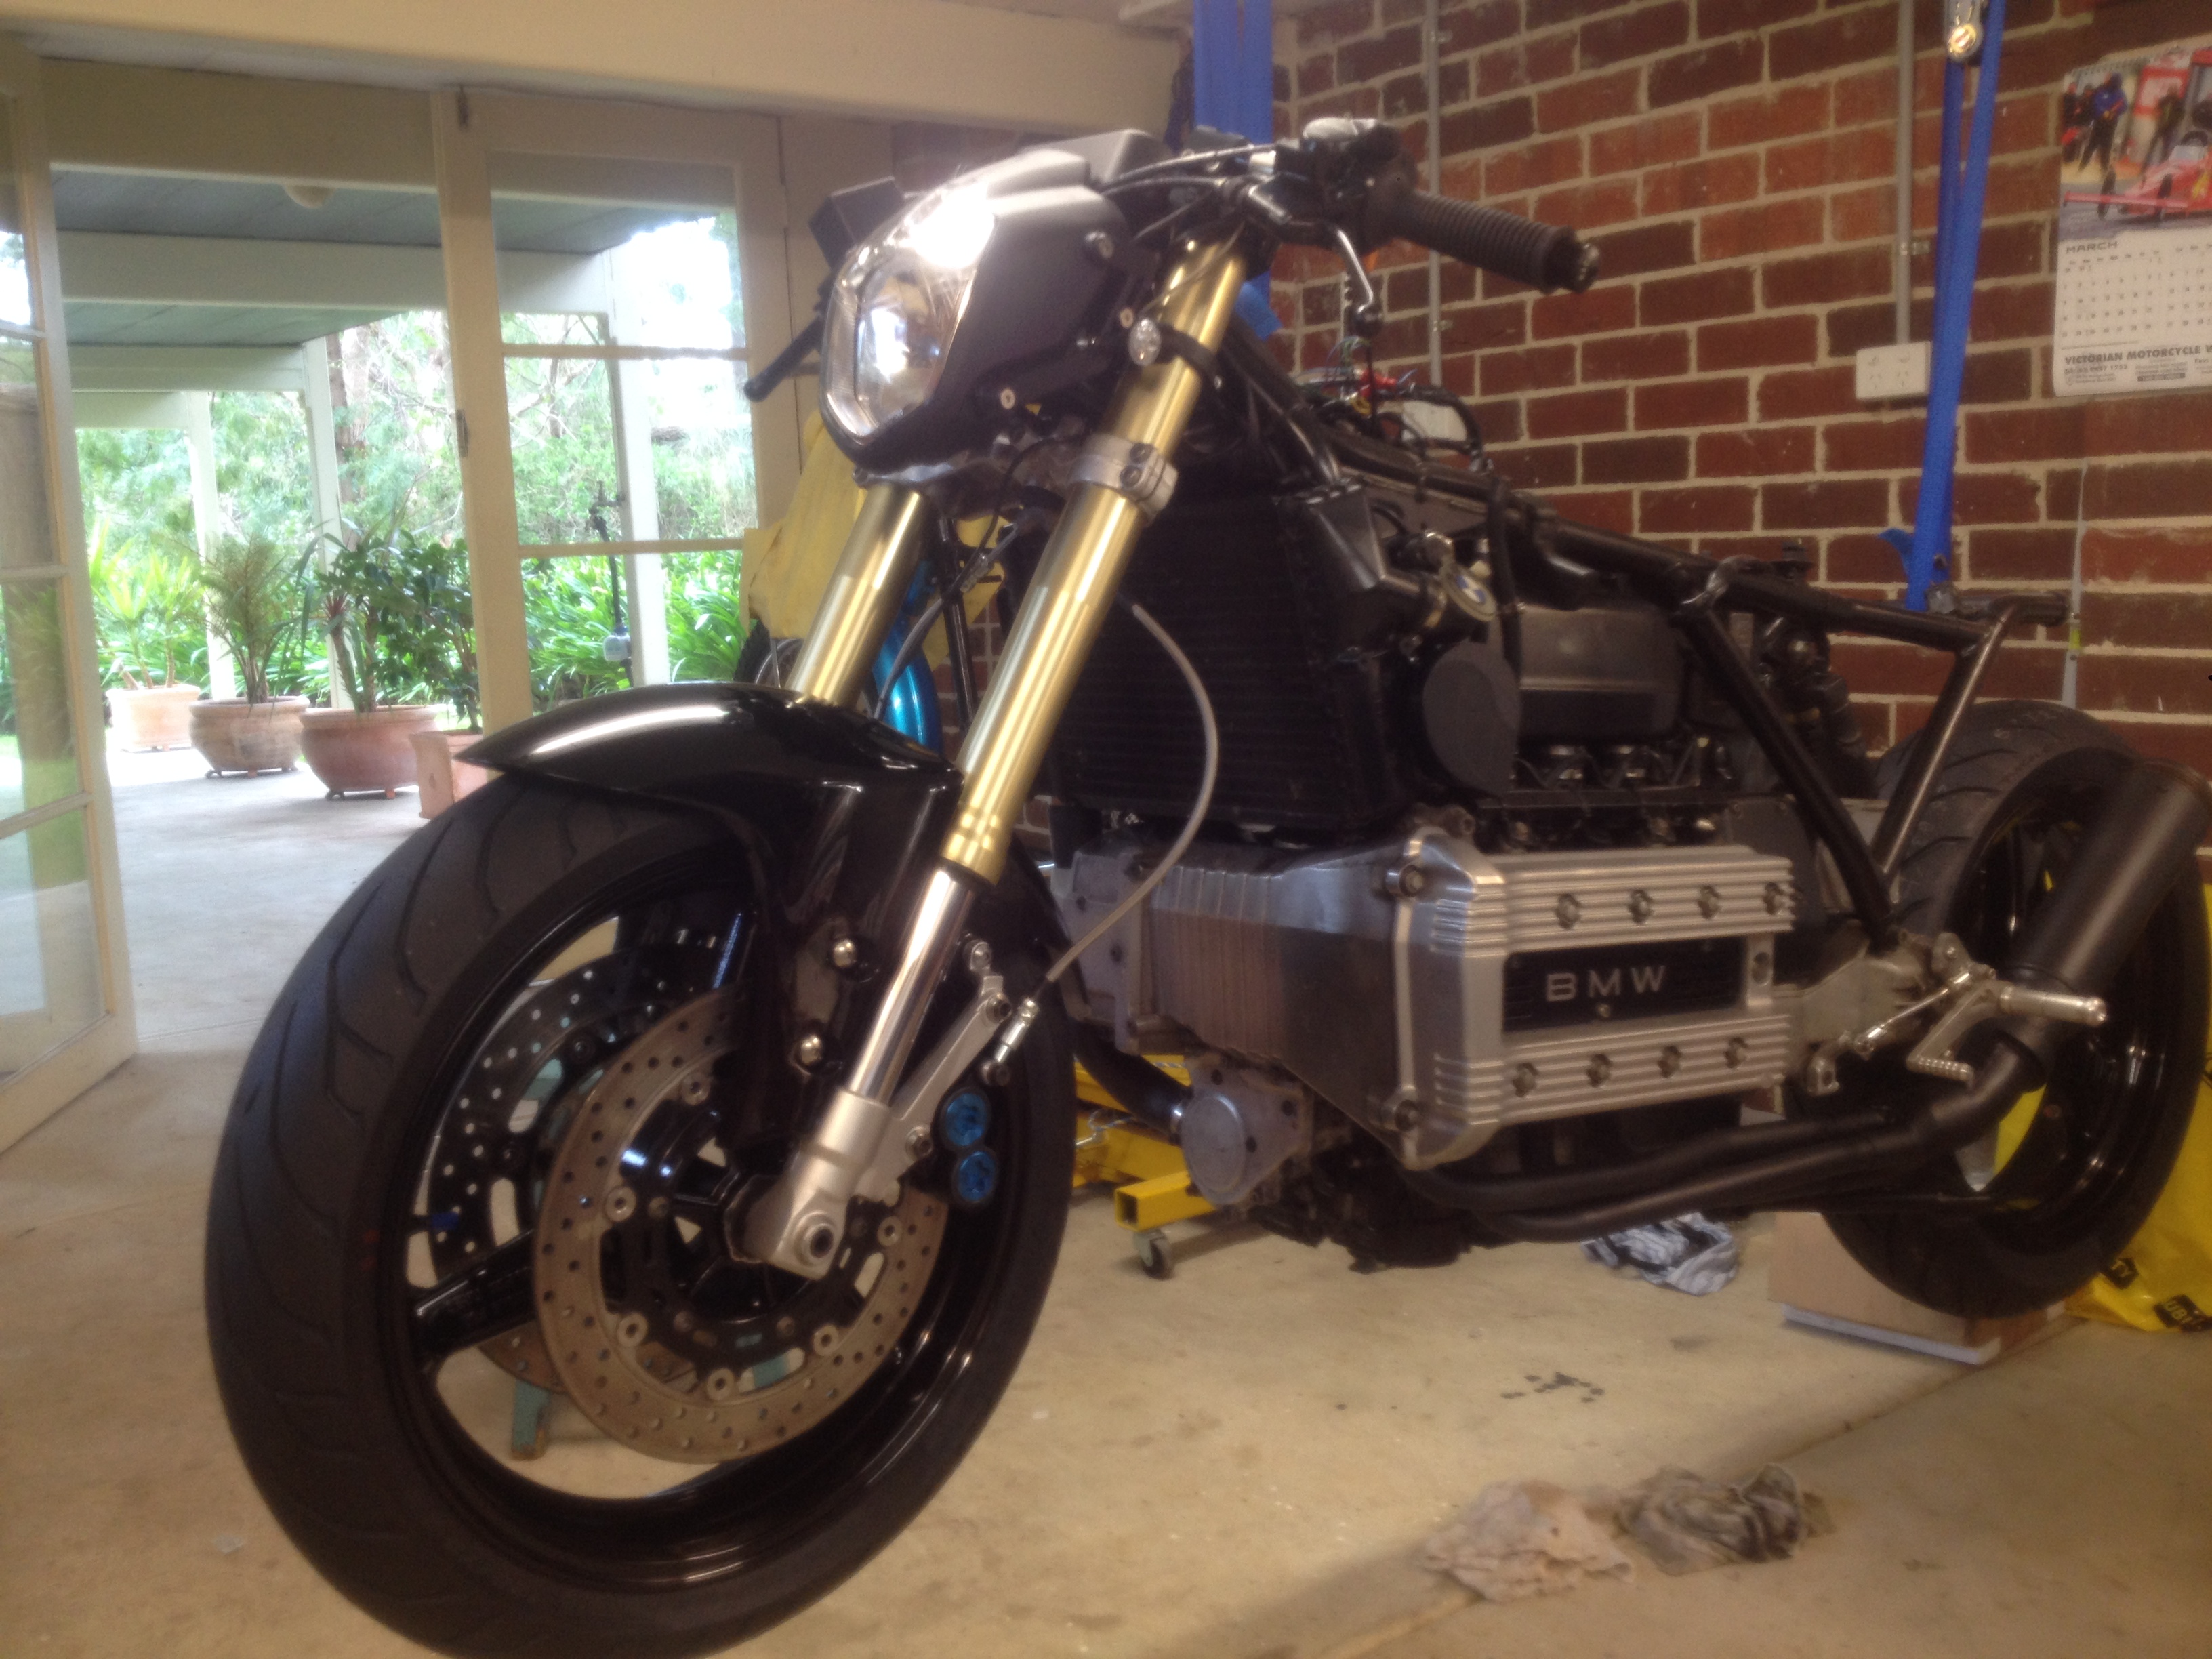
I was blown away that a K100 could look so good! This blog is how, over 4 months, I turned this;

Into this.

And after my mate crashed it, this.

I found the donor bike in Adelaide as an unregistered trade-in advertised on gumtree. My Dad and I did a quick 1540km round trip, and the real journey began!

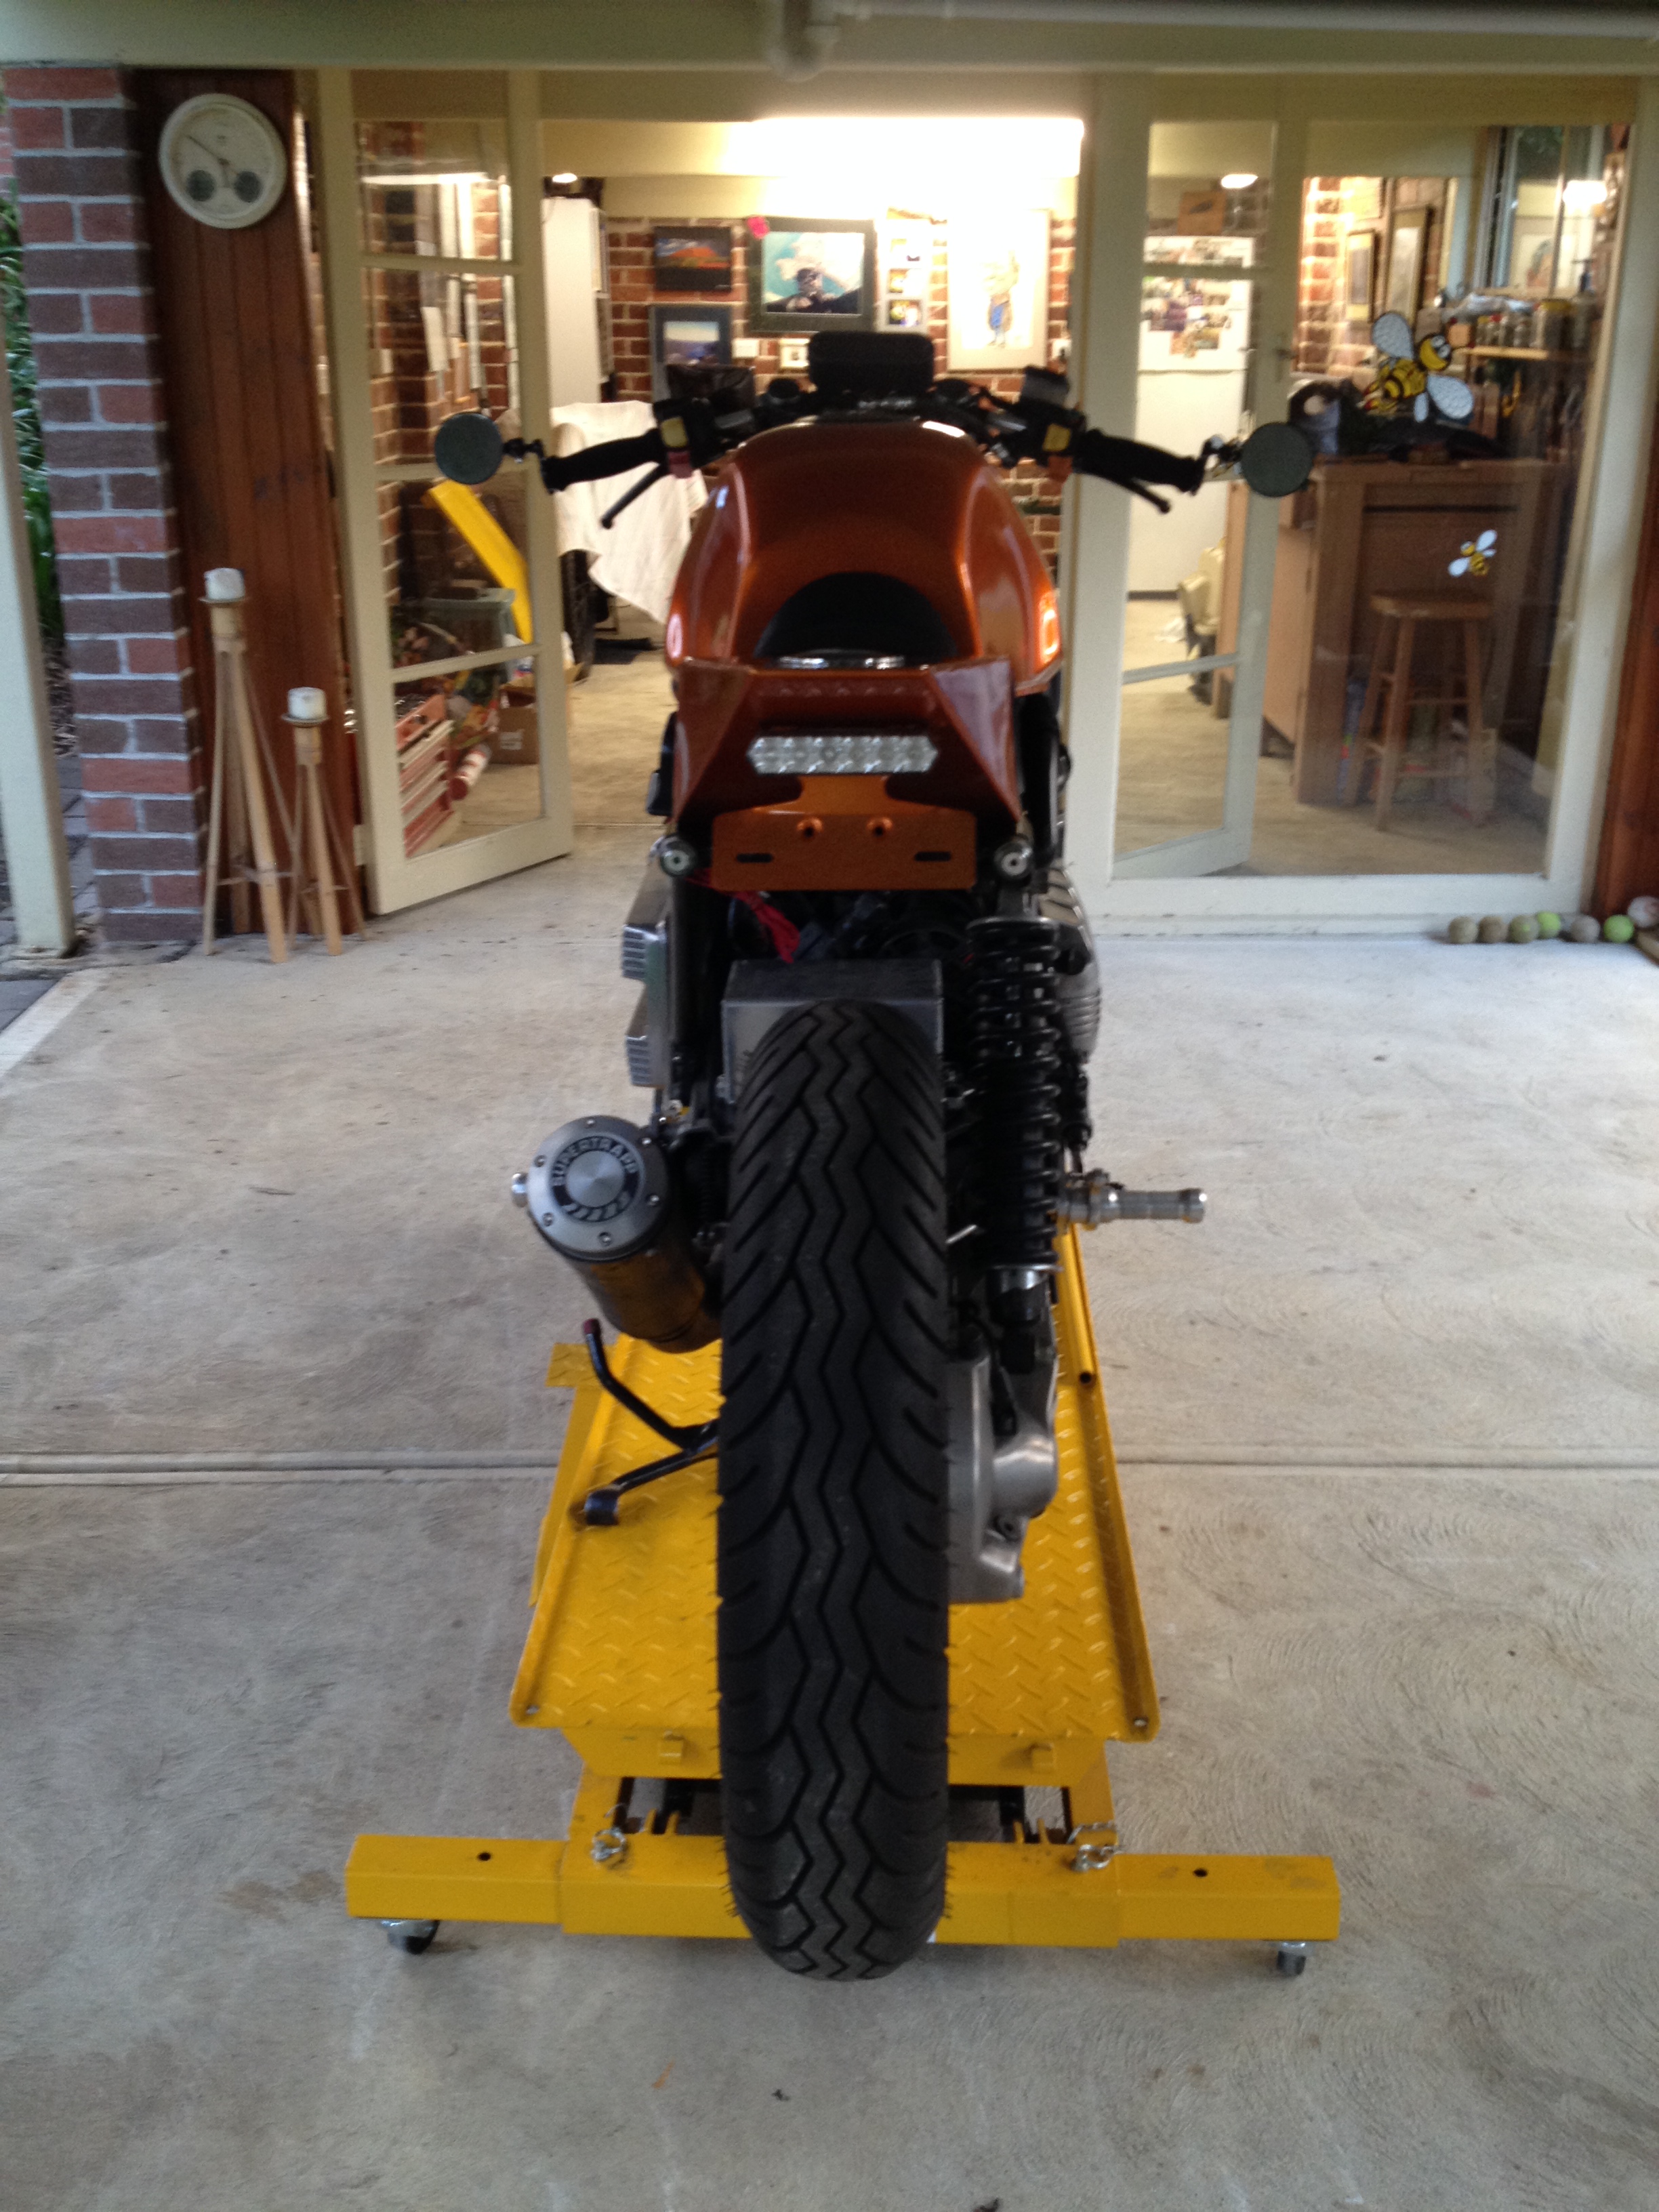
Bought a bike lift off ebay.

Fairings and seat were stripped and sold to a wrecker for $450, No turning back now!

Being my first build, I’m still trying to work out the sequence of work. It is a bit daunting! I decided to start easy and do the front guard. 
I marked out trimmed shape I wanted

and went at it with the dremel.

Have ordered 3M carbon fibre wrap to finish it off.
Dad did a good job of trimming unwanted metal tags from the subframe

I took a slightly different route for a radiator overflow tank!

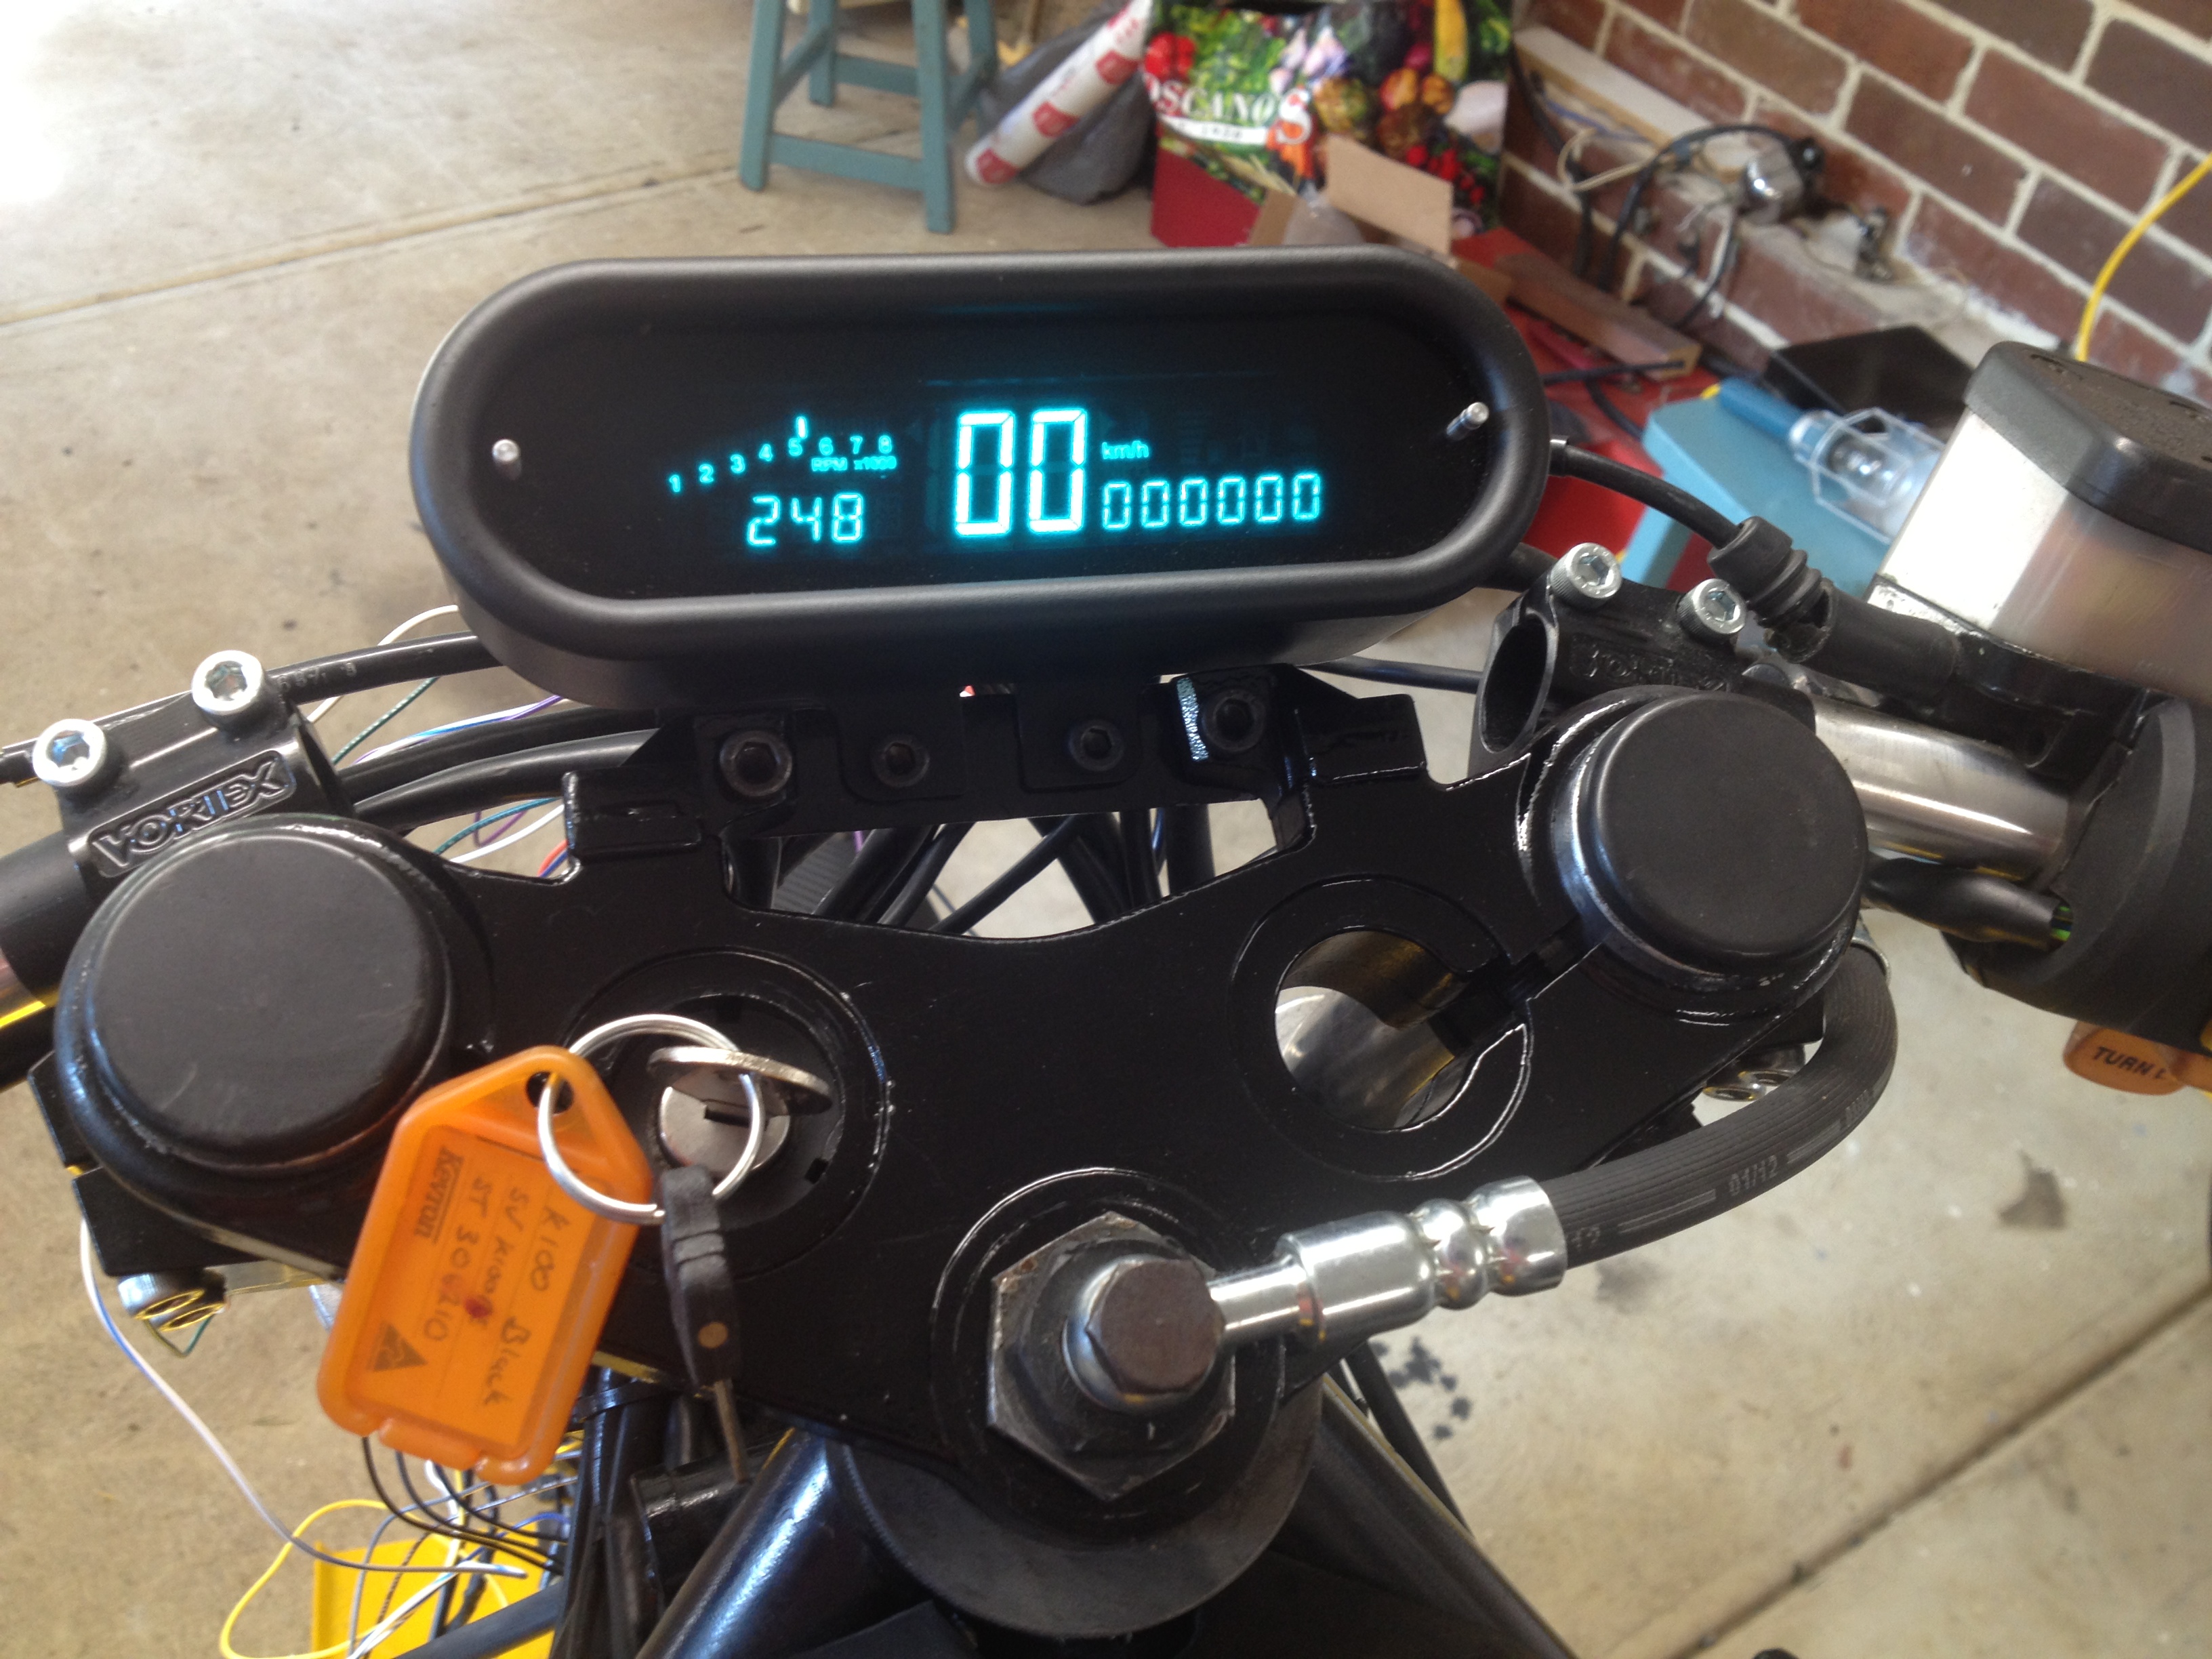
Pace should pick up now, the goodies that arrived this week; Rear sets from BSK SpeedWorks Speedo from Daktota Digital
The rear-sets were an easy fit, and very well made
Before
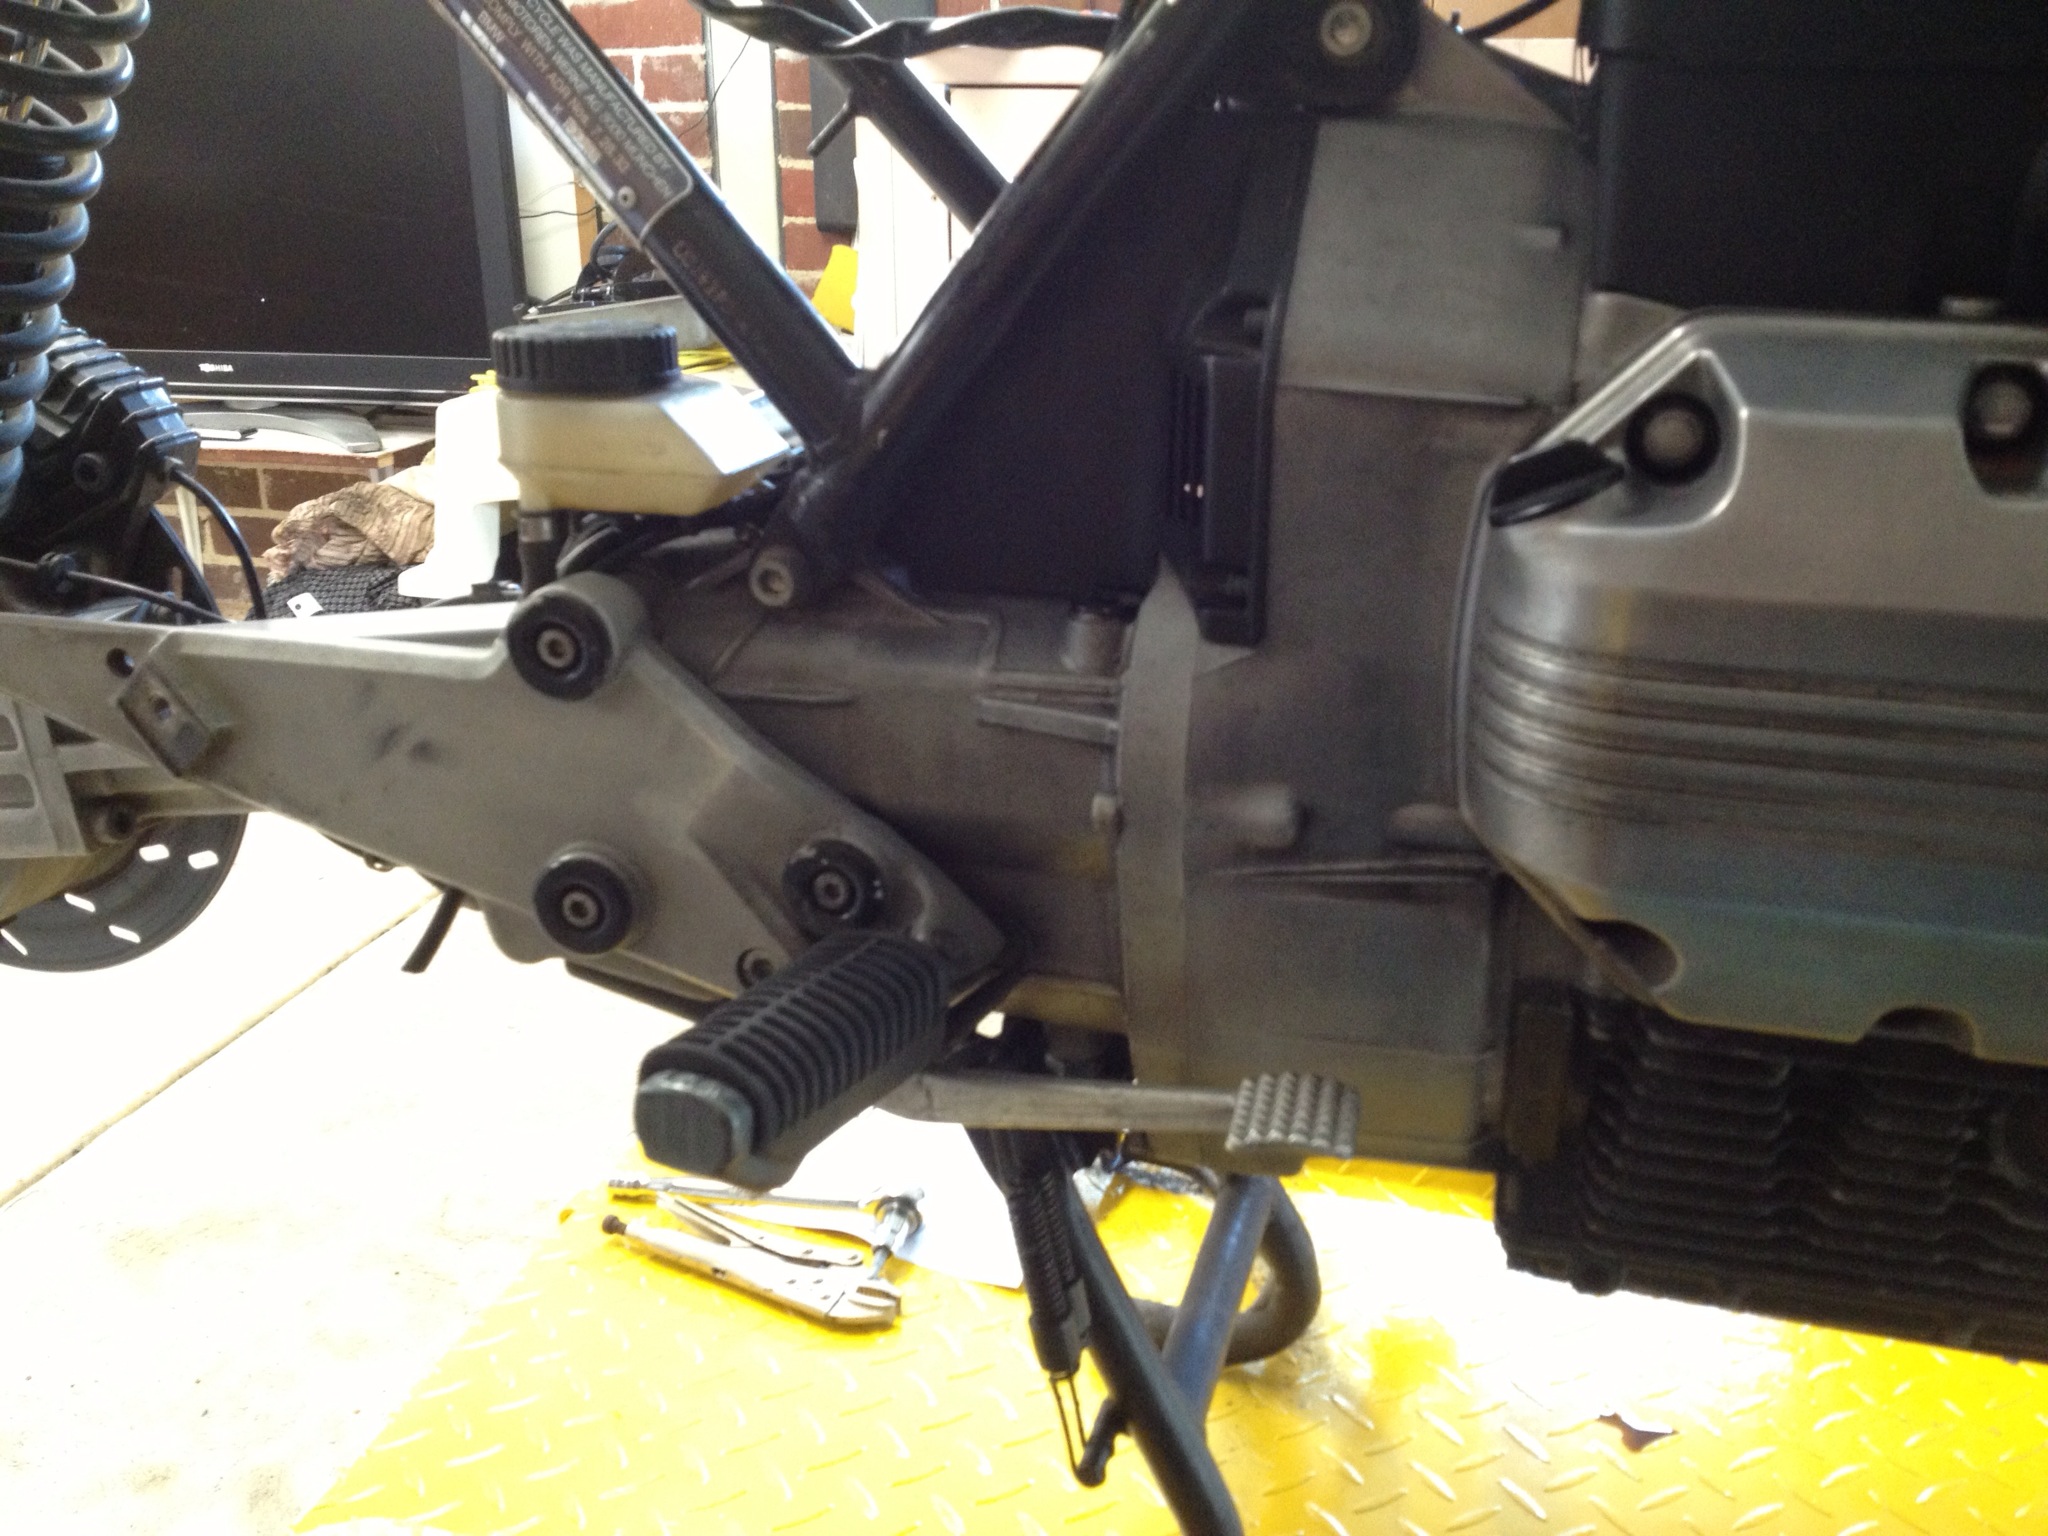
After

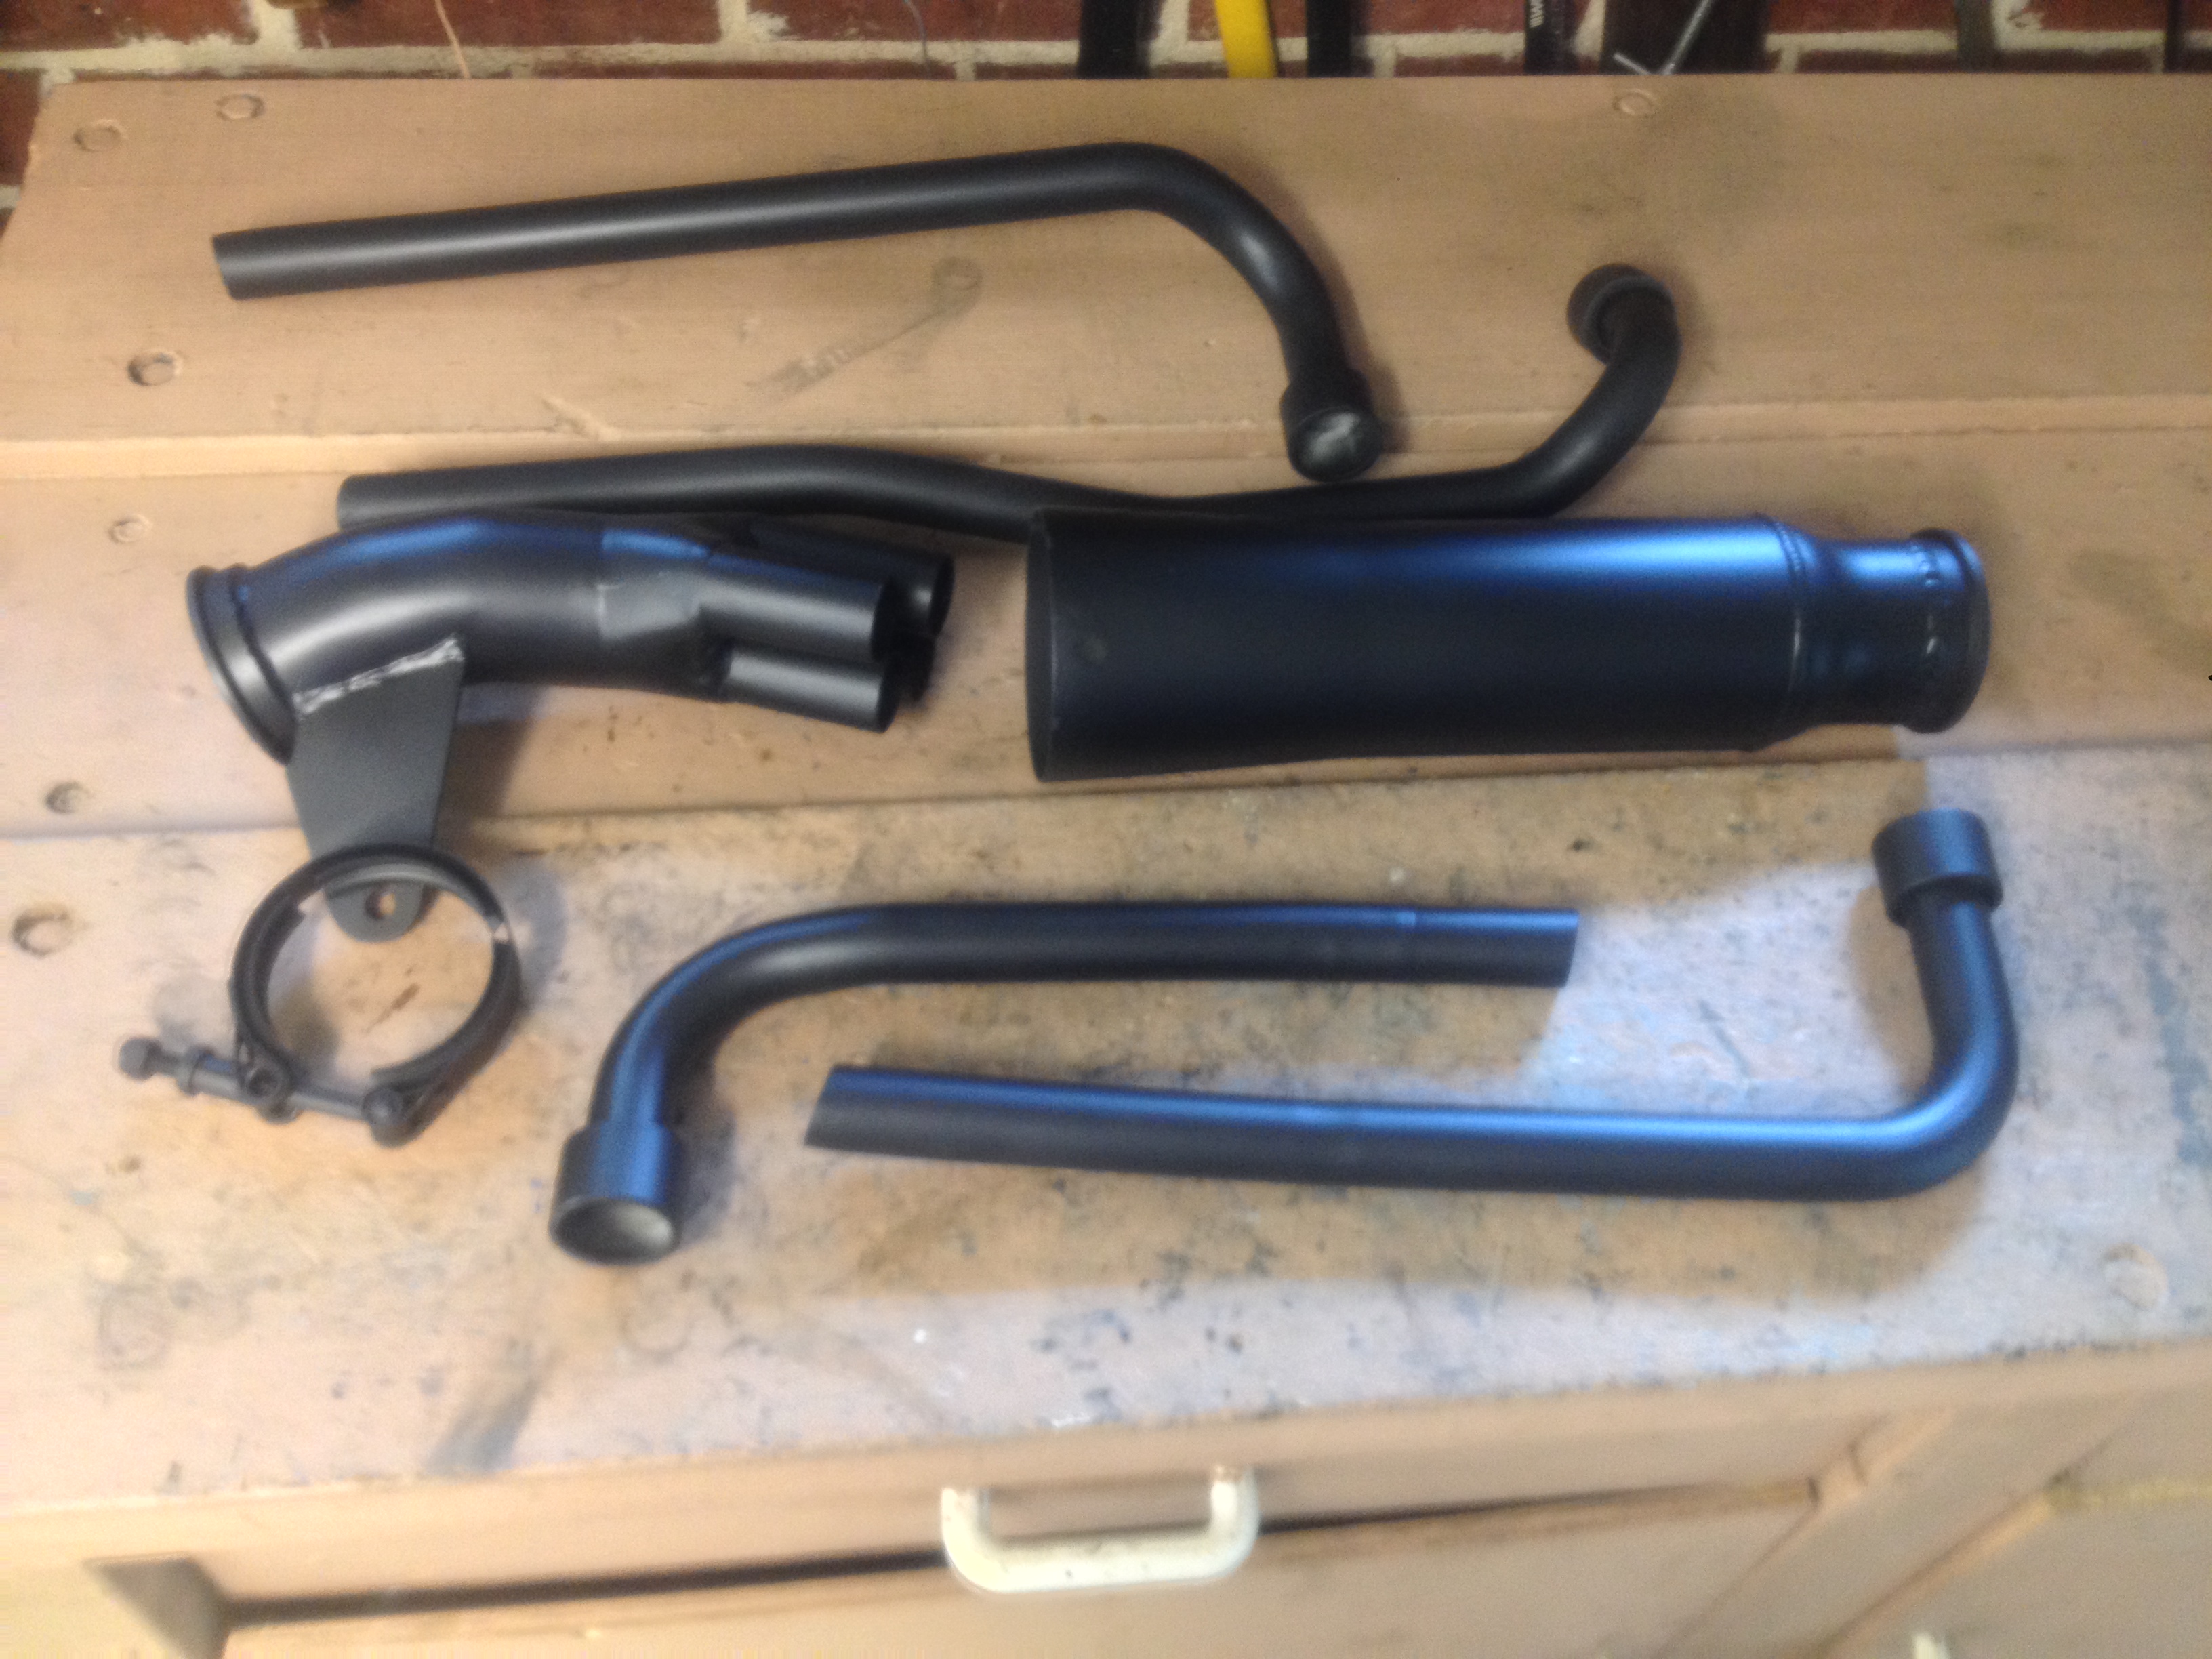
I was hoping the exhaust collector I found would be easy to rotate 90 degrees to get the angle I wanted. Not possible! It will only fit in the header pipes one way.


Have found Mick at Valley Engineering, who has modified it to suit.


He also has fixed the Clip-On bars, making the bars 22mm and the mounts 41.3mm. I’m getting a rough idea of the seat unit style I’m after. I want to follow the line from the fuel tank base through to the rear tail unit. I’m not after a particular style, but aiming for a look that is a cross between café racer and street fighter.

Clip-ons were an easy fit after mods to the bar diameter and fork clamp!


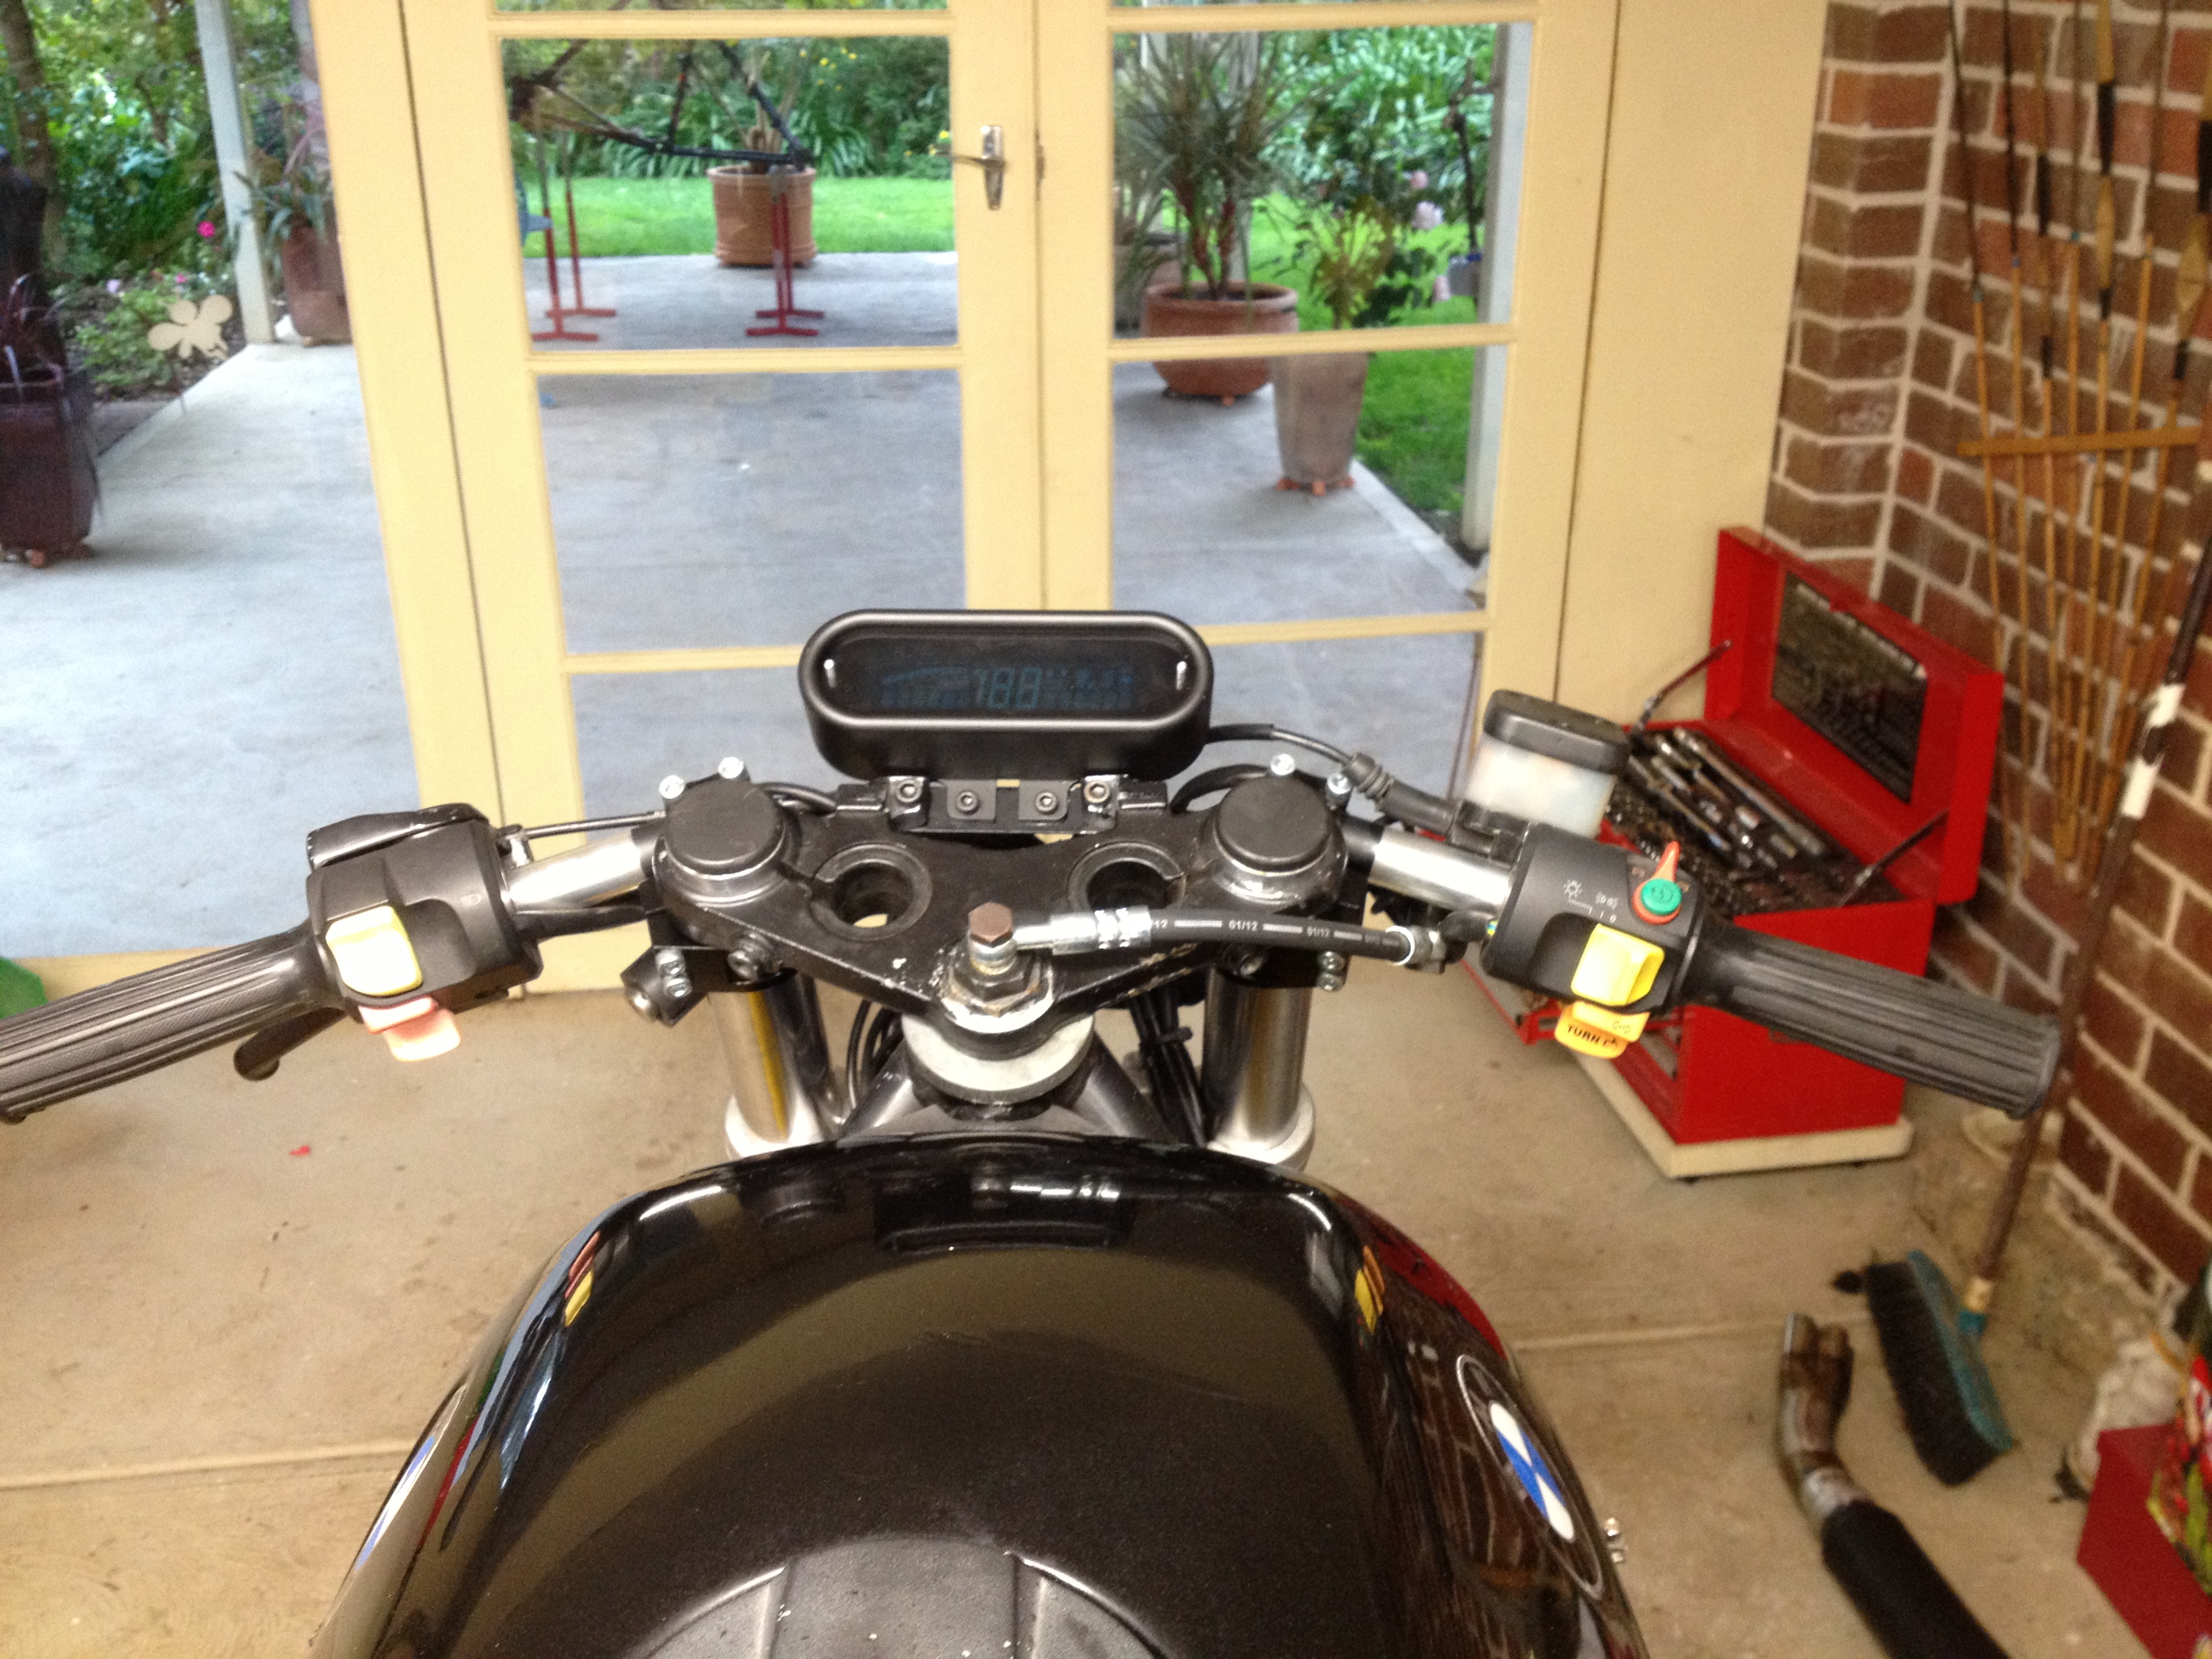
The Speedo mount is done. Longer brake hose fitted.
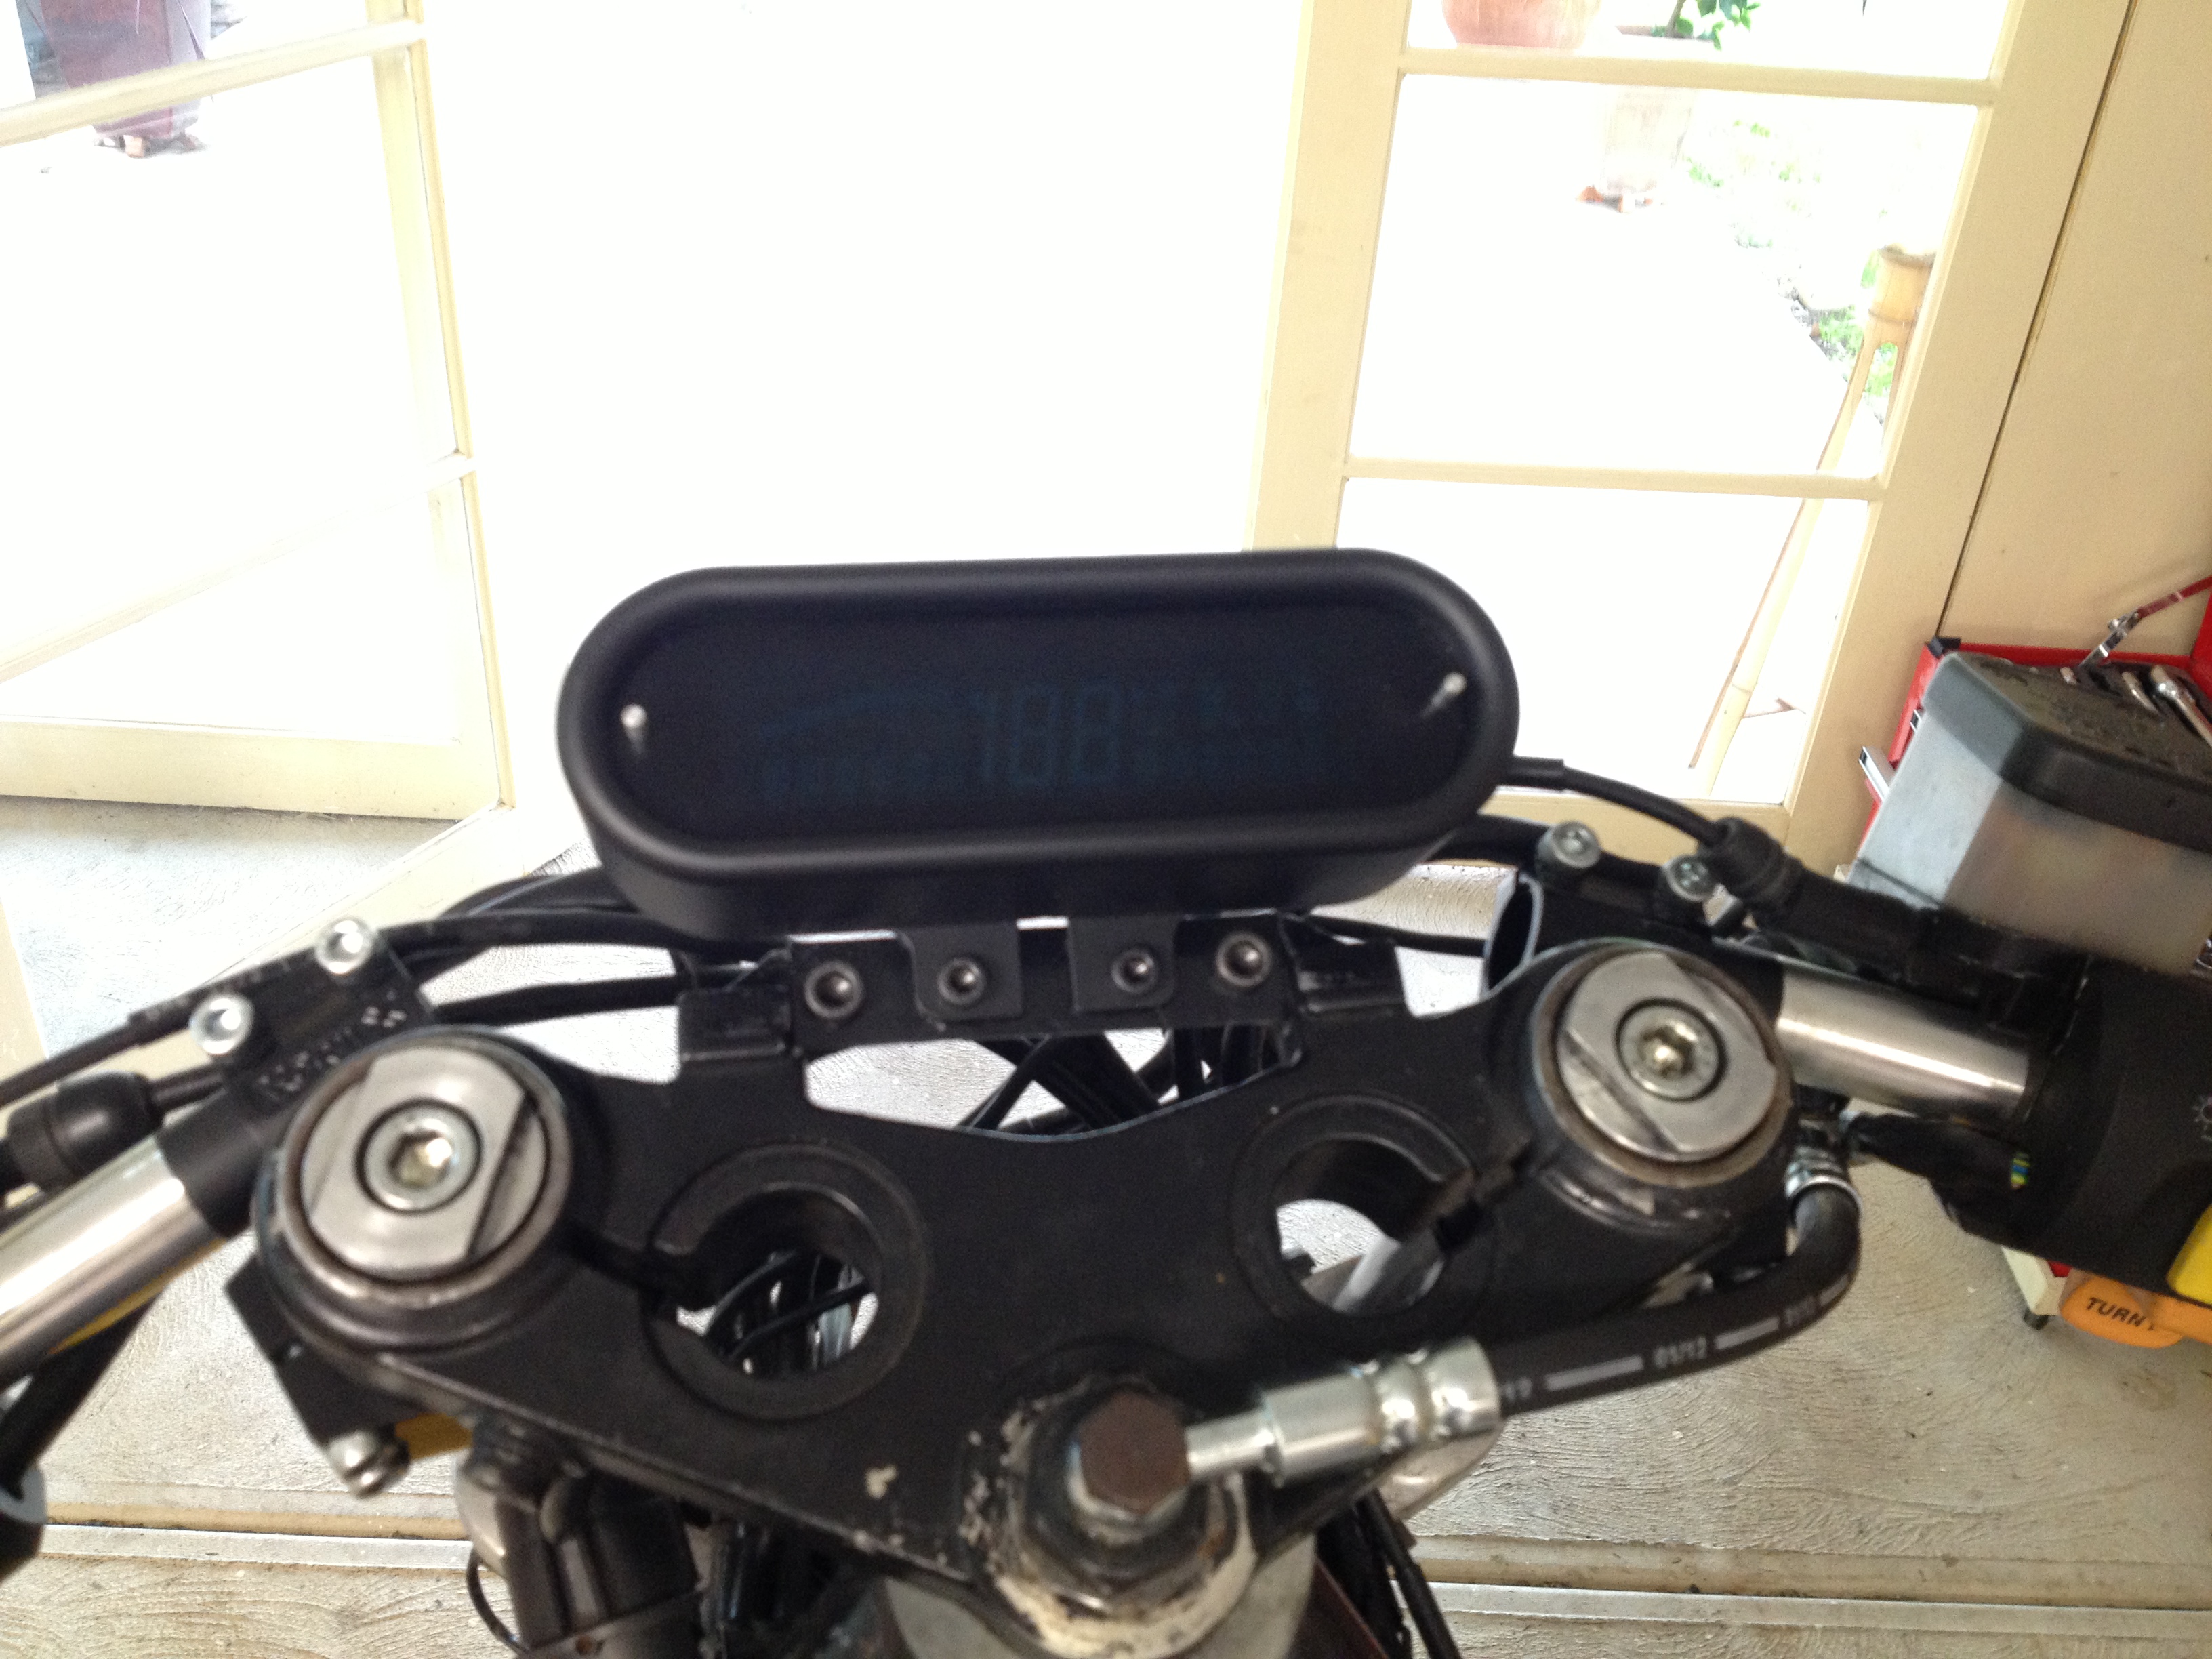
Lowered the speedo a bit, happy with it now

Decided to only use one horn. Made a bracket and mounted it on the left, behind the radiator.

Rear brake reservoir mounted.

Getting rid of the last of the frame tags.

Bike is now off to Valley Engineering for some surgery.


Mick (on the right) is going to do the tasks I can’t do at home.
– Hone out the hole in the upper triple clamp to hold the ignition block.
– Fabricate an exhaust hanger.
– Cut and brace the sub-frame.
– Manufacture the seat unit and tail piece.
Mick has form, turning his Ducati Monster SP into a café racer with the radiator moved to under the sub-frame!
One week later …………………………………………………..


Extra bracing of the sub-frame.

The smaller battery is now enclosed.

The ignition now fits in the clamp,

The seat unit is just how I wanted it. It continues the line from the tank, and the frame.

Fortunately, I provided accurate drawings, and a scale mock up to work from!

The exhaust is now finished!

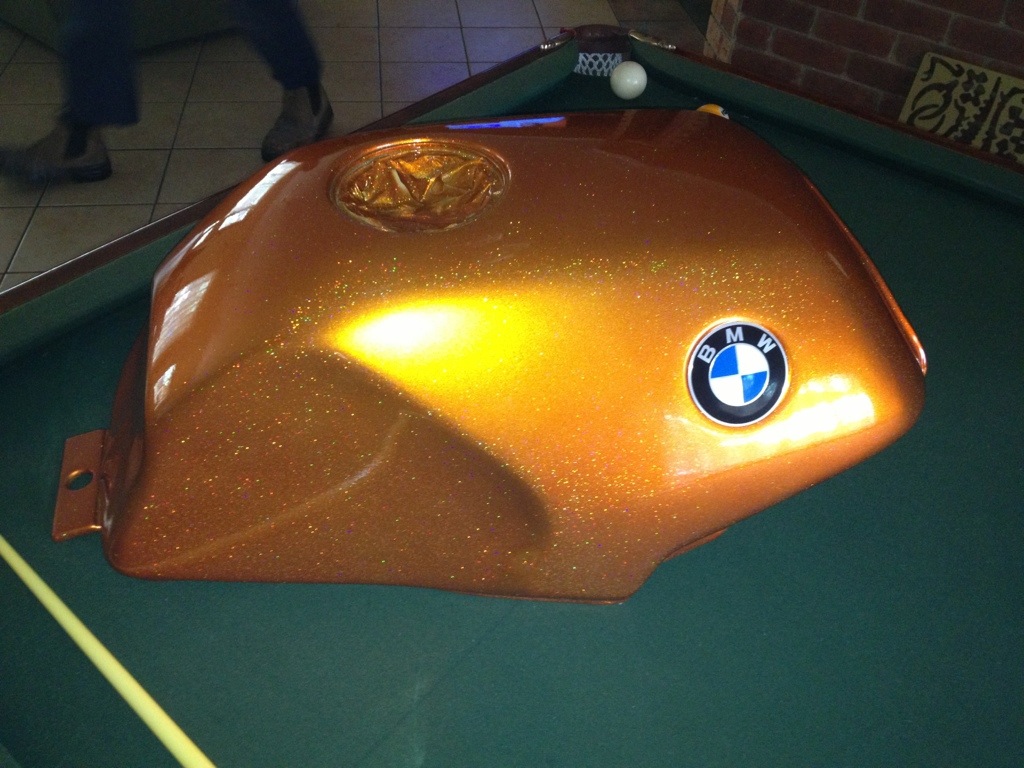
The tank and seat unit are off again for painting. My mate Pete of Peter’s Panels has offered to do the job for a couple of bottles of scotch! On the condition I do the preparation work. The colour is from a new range called ‘vibrance’. It is a nod to the BMW 1970’s colours, but with metal flake.


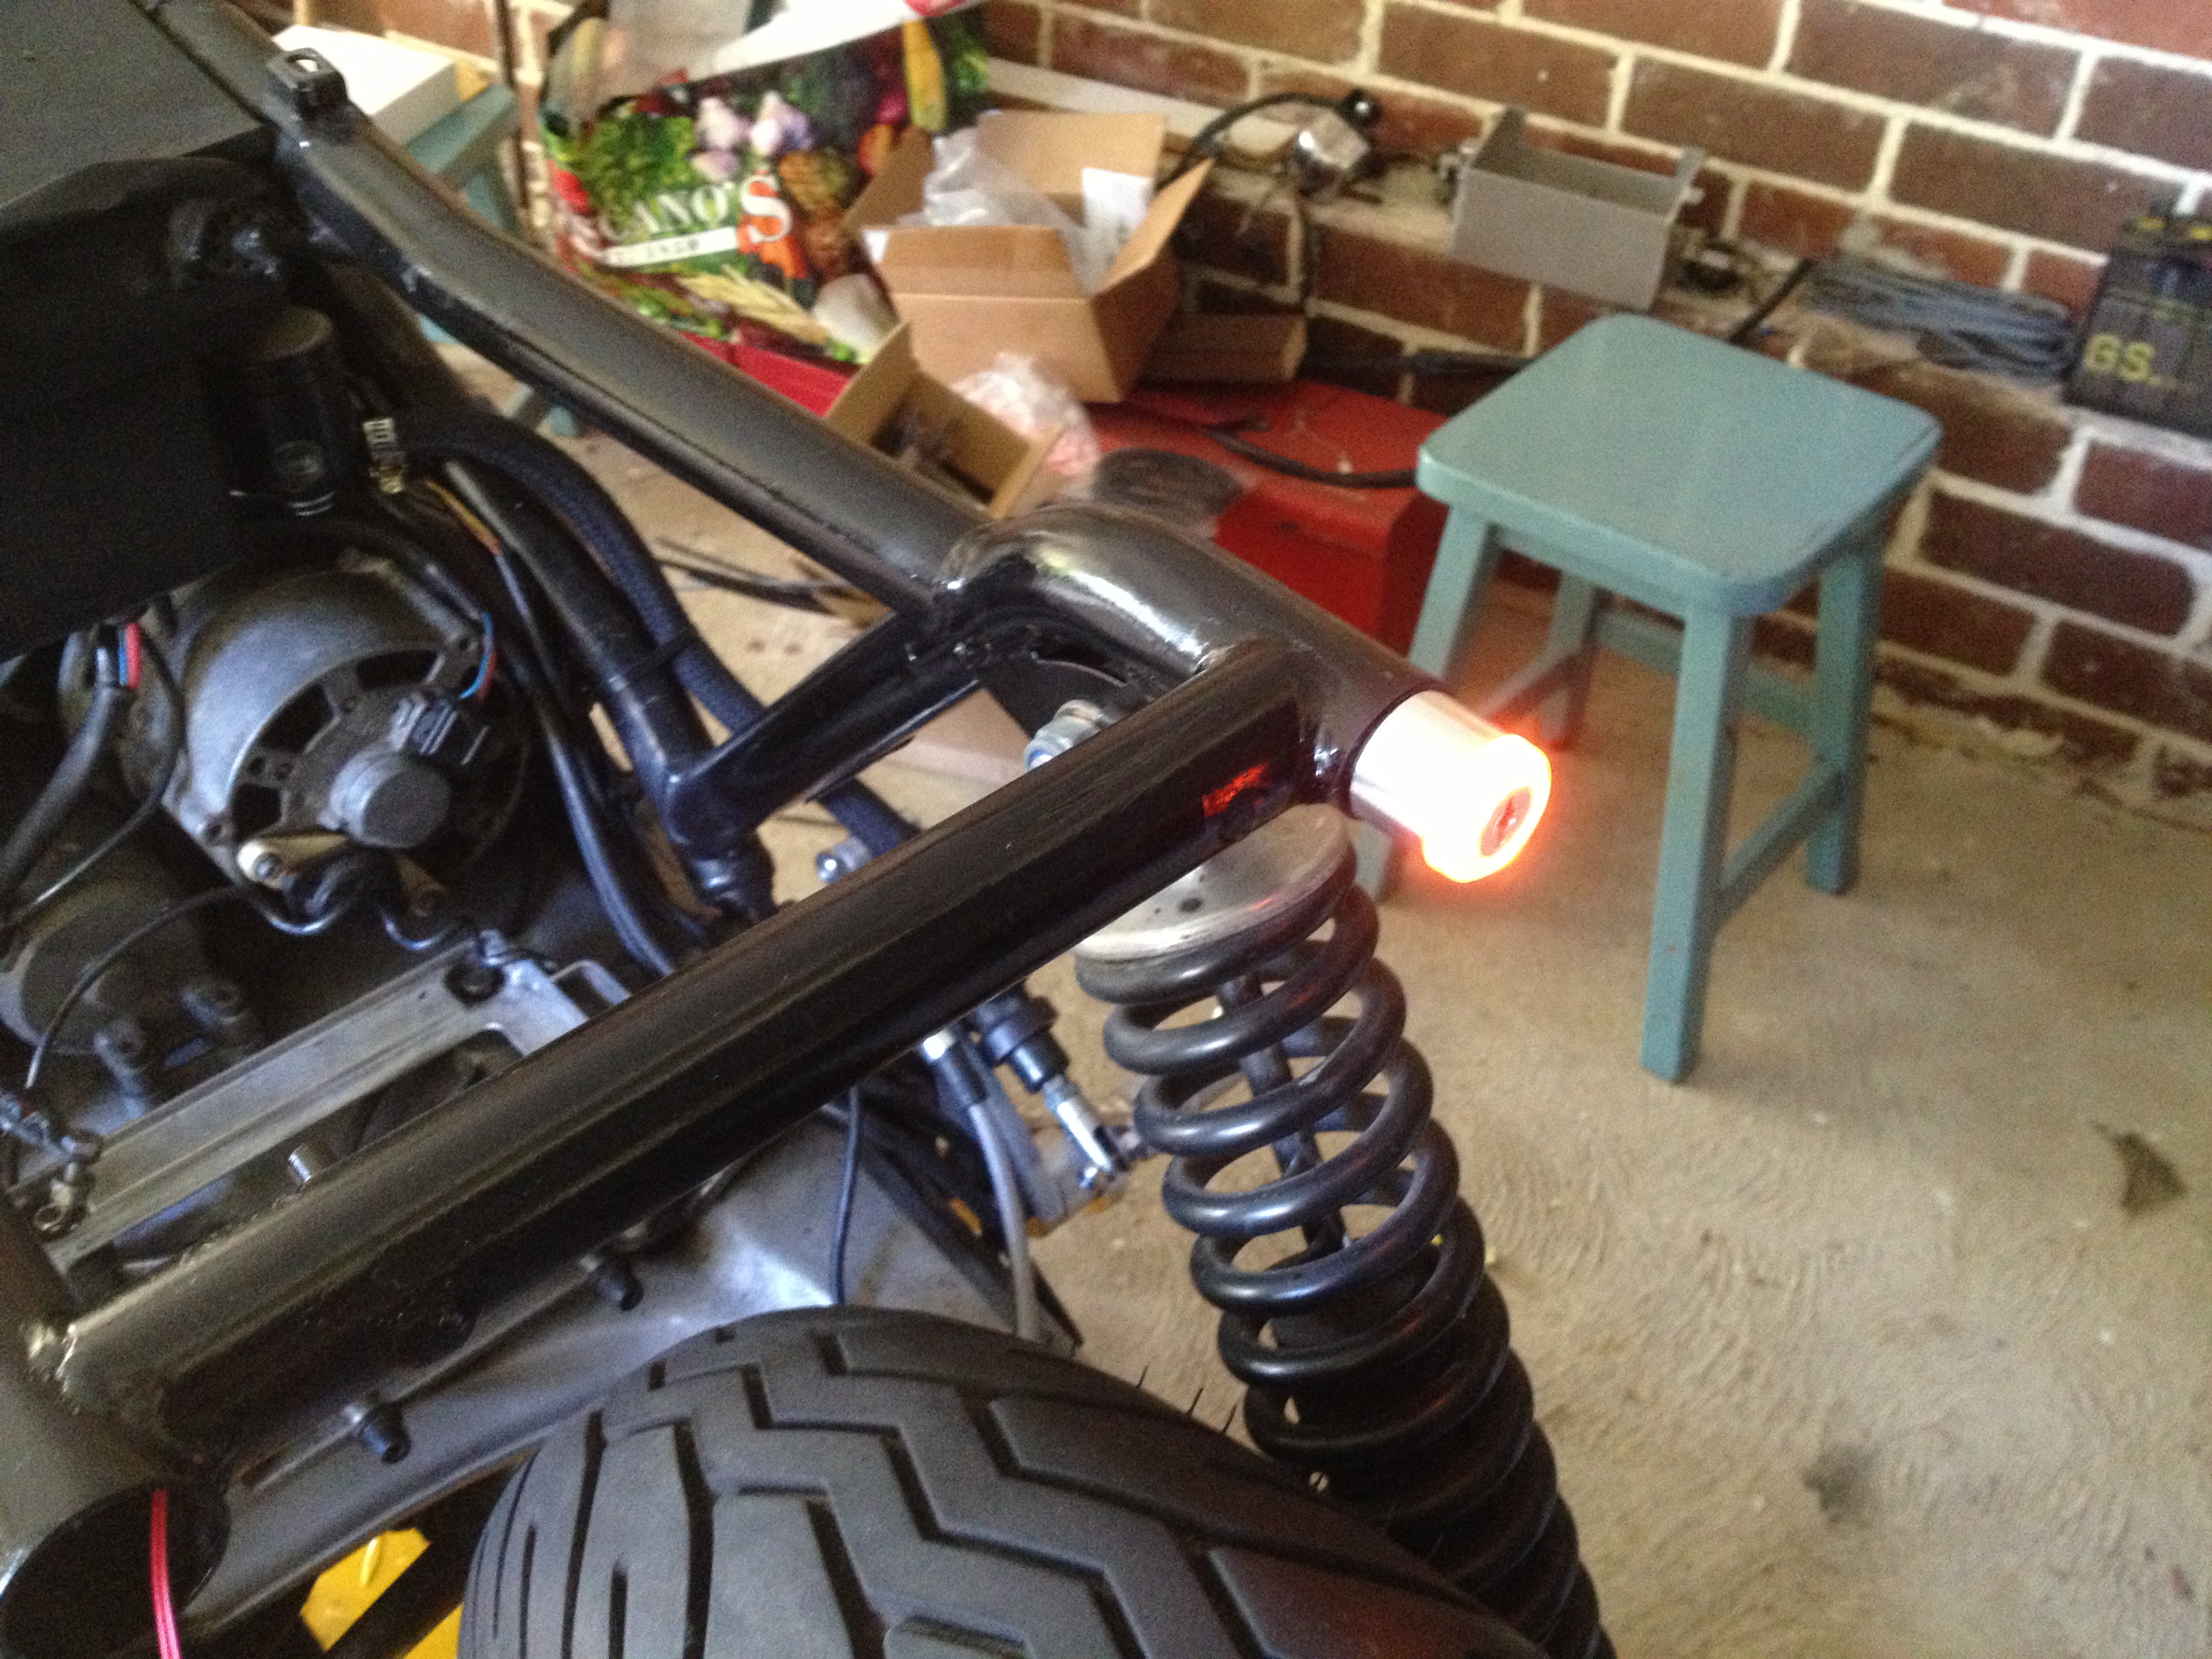
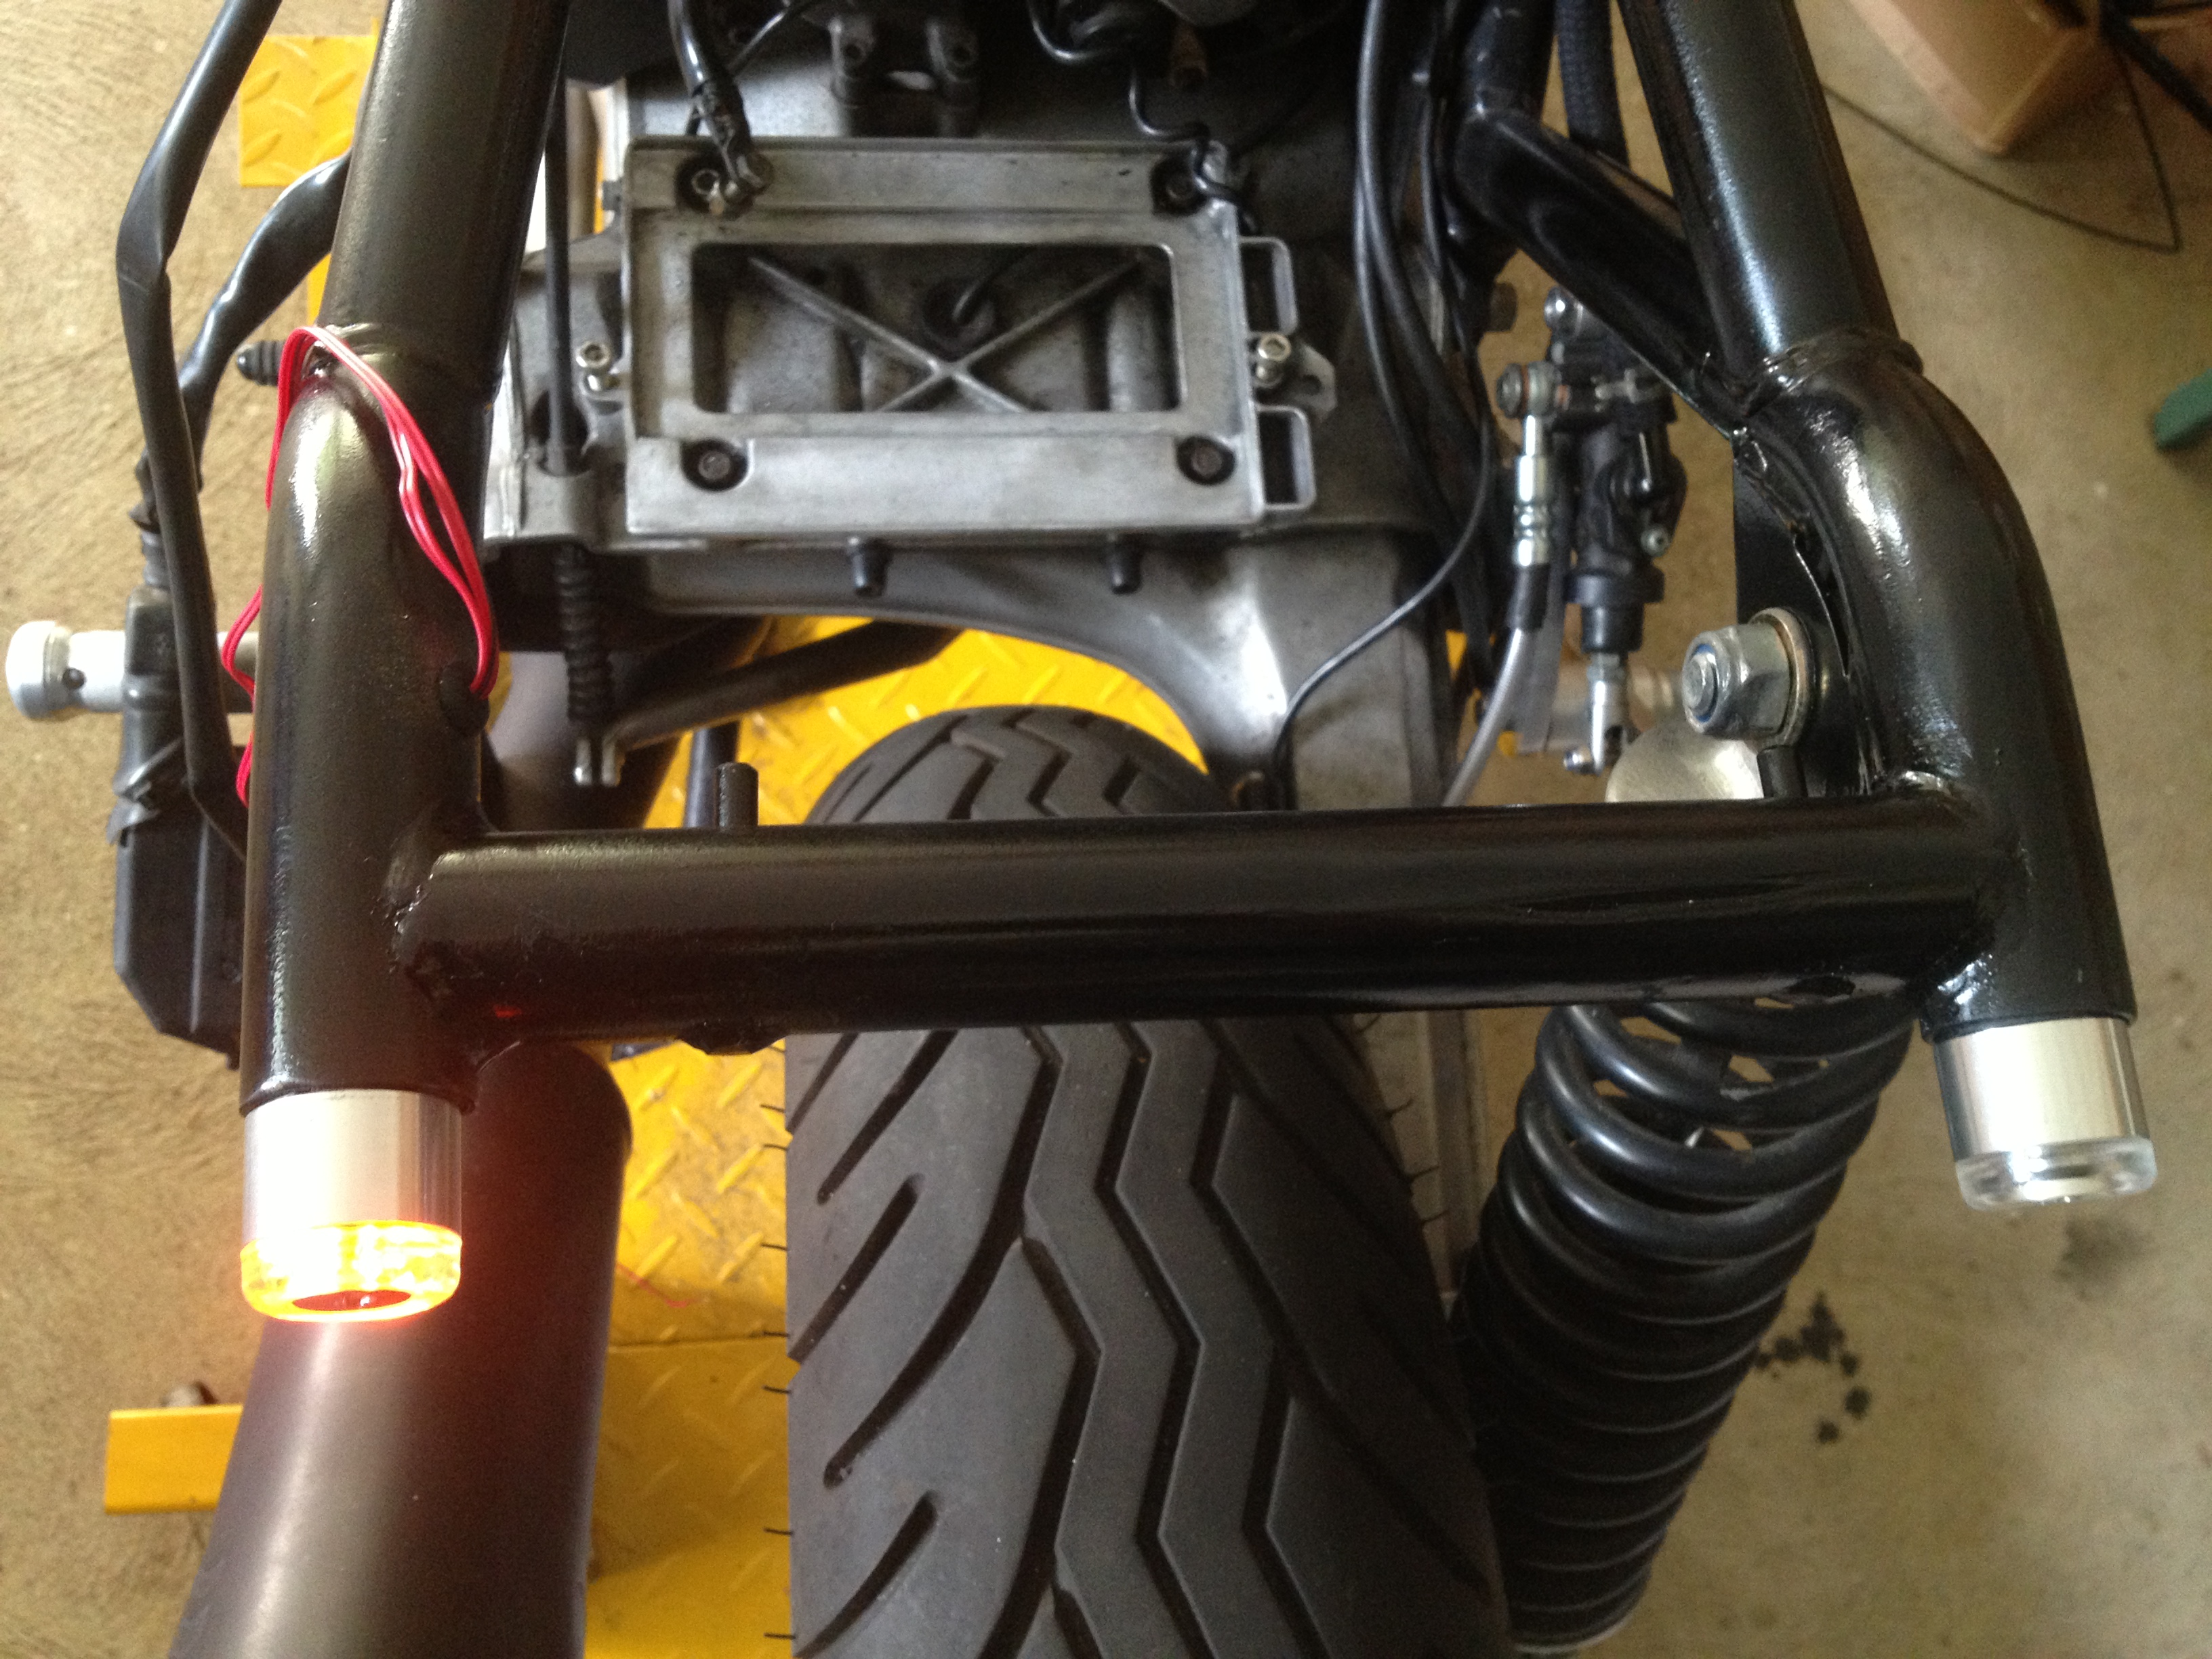
I bought some bar end indicators off eBay to use in the frame holes. Internal wiring was an interesting job!
Front fender now covered with 3M carbon fibre wrap.

Battery connected and installed in custom made box.

Now for the part I’ve been dreading!

We have ignition!
I’ve managed to get most of the cautions working, I can’t get the neutral light working for some reason. I need the tank and seat unit back to run the engine to check tacho. Then to see if the OEM speedo signal will work……… nope!
I ended up getting a sensor unit from Dakota Digital and mounting it on the front wheel. It counts the wheel studs.

The master at work, putting on the base silver coat.

The paint job by Pete is flawless!

The wiring is coming along. Yellow spaghetti! Thank you self closing braided line!


I’m away for work the next week, will book in the seat fabricator when I return. Reassembled to get the seat done.


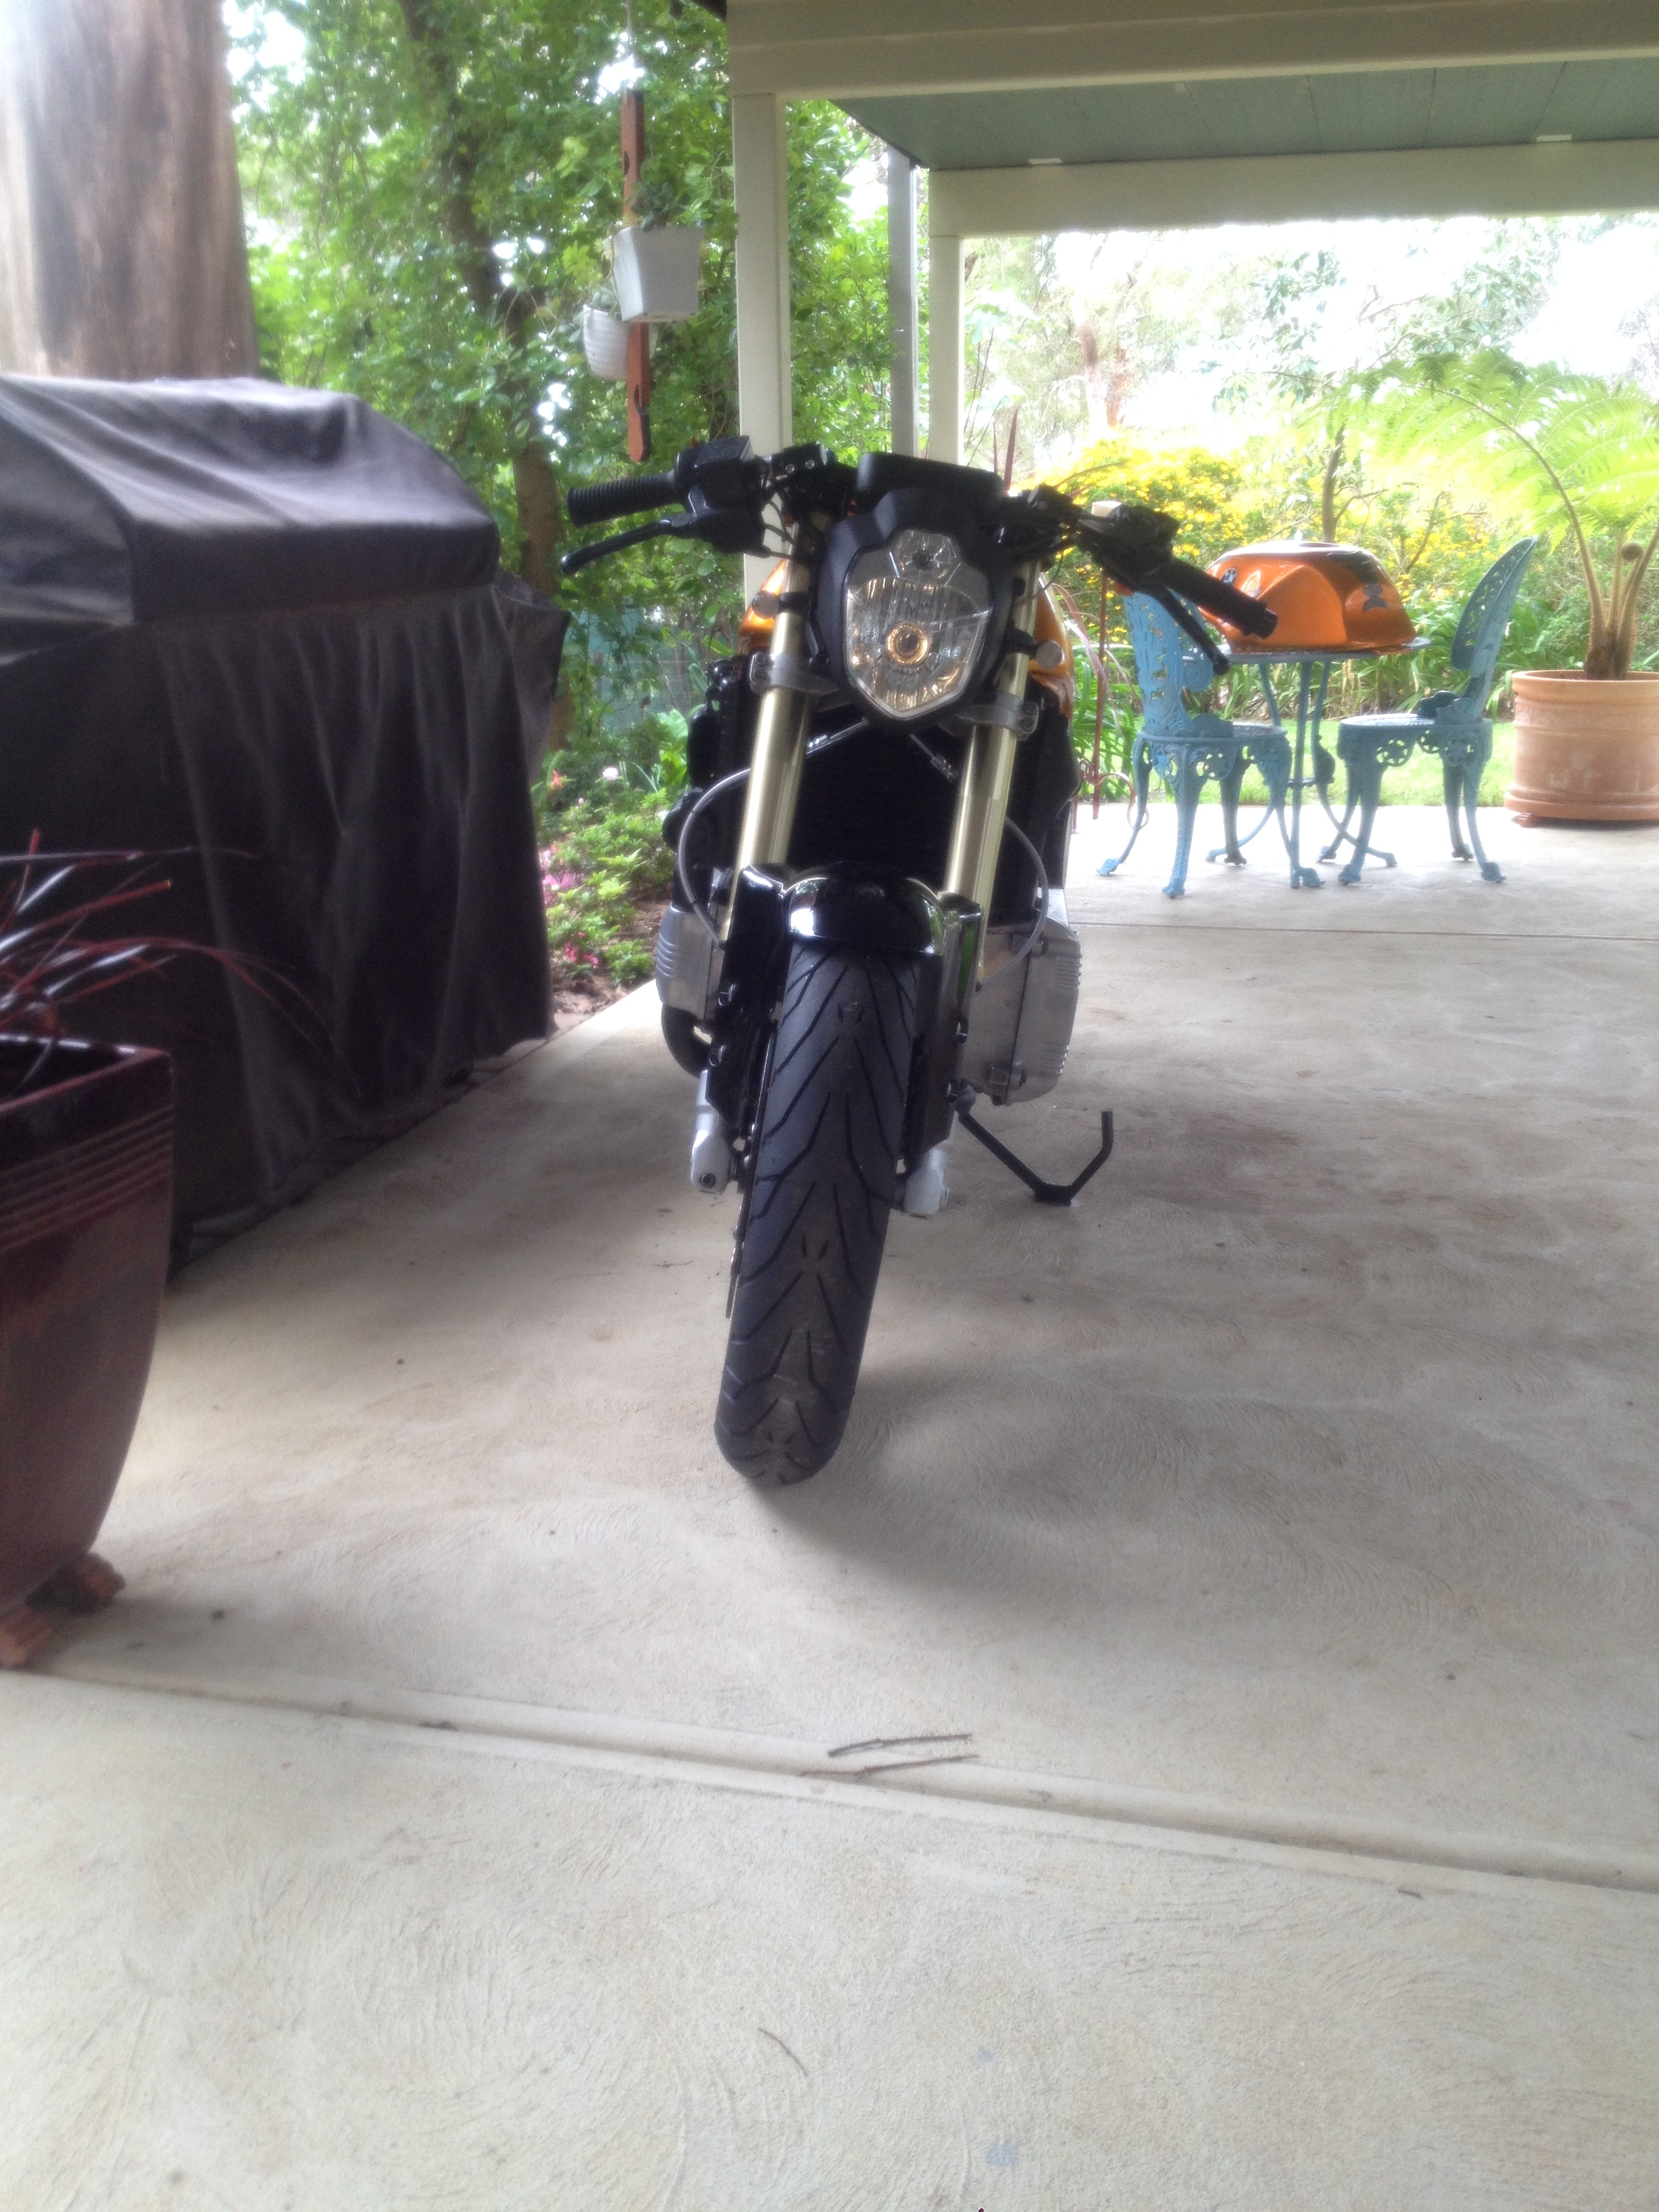
Got the seat back, great job! Put the bike together and added the headlight to preview the finished bike.


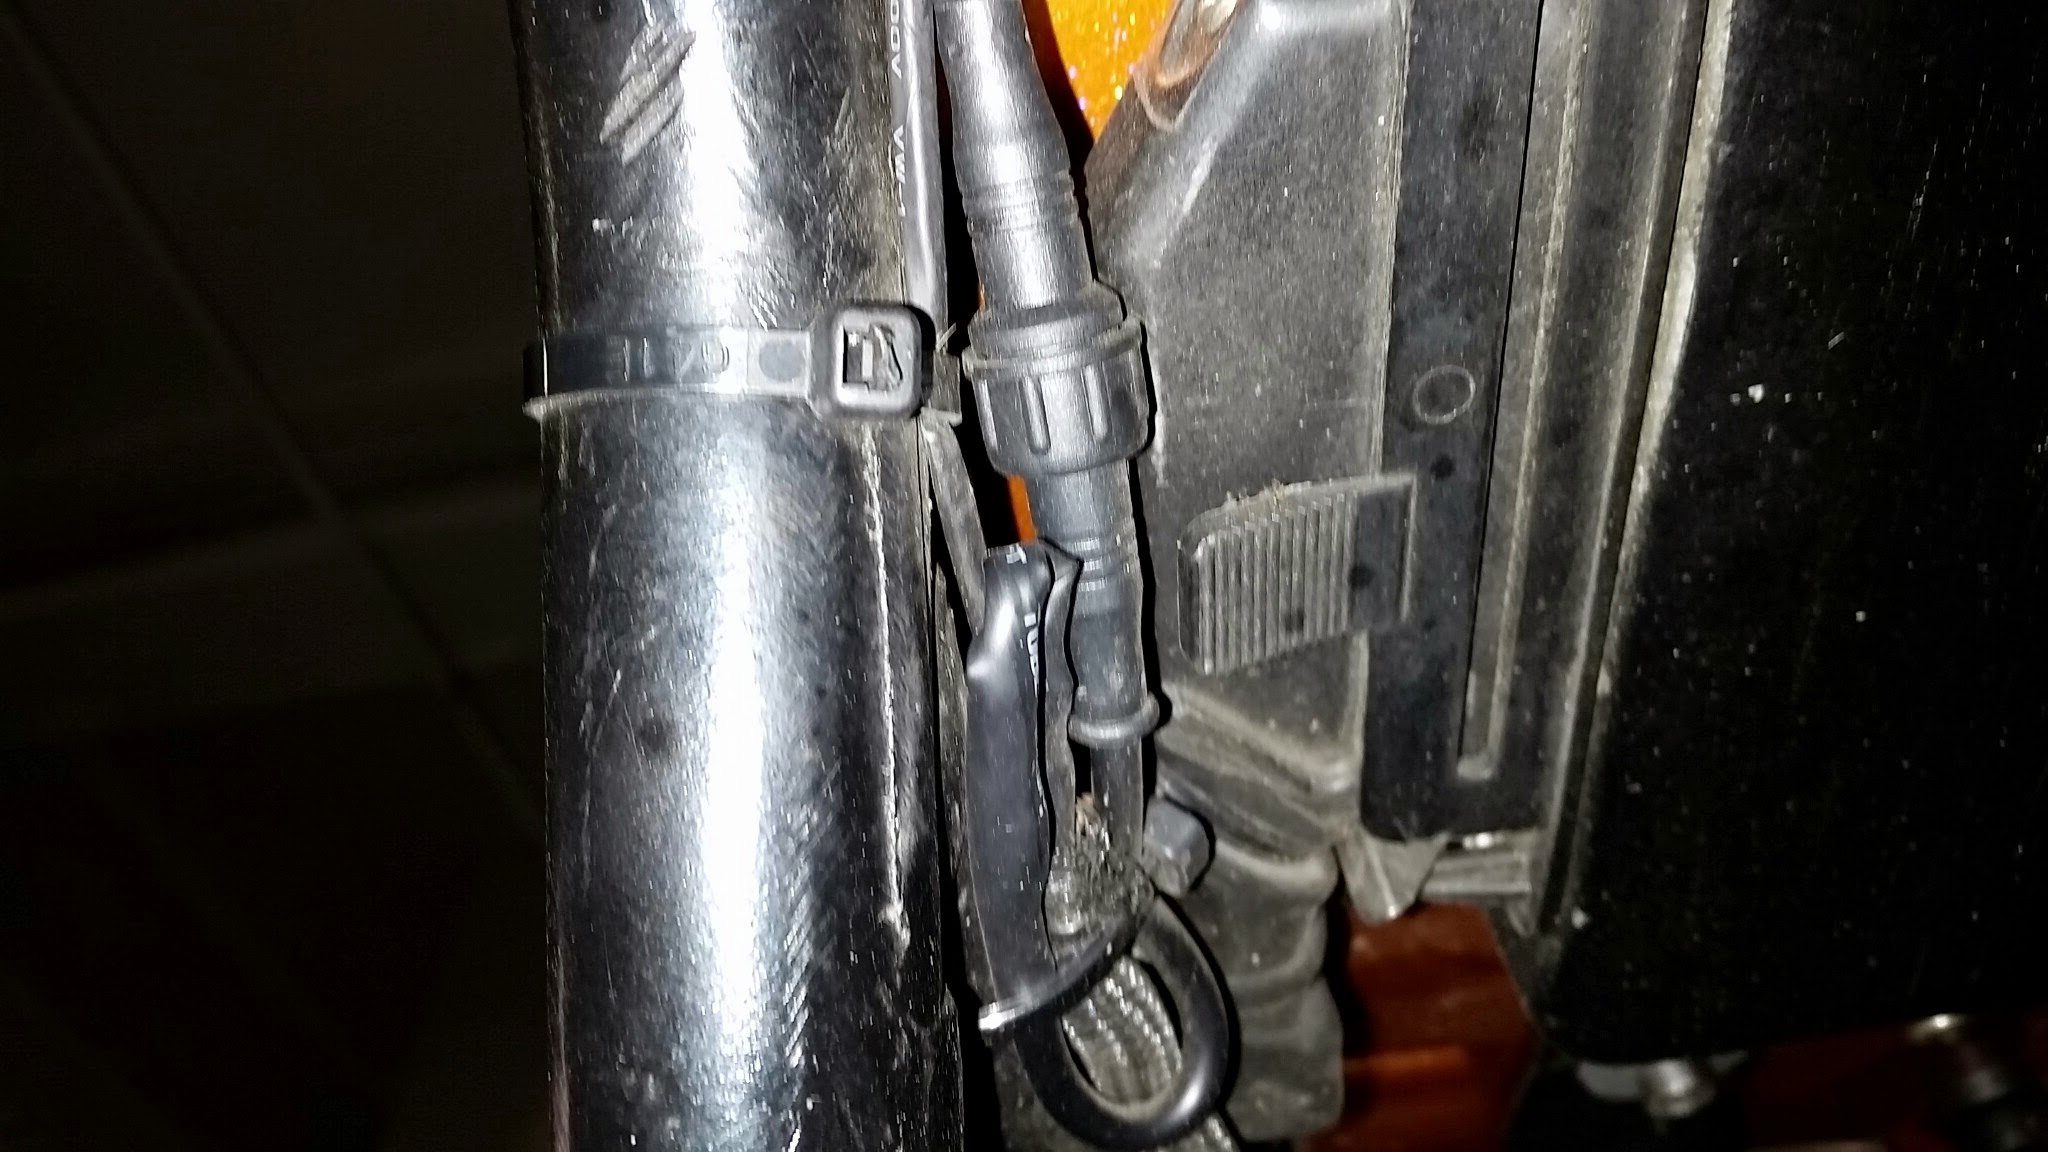
After 6 days work, back into the wiring. This is a boring picture, but it is satisfying to get it right. Now have a waterproof quick release connector for easy seat removal. 
I later changed to a smaller, completely waterproof connector.
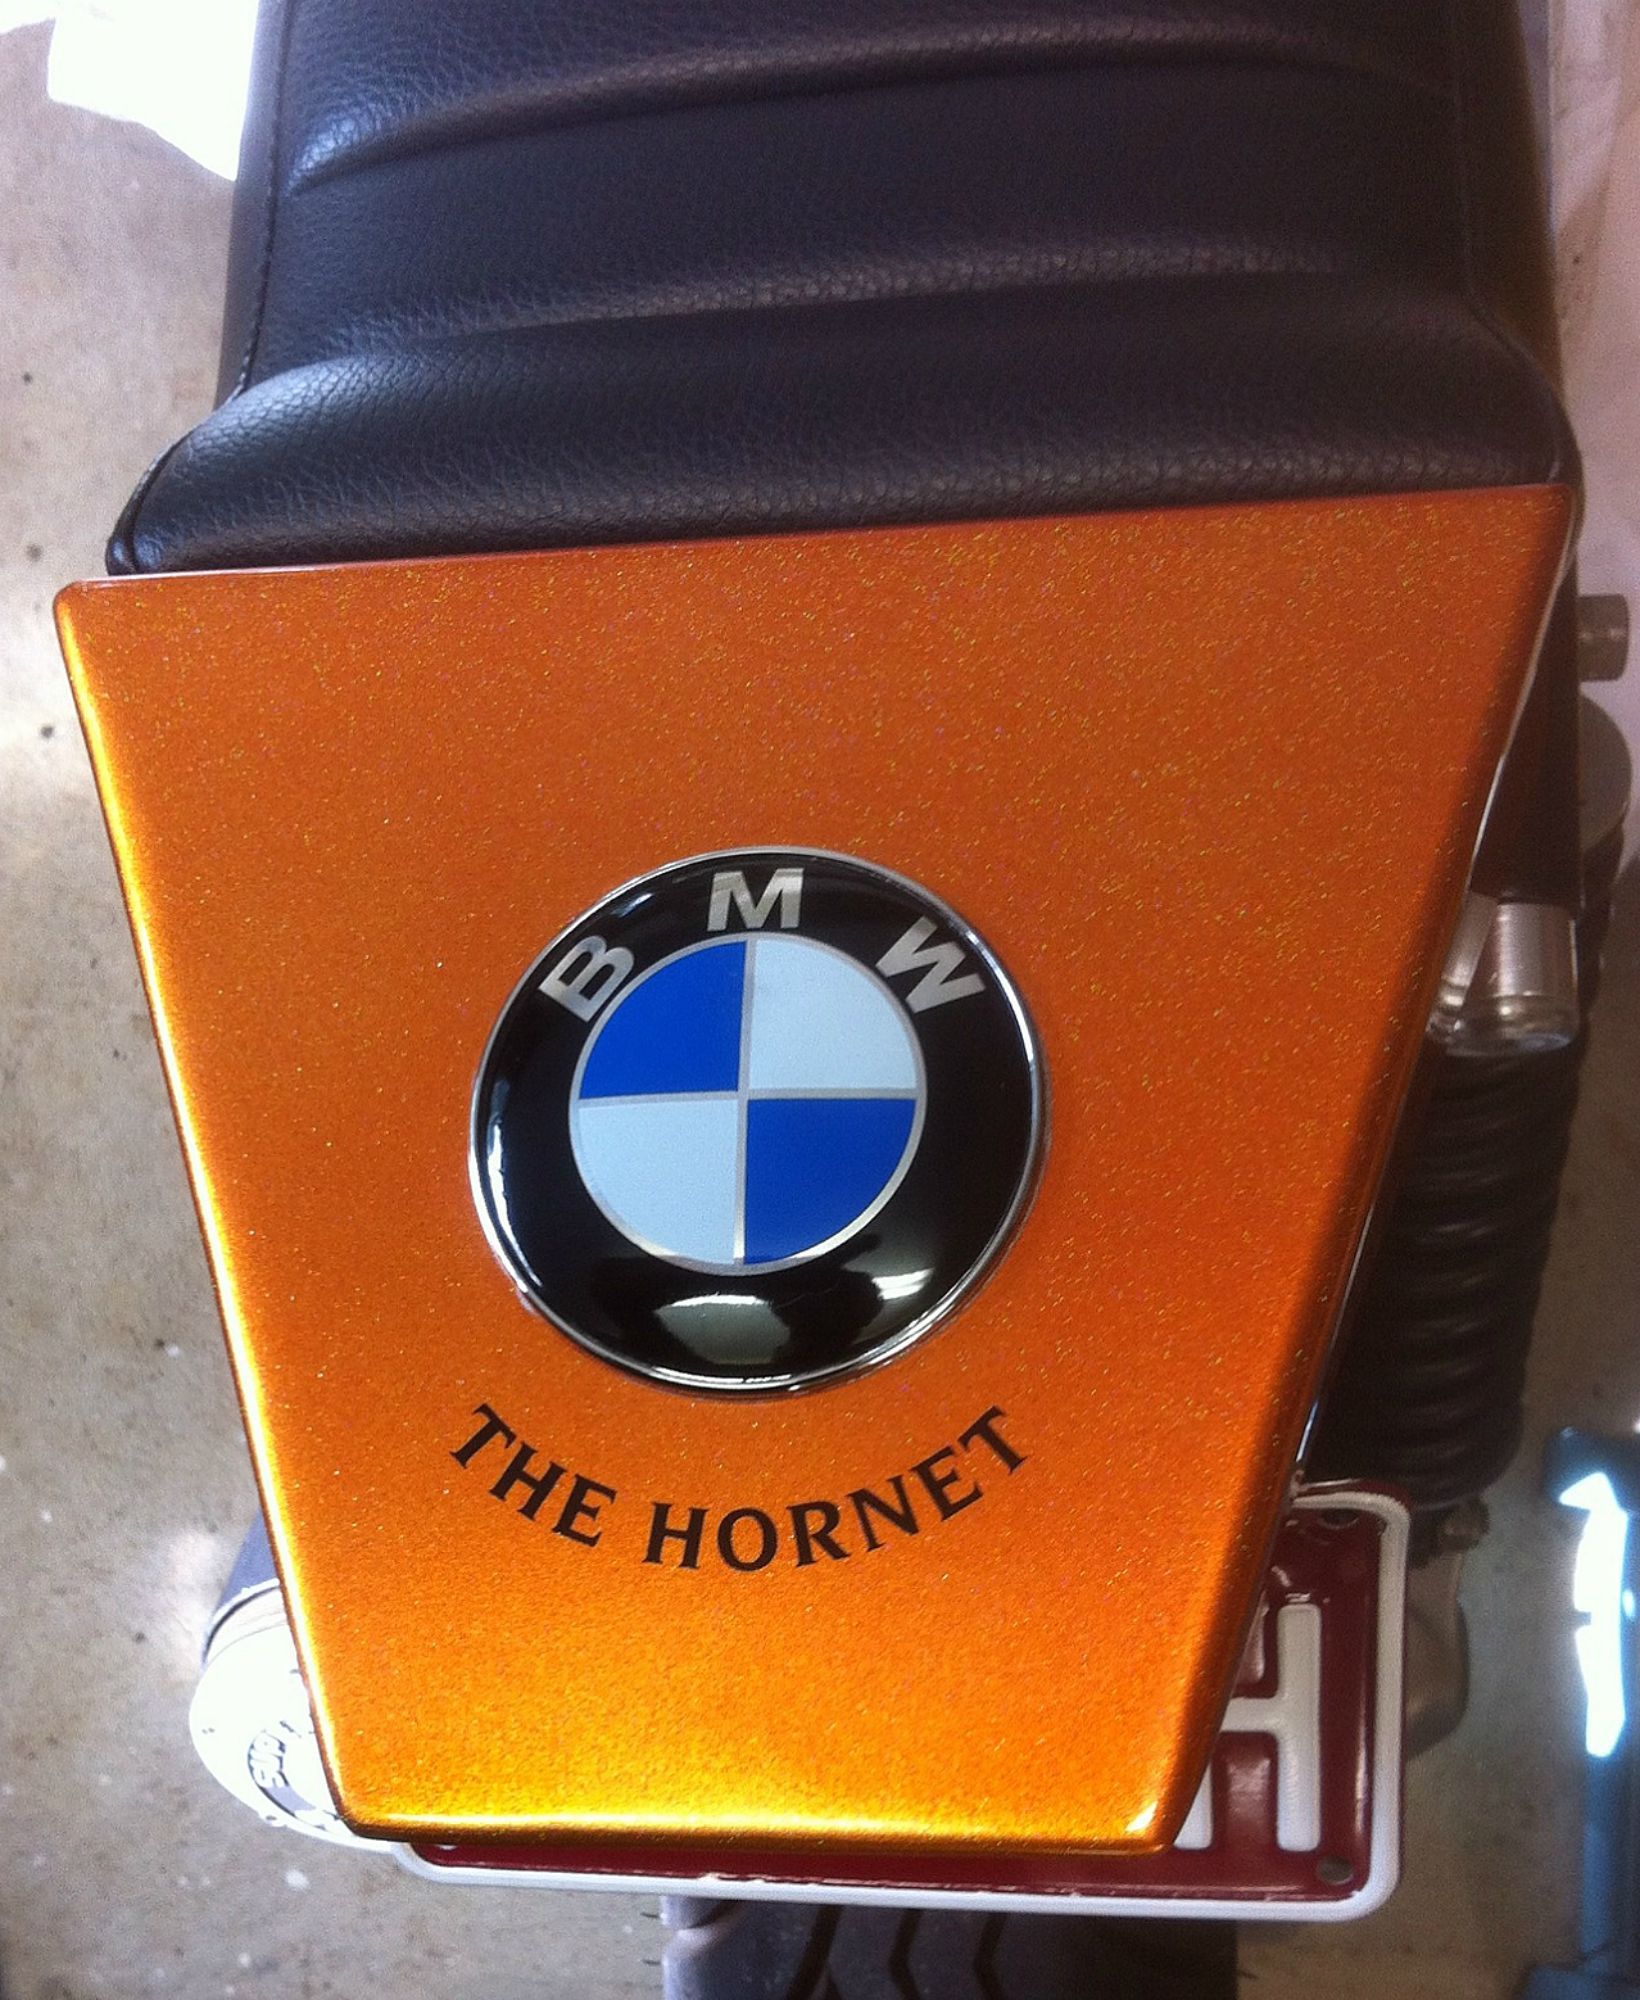
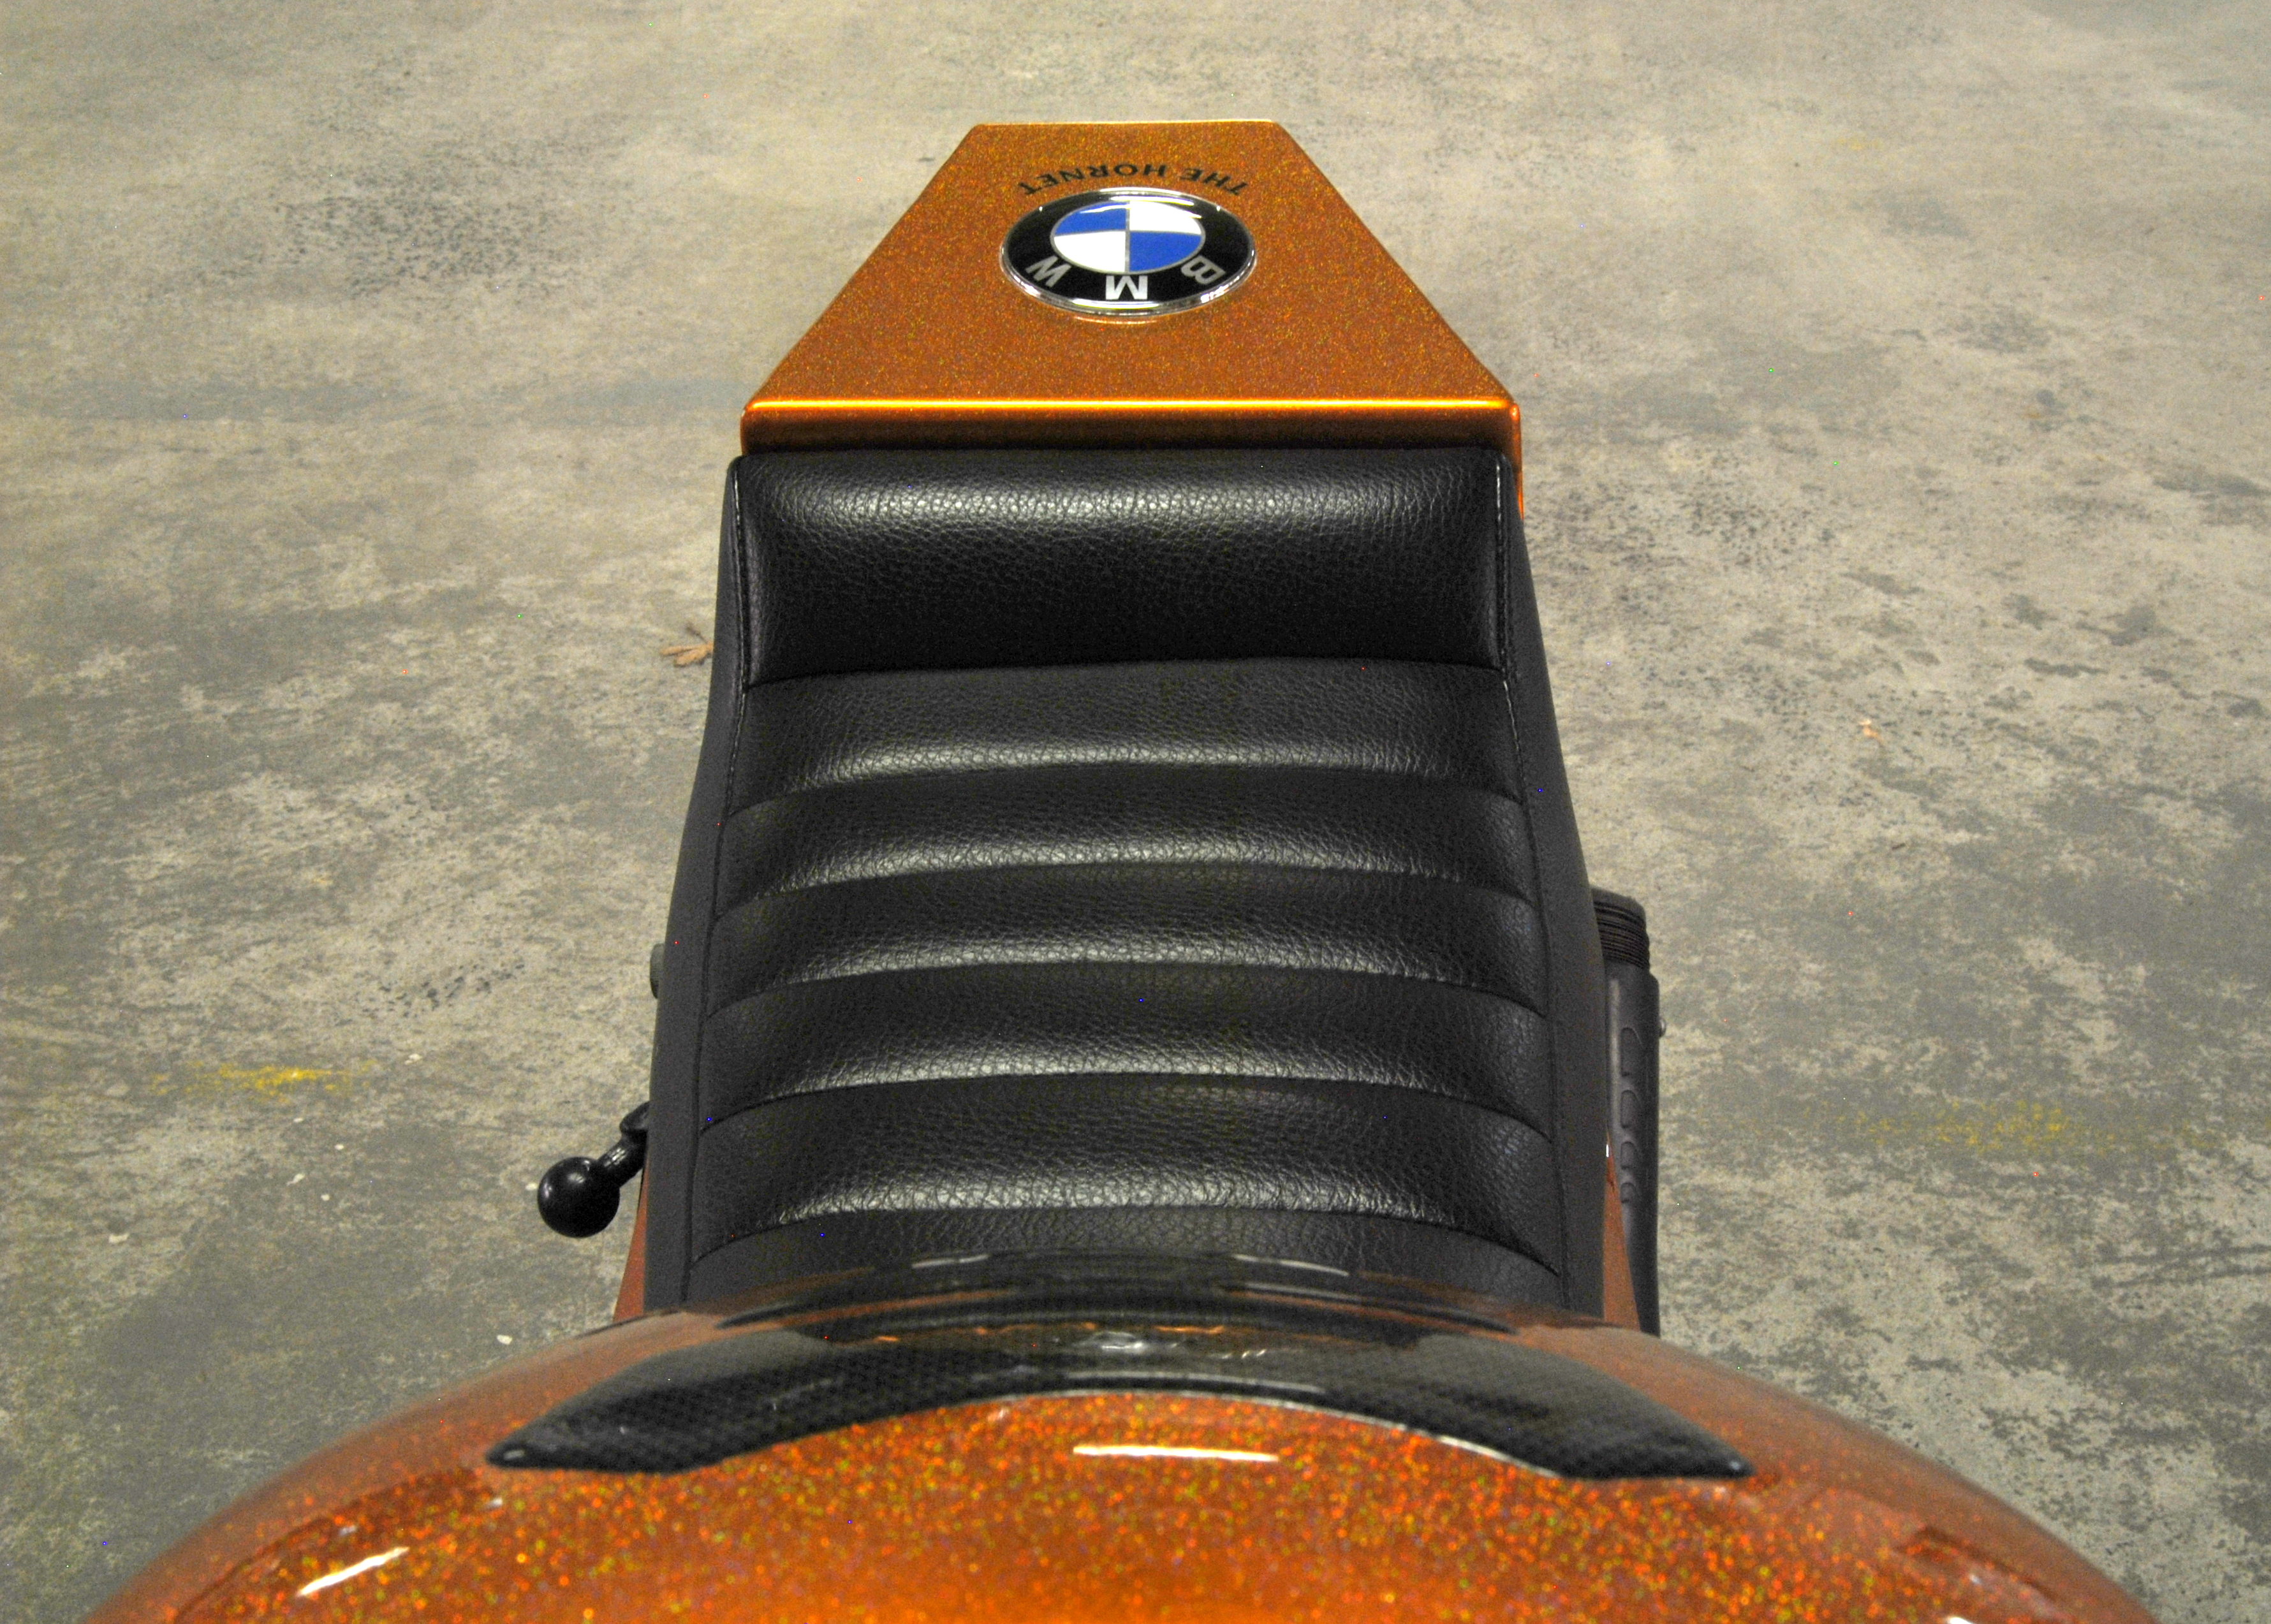
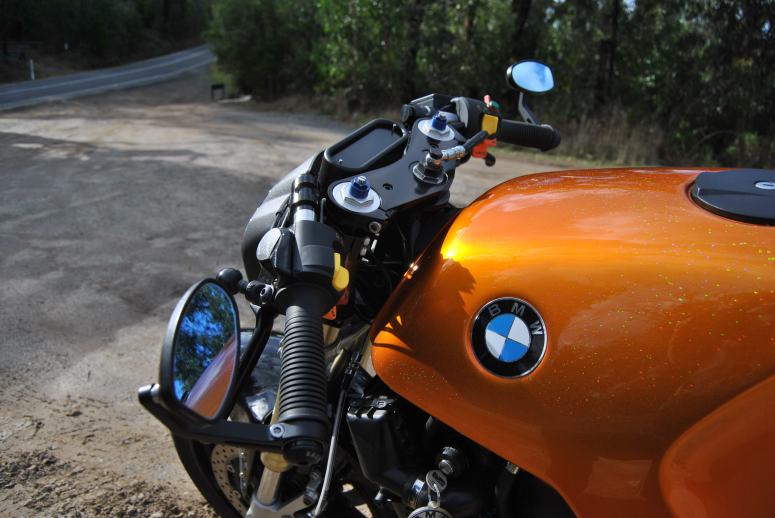
I took the tank and seat back to Pete for a final touch up today. Pete surprised me with a sticker he’d got made up. It turns out the colour I chose is called “hornet orange”. Since I flew hornets in the RAAF, Pete had the sticker made. The bike now has a name!
I’m now just waiting on a couple of 12ohm resistors from eBay. They need to be installed next to the flasher unit under the tank so the LED indicators work properly. While waiting I’ve changed the oil, oil filter, fuel filter, bled the brakes, and done some polishing.

I’ve got the indicators working, tank and seat back on. Given it a start up. Almost done!


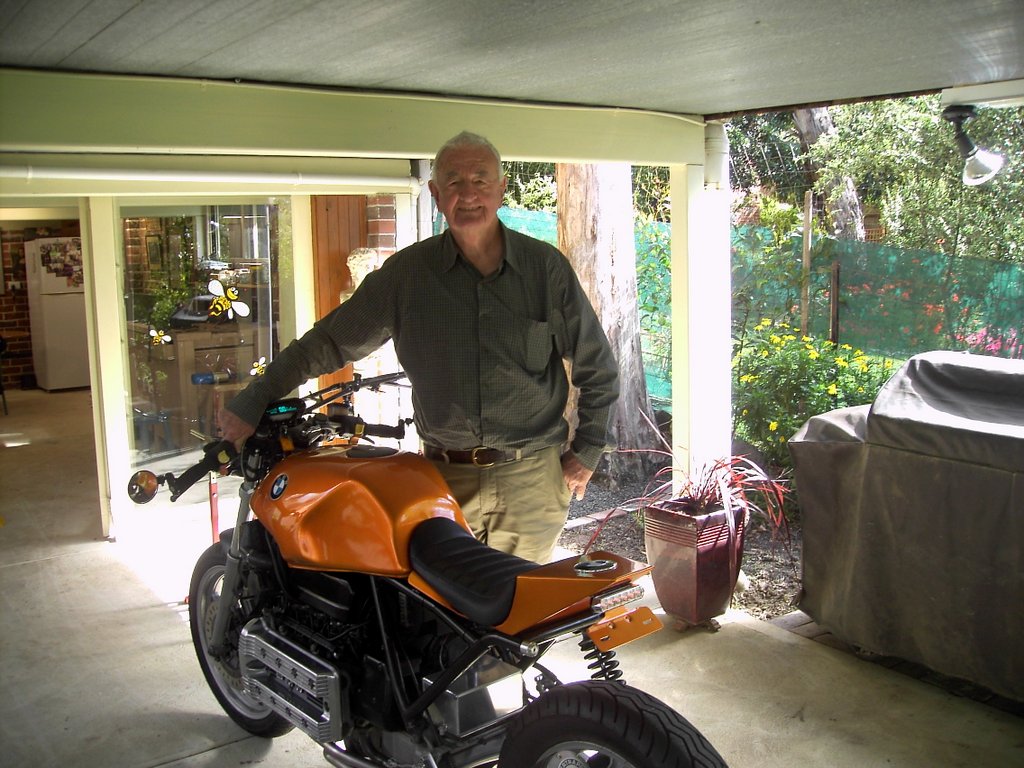
After initial rough running and stalling (I think it was air in the lines due fuel filter change), it settled down and ran smoothly. The exhaust is surprisingly not much louder than stock! Programmed the gear indicator and calibrated the speedo. The weight loss was apparent from the first crank of throttle! It is a bit of a reach to the bars, but at 100km/h the weight comes off the wrists and it should be good for longer rides. I still have few things to do. The rear mud guard looks like it can be chopped into a small fly screen to cover the instrument wiring.
I have been a bit remiss by not acknowledging my co-builder, dad. He provided the workshop, tools, and lots of unwanted advice (some of which was useful)!
I did not like that the speedo wiring was visible (even though it was covered in black shrink wrap). The removed rear mud guard was made of plastic. I thought it looked about the right width. Cut to shape, then covered it in carbon fibre wrap. No more visible wires and cables!


I also took off the centre stand to tidy up under the bike.

The rear shock was on it’s last legs. Bit the bullet and installed a Hyperpro.
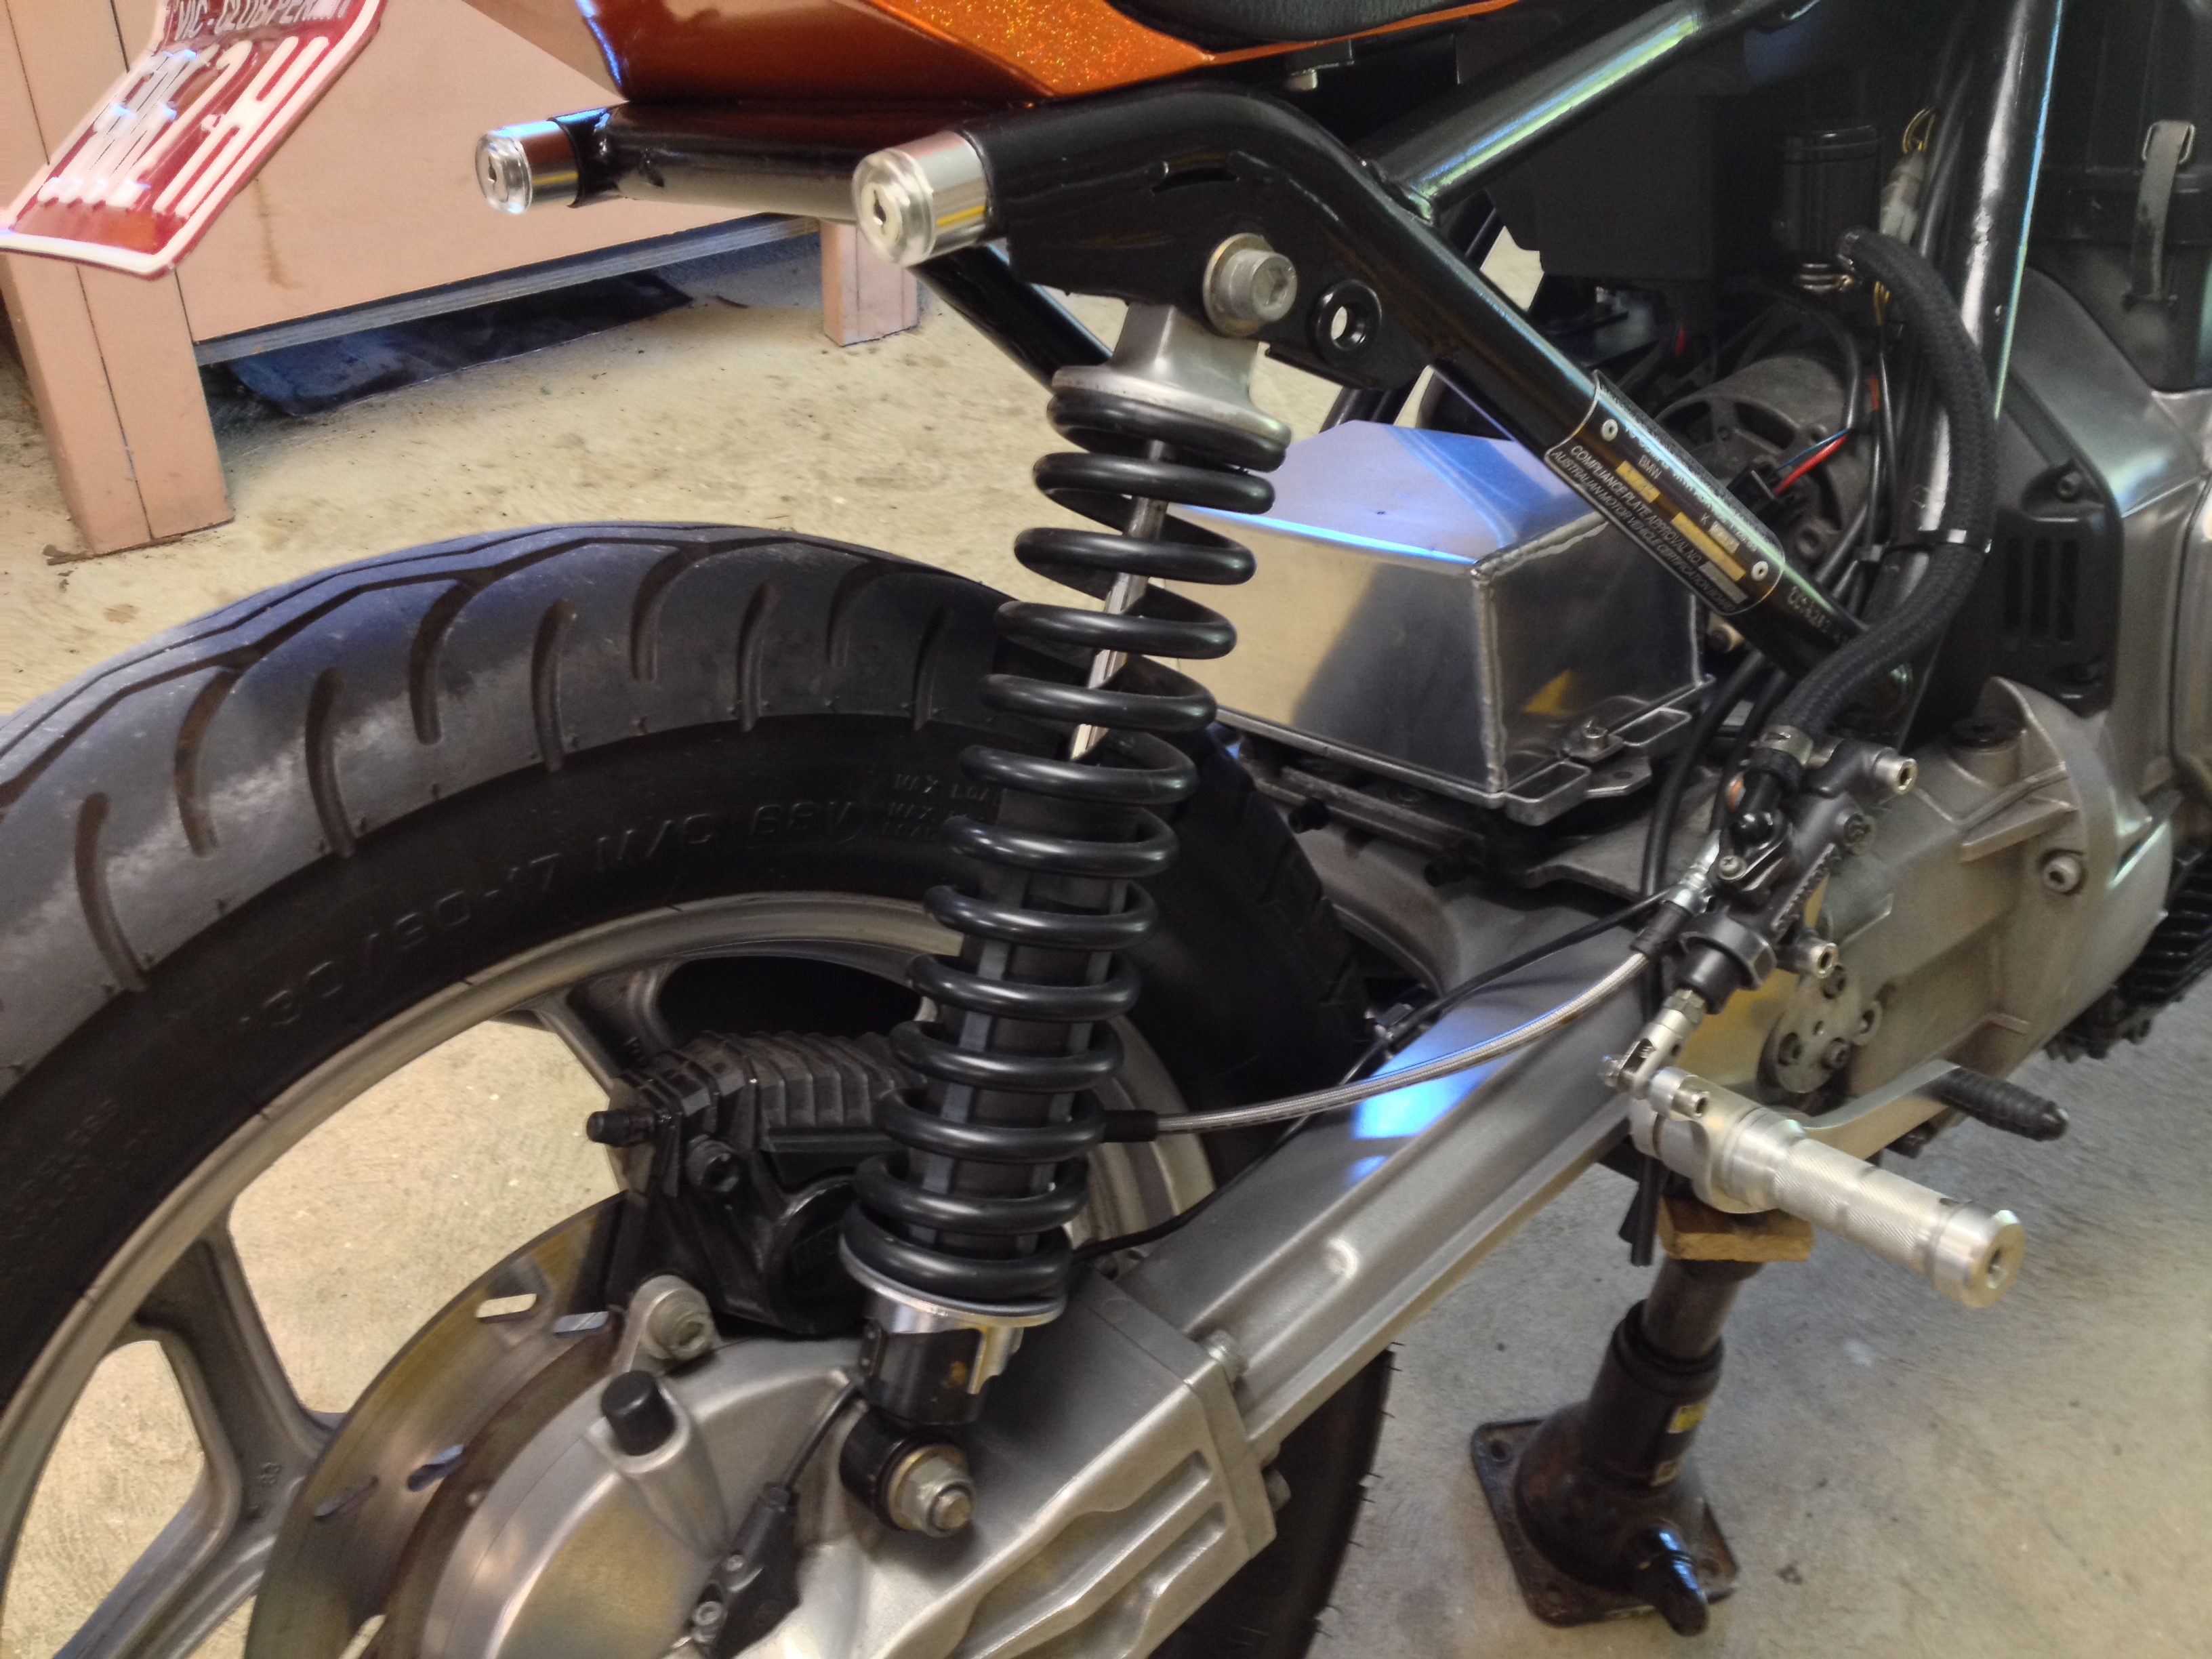

I took the bike to get the shock dialled in. Bad news is that it has lost so much weight I need a lighter spring! Going to get it resprung and revalved for the new weight.
Couldn’t only do the rear, so the forks are off for some White Power springs and oil change.

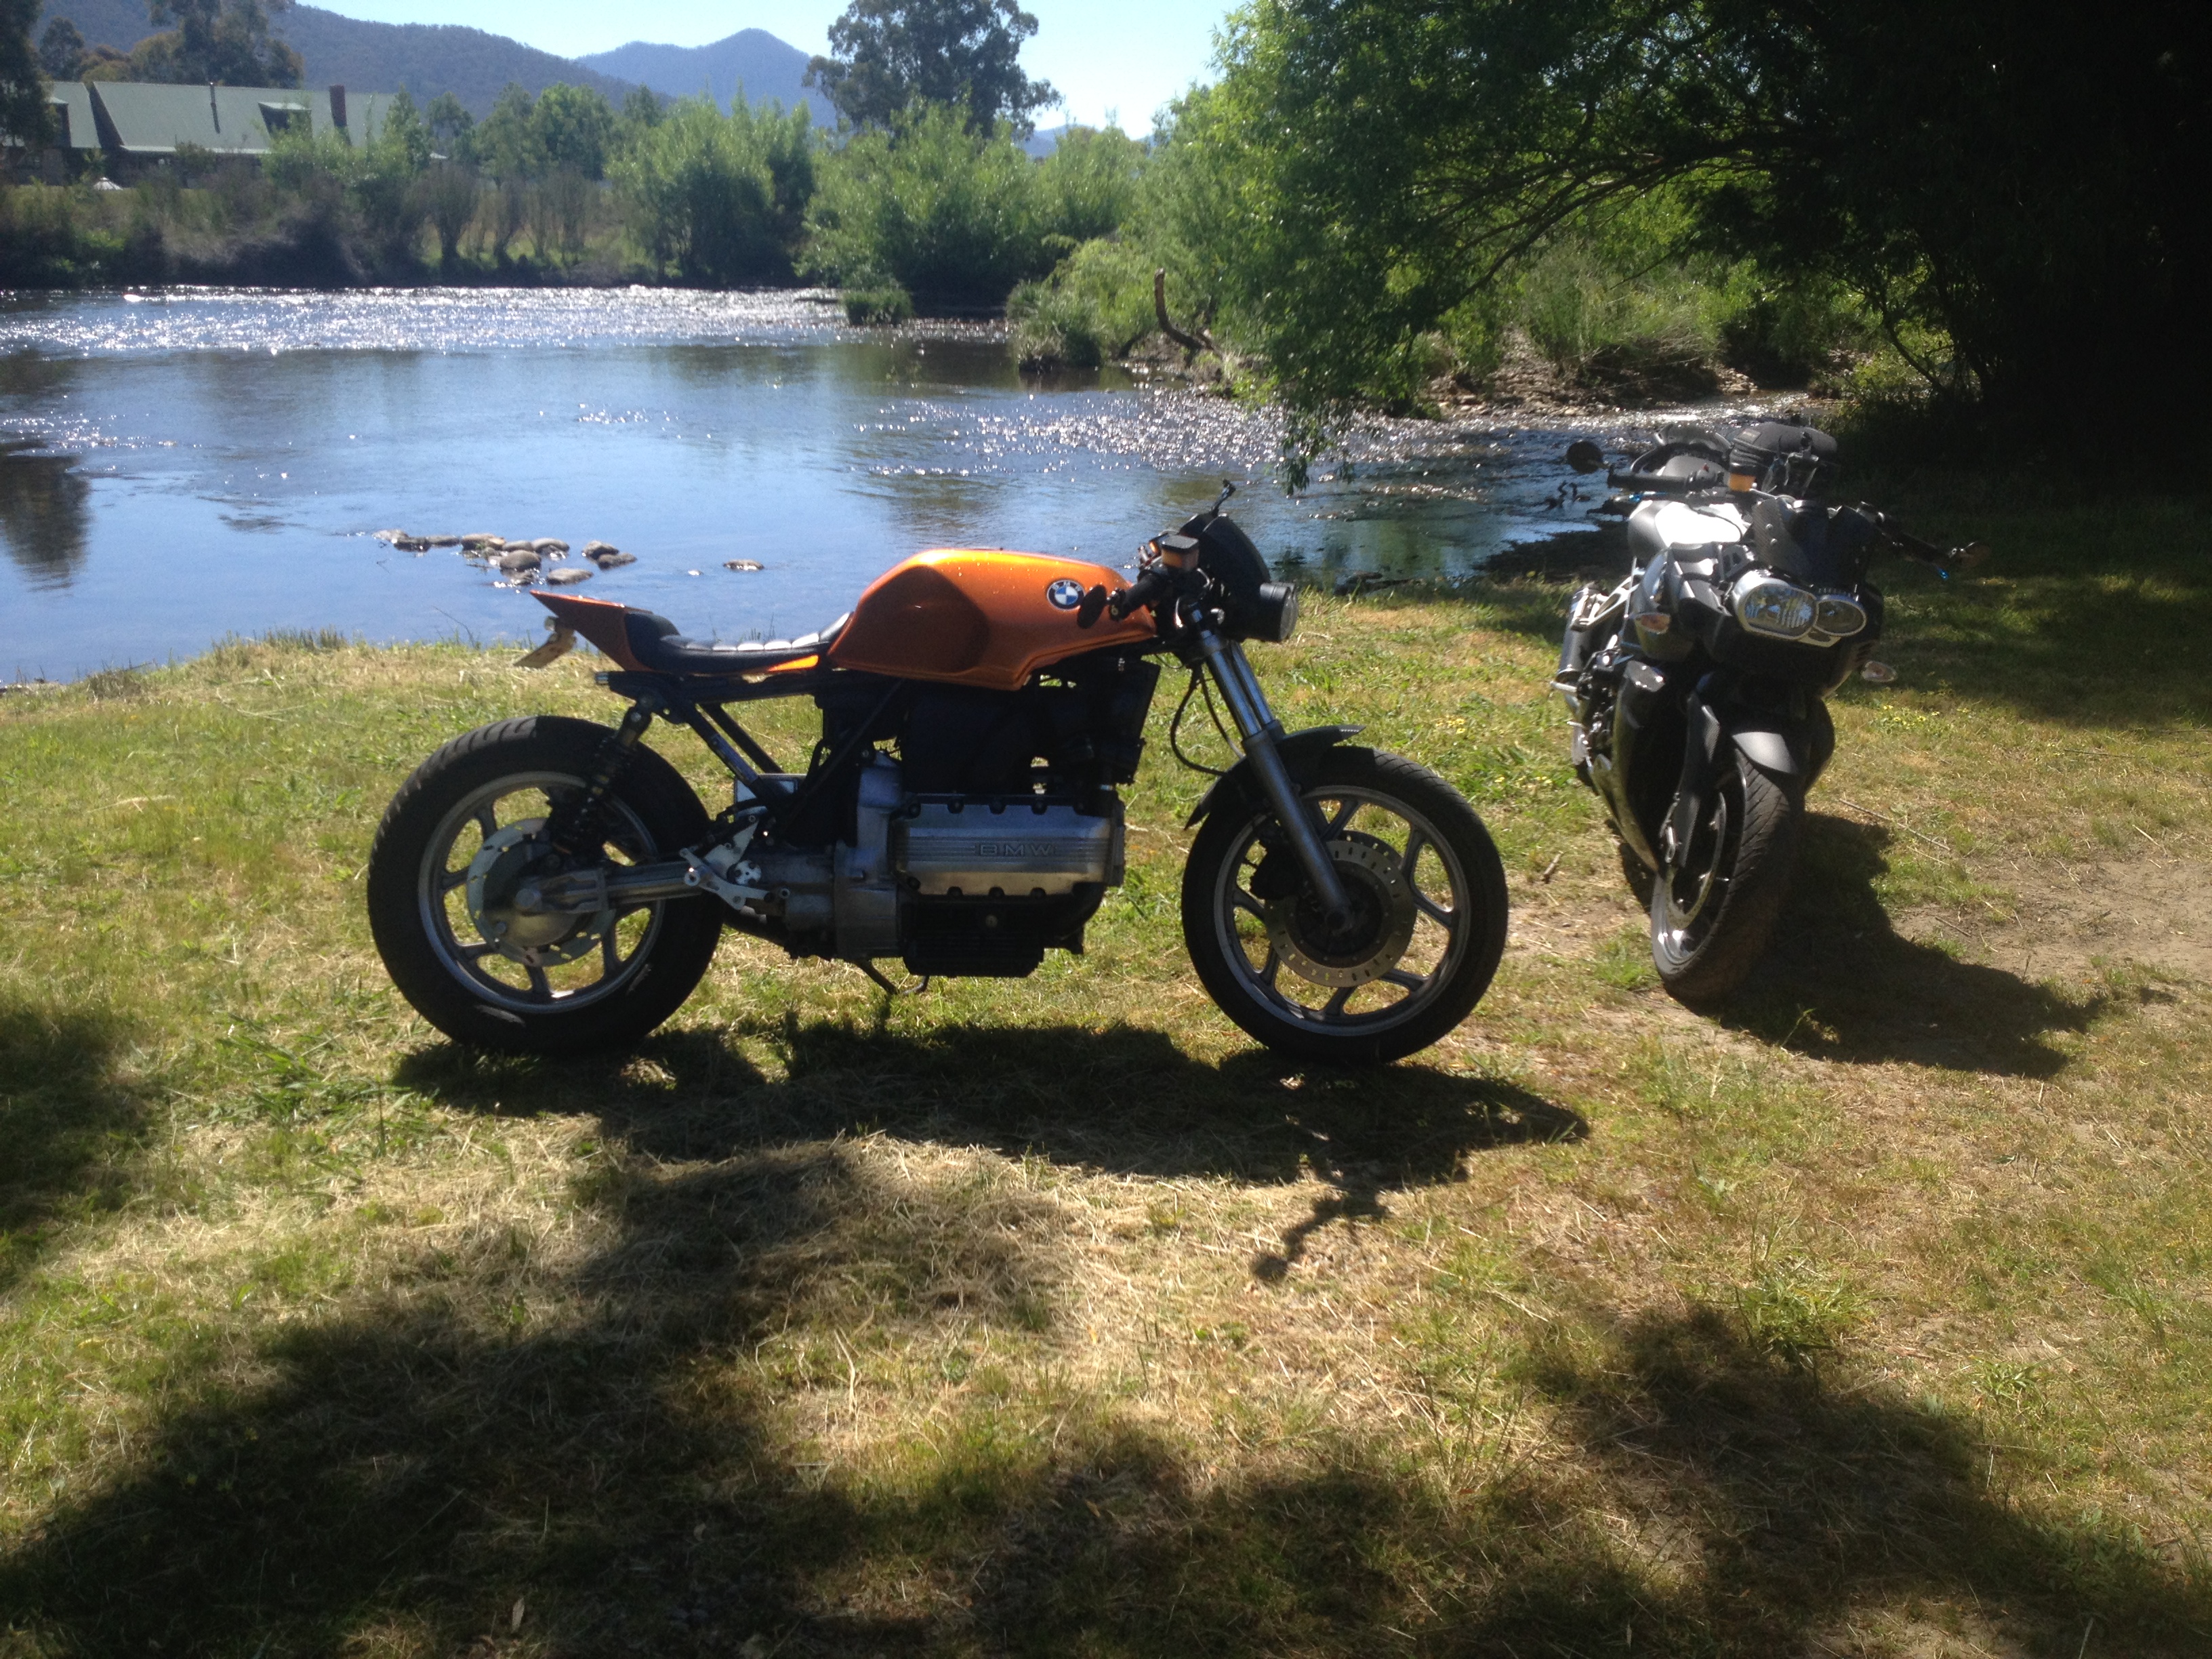
New springs and oil. I think I can now say it is finished! Cleaned up and ready to go.


I had been working towards entering it in a bike show in Melbourne called “Oil Stained Brain”. It turned out it did not make the cut, and I only finished it 2 days before the show. The weekend of the show, without a decent test ride, I took it on 1000km loop into the snowy mountains with some mates! The only glitch was having to tighten the folding mirrors when they folded back at 170km/h! 


After the loss of weight, and suspension work, it was as fast as my K1200R in the tight stuff! I’m still tinkering. Was not happy with the quality of the mirrors, so have changed to these. 
I finally took some photos with a real camera (instead of my phone).


I have found the rear indicators not bright enough in direct sunlight. Santa made a late delivery of these beauties! 

Definitely bright enough!
The baby bottle idea for the radiator overflow turned out to have insufficient volume. I have replaced it with a 500ml stainless steel drink bottle. 
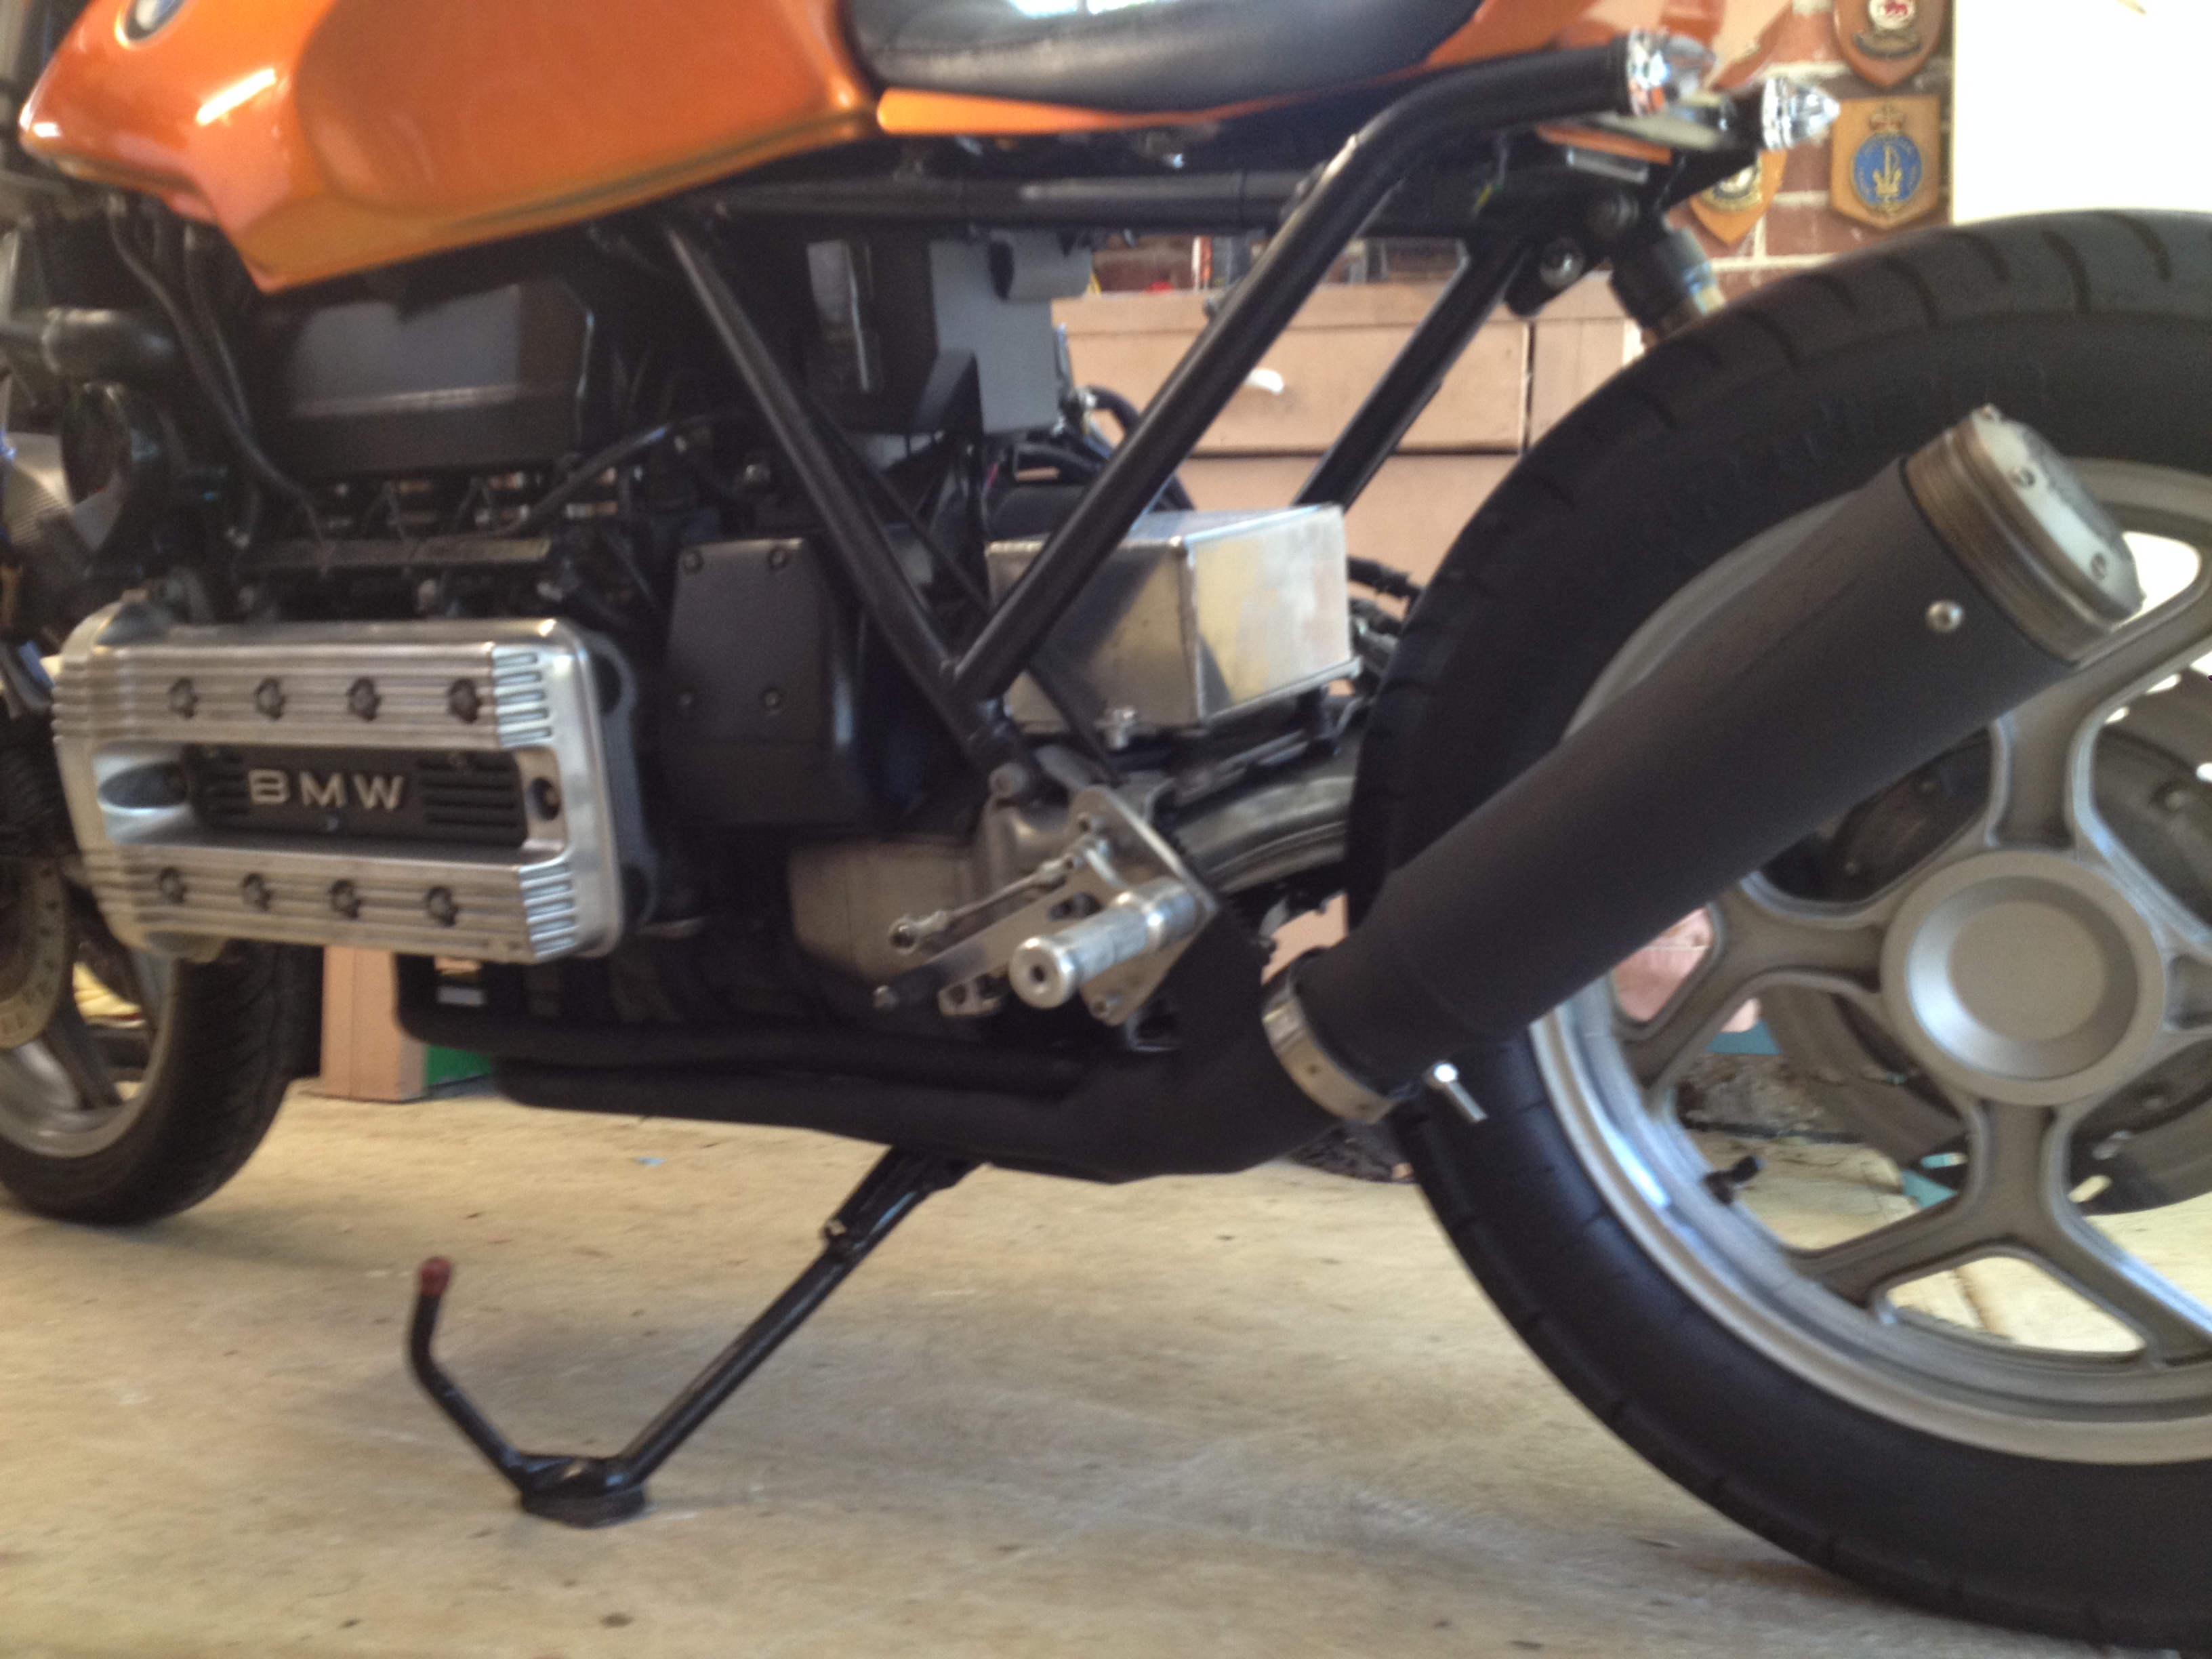
The join between the steel collector and the aluminium exhaust has never been ideal, continually working loose due to different expansion rates. I think I now have a solution using a V-clamp. It also makes for easy exhaust removal (needed to remove rear wheel).

I took the opportunity to paint the header pipes black. The paint needed baking, so I used the BBQ. 
All done!
I will take it on a decent test ride as the Hornet is going to Tasmania for a 7 day extravaganza the end of Feb!
The seat pan is attached to the frame by two pins at he rear, and one central bolt at the front. I have occasionally noticed a small amount of seat pan flex, which I have decided to fix. I found these plastic lugs in the cupboard (I can’t remember where they came from).

I drilled the centers so they would fit snugly onto the alan head bolts that hold the rear tank mount. I had to shape the tops to match the seat pan, then paint them black. 
Rock solid now, ready for Tassie!

Day three of riding the great roads of Tasmania, my mate Kev lost the front end under brakes. The resulting low side caused too much to continue. Tank, engine casing, foot pegs, gear shift, left bar and switch block. I thought I had finished this blog, I guess not!


Shannons Insurance were great in getting it home, after several stressful hours when they were threatening to write it off and leave it in Tasmania!……………………
After recovering the bike to Melbourne, the Shannons assessor decided my poor bike was a write-off!
The good news is I’m going to fix it myself. I’ll take the opportunity to do some upgrades, stay tuned!! I’ve got my bike back in the workshop, build number 2 can commence!
THE HORNET MACH II
I considered repairing the bike back to pre-crash condition, but it seemed a waste of money and effort to do all the work and end with the same bike. Having learned so much in the first build, I thought about what I could improve. The bike was a weapon in the corners, but I never had much faith in the tires (Kev, even less so now!). To run radial rubber, wider wheels are needed. A K1100 wheel bolts easily onto the rear. I know it is possible to bolt on a K1100 front end, which gives 4 spot calipers. I thought, but why take the front end 5 years into the future, why not 20 years? Old bikes with USD forks also look the biz!! 
I’ve sourced some parts. Found a decent tank for $150.

The Valve cover will require bead blasting.


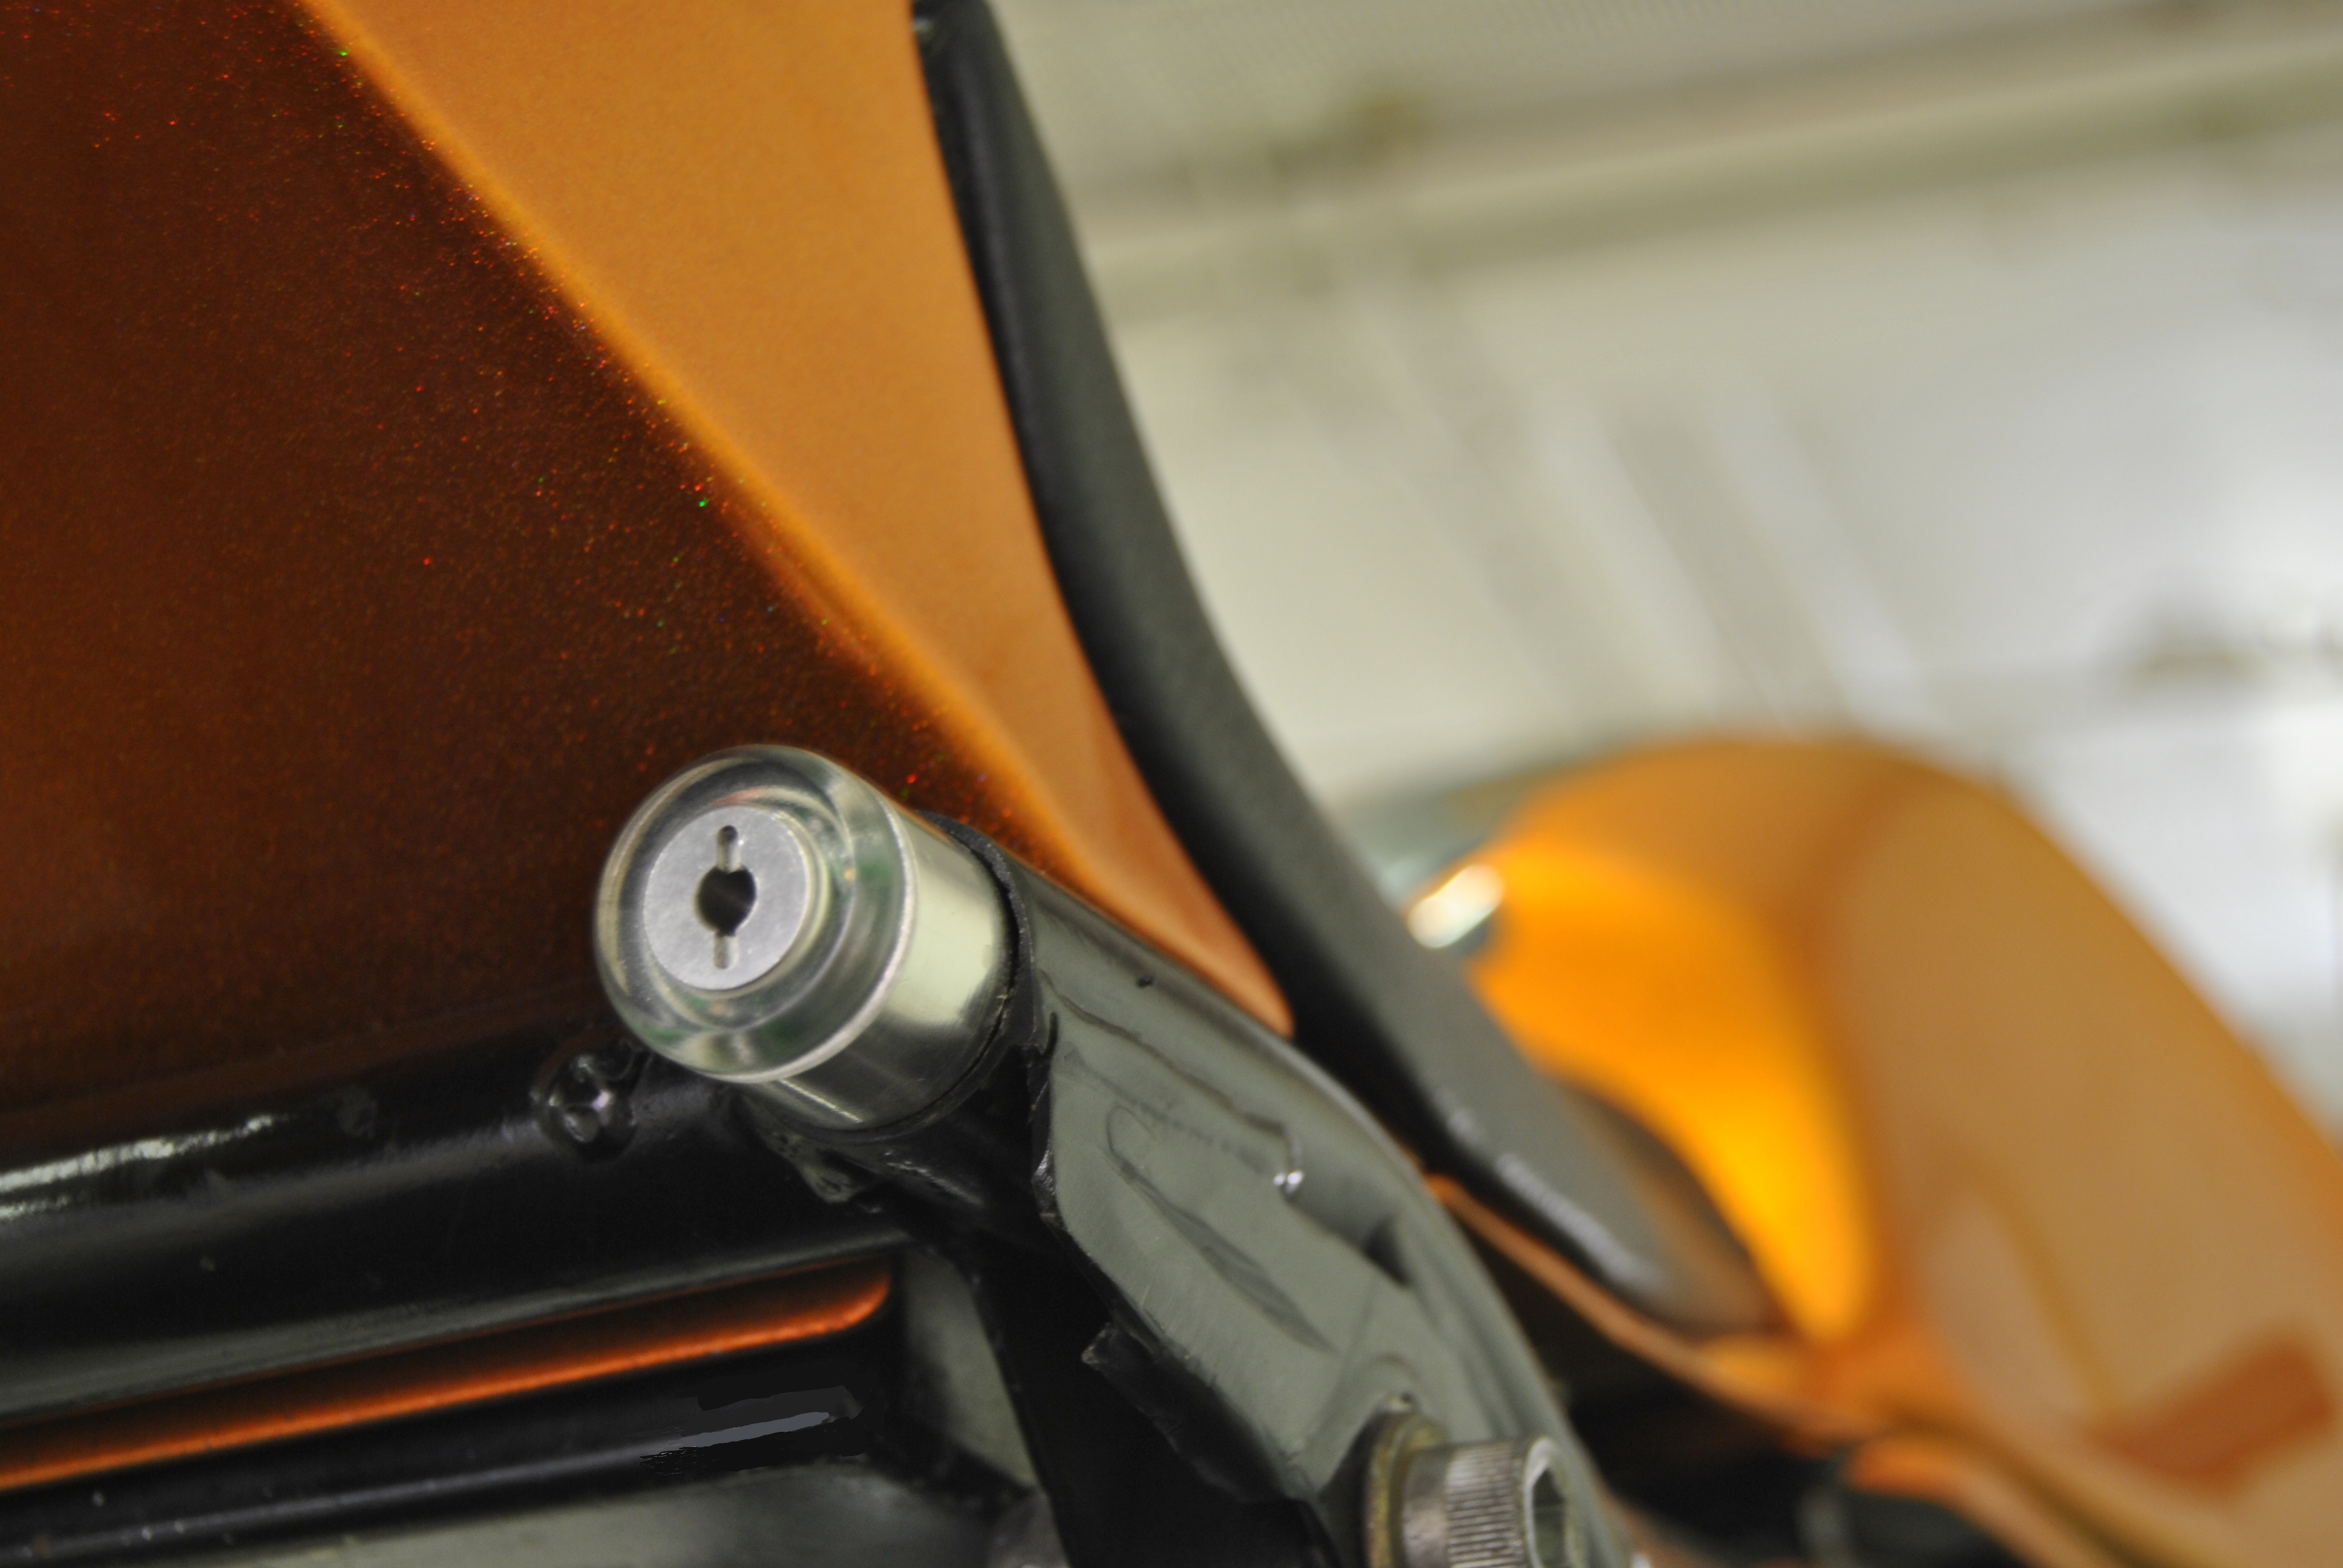
I spent several hours at the wreckers looking for some USD forks in good condition. I needed a 3 spoke front wheel to match a K1100 rear wheel. The best solution was from a 2000 Yamaha R1. I put a deposit on the front end so I could take the triple clamps. I wanted to see if it was going to work before I paid the full amount!… I’ve got the triple clamps at Valley Engineering getting assessed for the transplant! The BMW post needs to be mated to the Yamaha clamps. If the R1 plan doesn’t work, I’ve sourced a BMW K1100 front end. In either case, I will need another solution to for the ignition key mount. I’ve decided to remove it from the triple clamp to clean up the dash. I was scratching my head for a mounting solution when I spied the surviving mirror from the crash…. 
Angle grinder and drill converted it to an ideal bracket for side mounting the ignition block! 

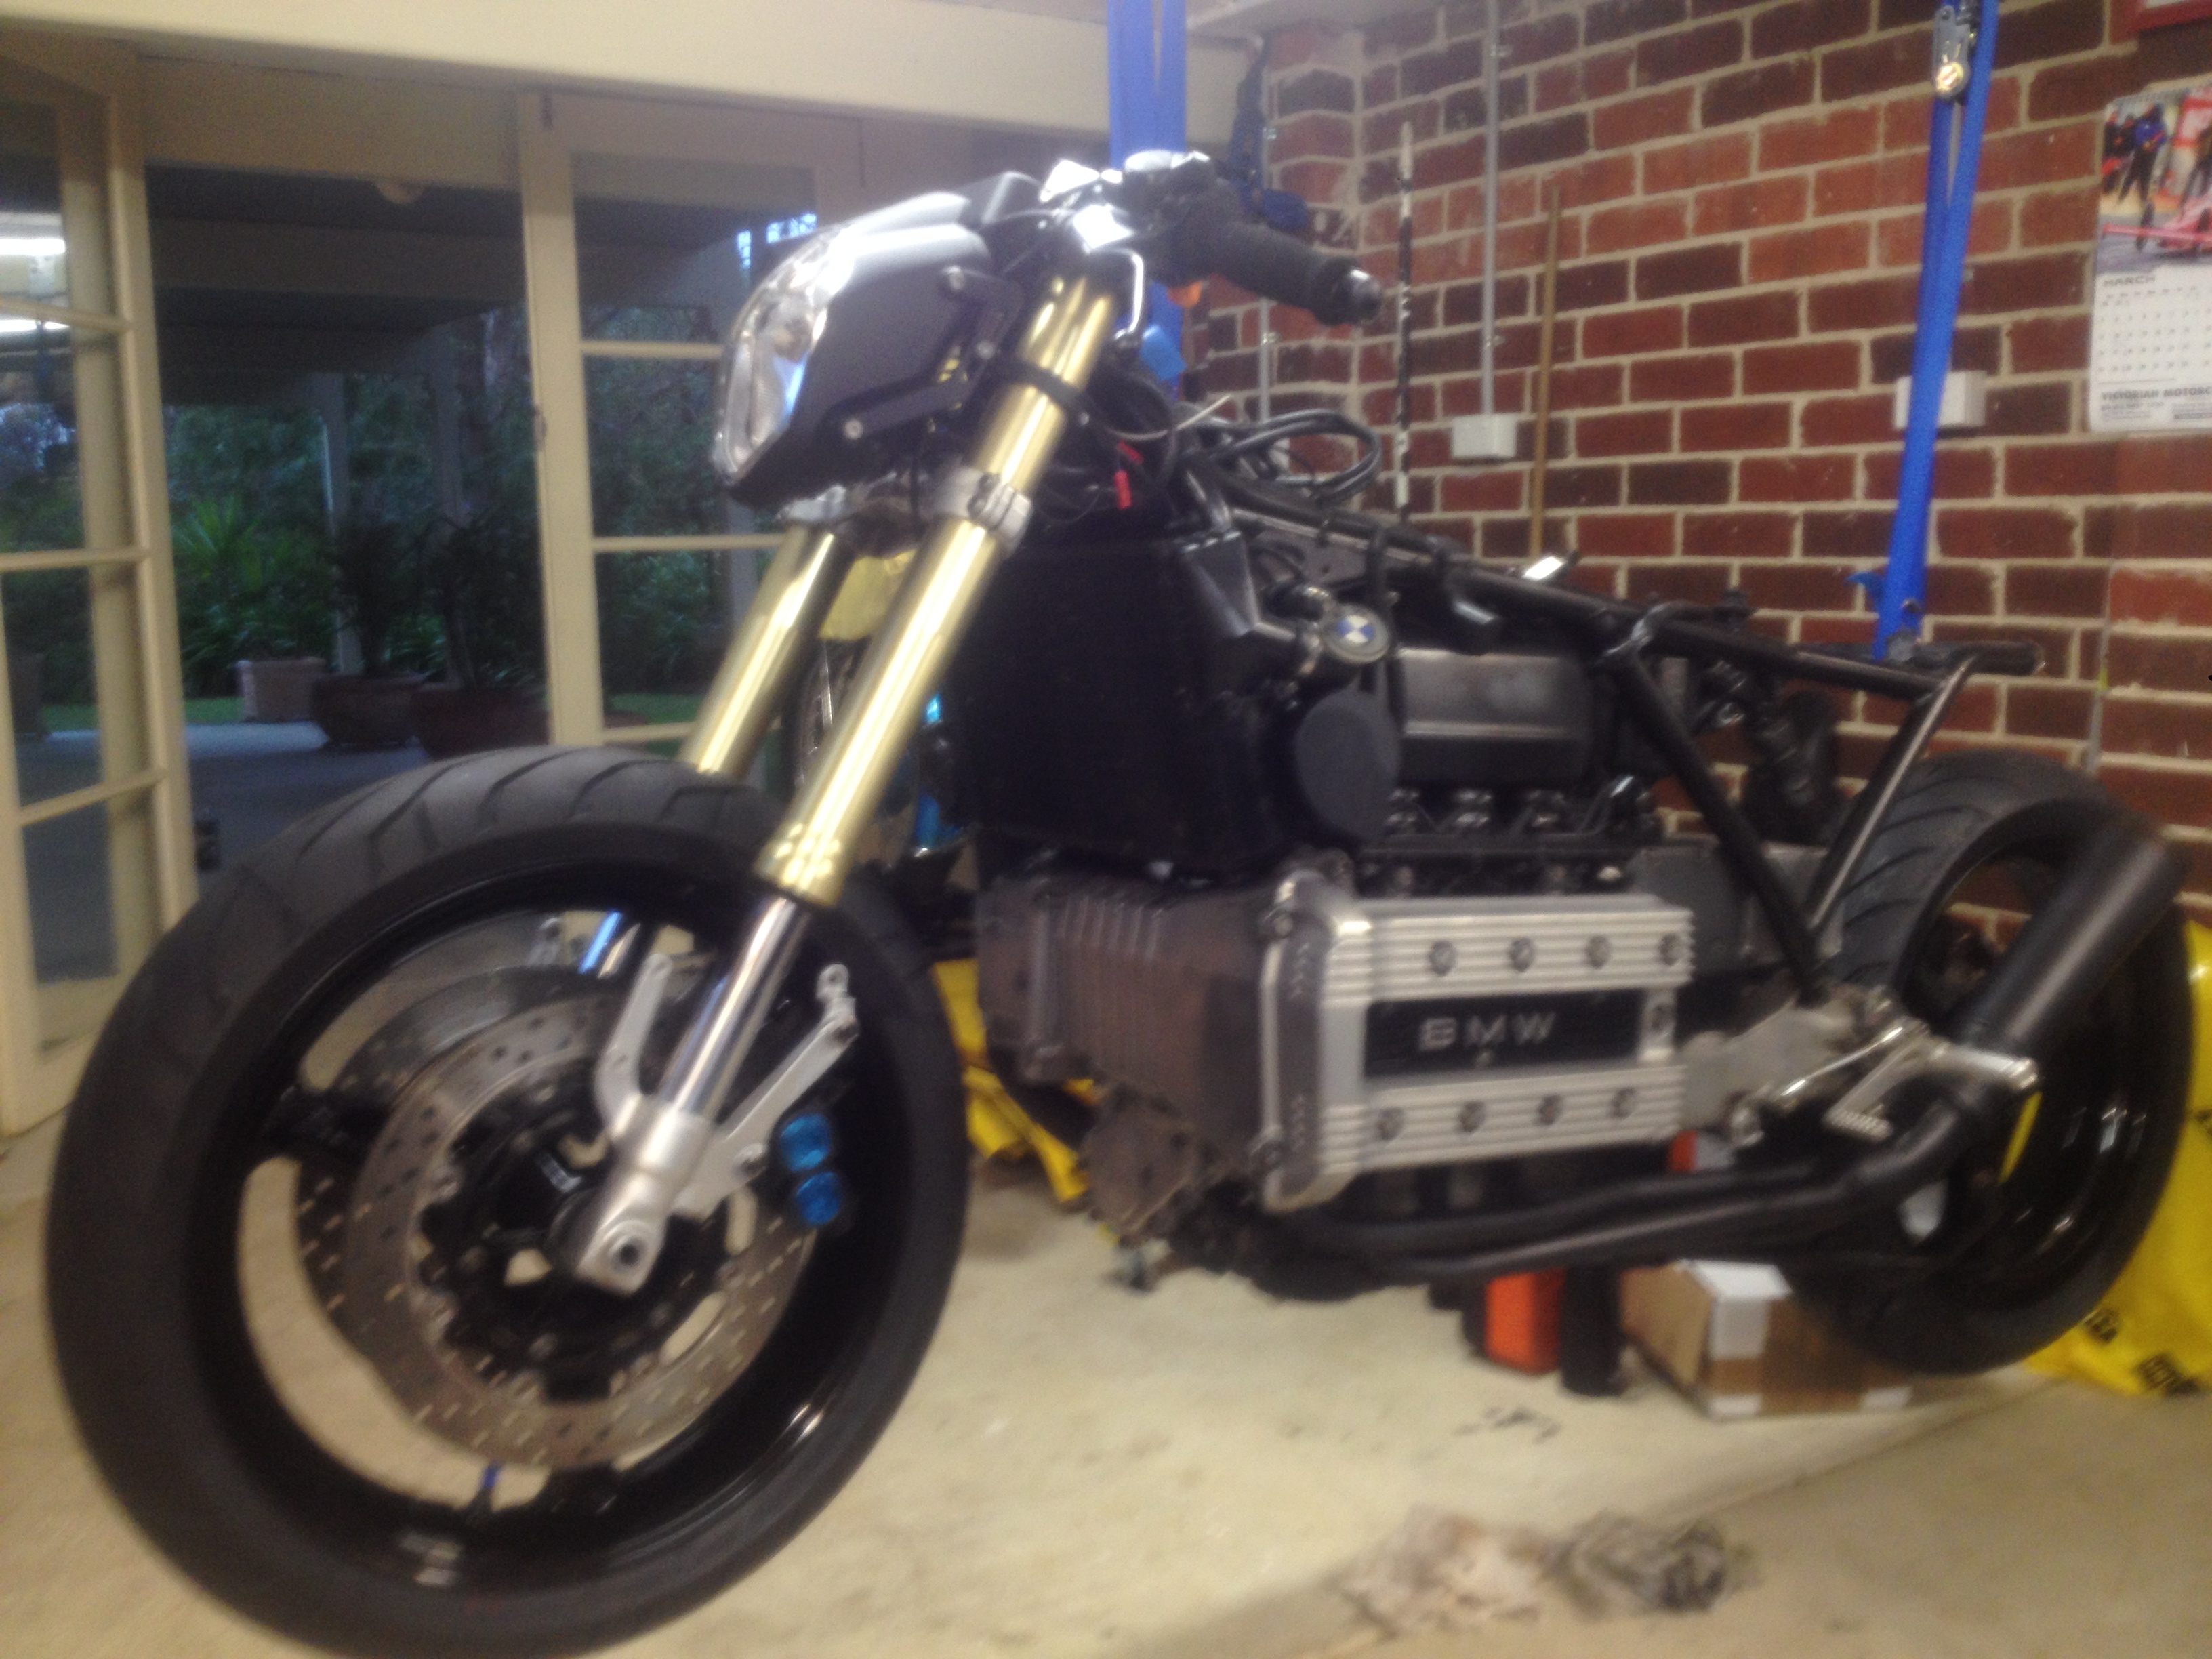
The R1 clamps are now fitted to the BMW shaft. Not cheap, but bolted up perfectly! Will now collect the rest of the front end and see how it fits. 


Like a glove!

Collected the engine covers after cleaning by sand rolling at Competition Coatings. He did the valve cover for free, to see if I liked the finish!

The new rear-sets have arrived, slightly redesigned, now with knurled levers instead of rubber. Nice!

I’ve used an angle grinder to remove the ignition mount and other tag from top triple clamp.

Will use a bench grinder to tidy it up….. All done, and sent to get powder coated.

The exhaust system is back after being ceramic coated front to back!

I’ll leave the can off for now, as the new wheel is still getting painted. The wheels are back from the paint shop. BMW K1100 rear, Yamaha R1 front, shod in Pirelli Angel GT tires.

Lisa, trying to distract me from those sexy wheels!

The rear bolted on no problem. Good clearance on both sides.

I used the damaged rear-set plate to fabricate the speedo mount. I had a small altercation with the bench grinder during the process!

Good result though, wanted it flush with top clamp.


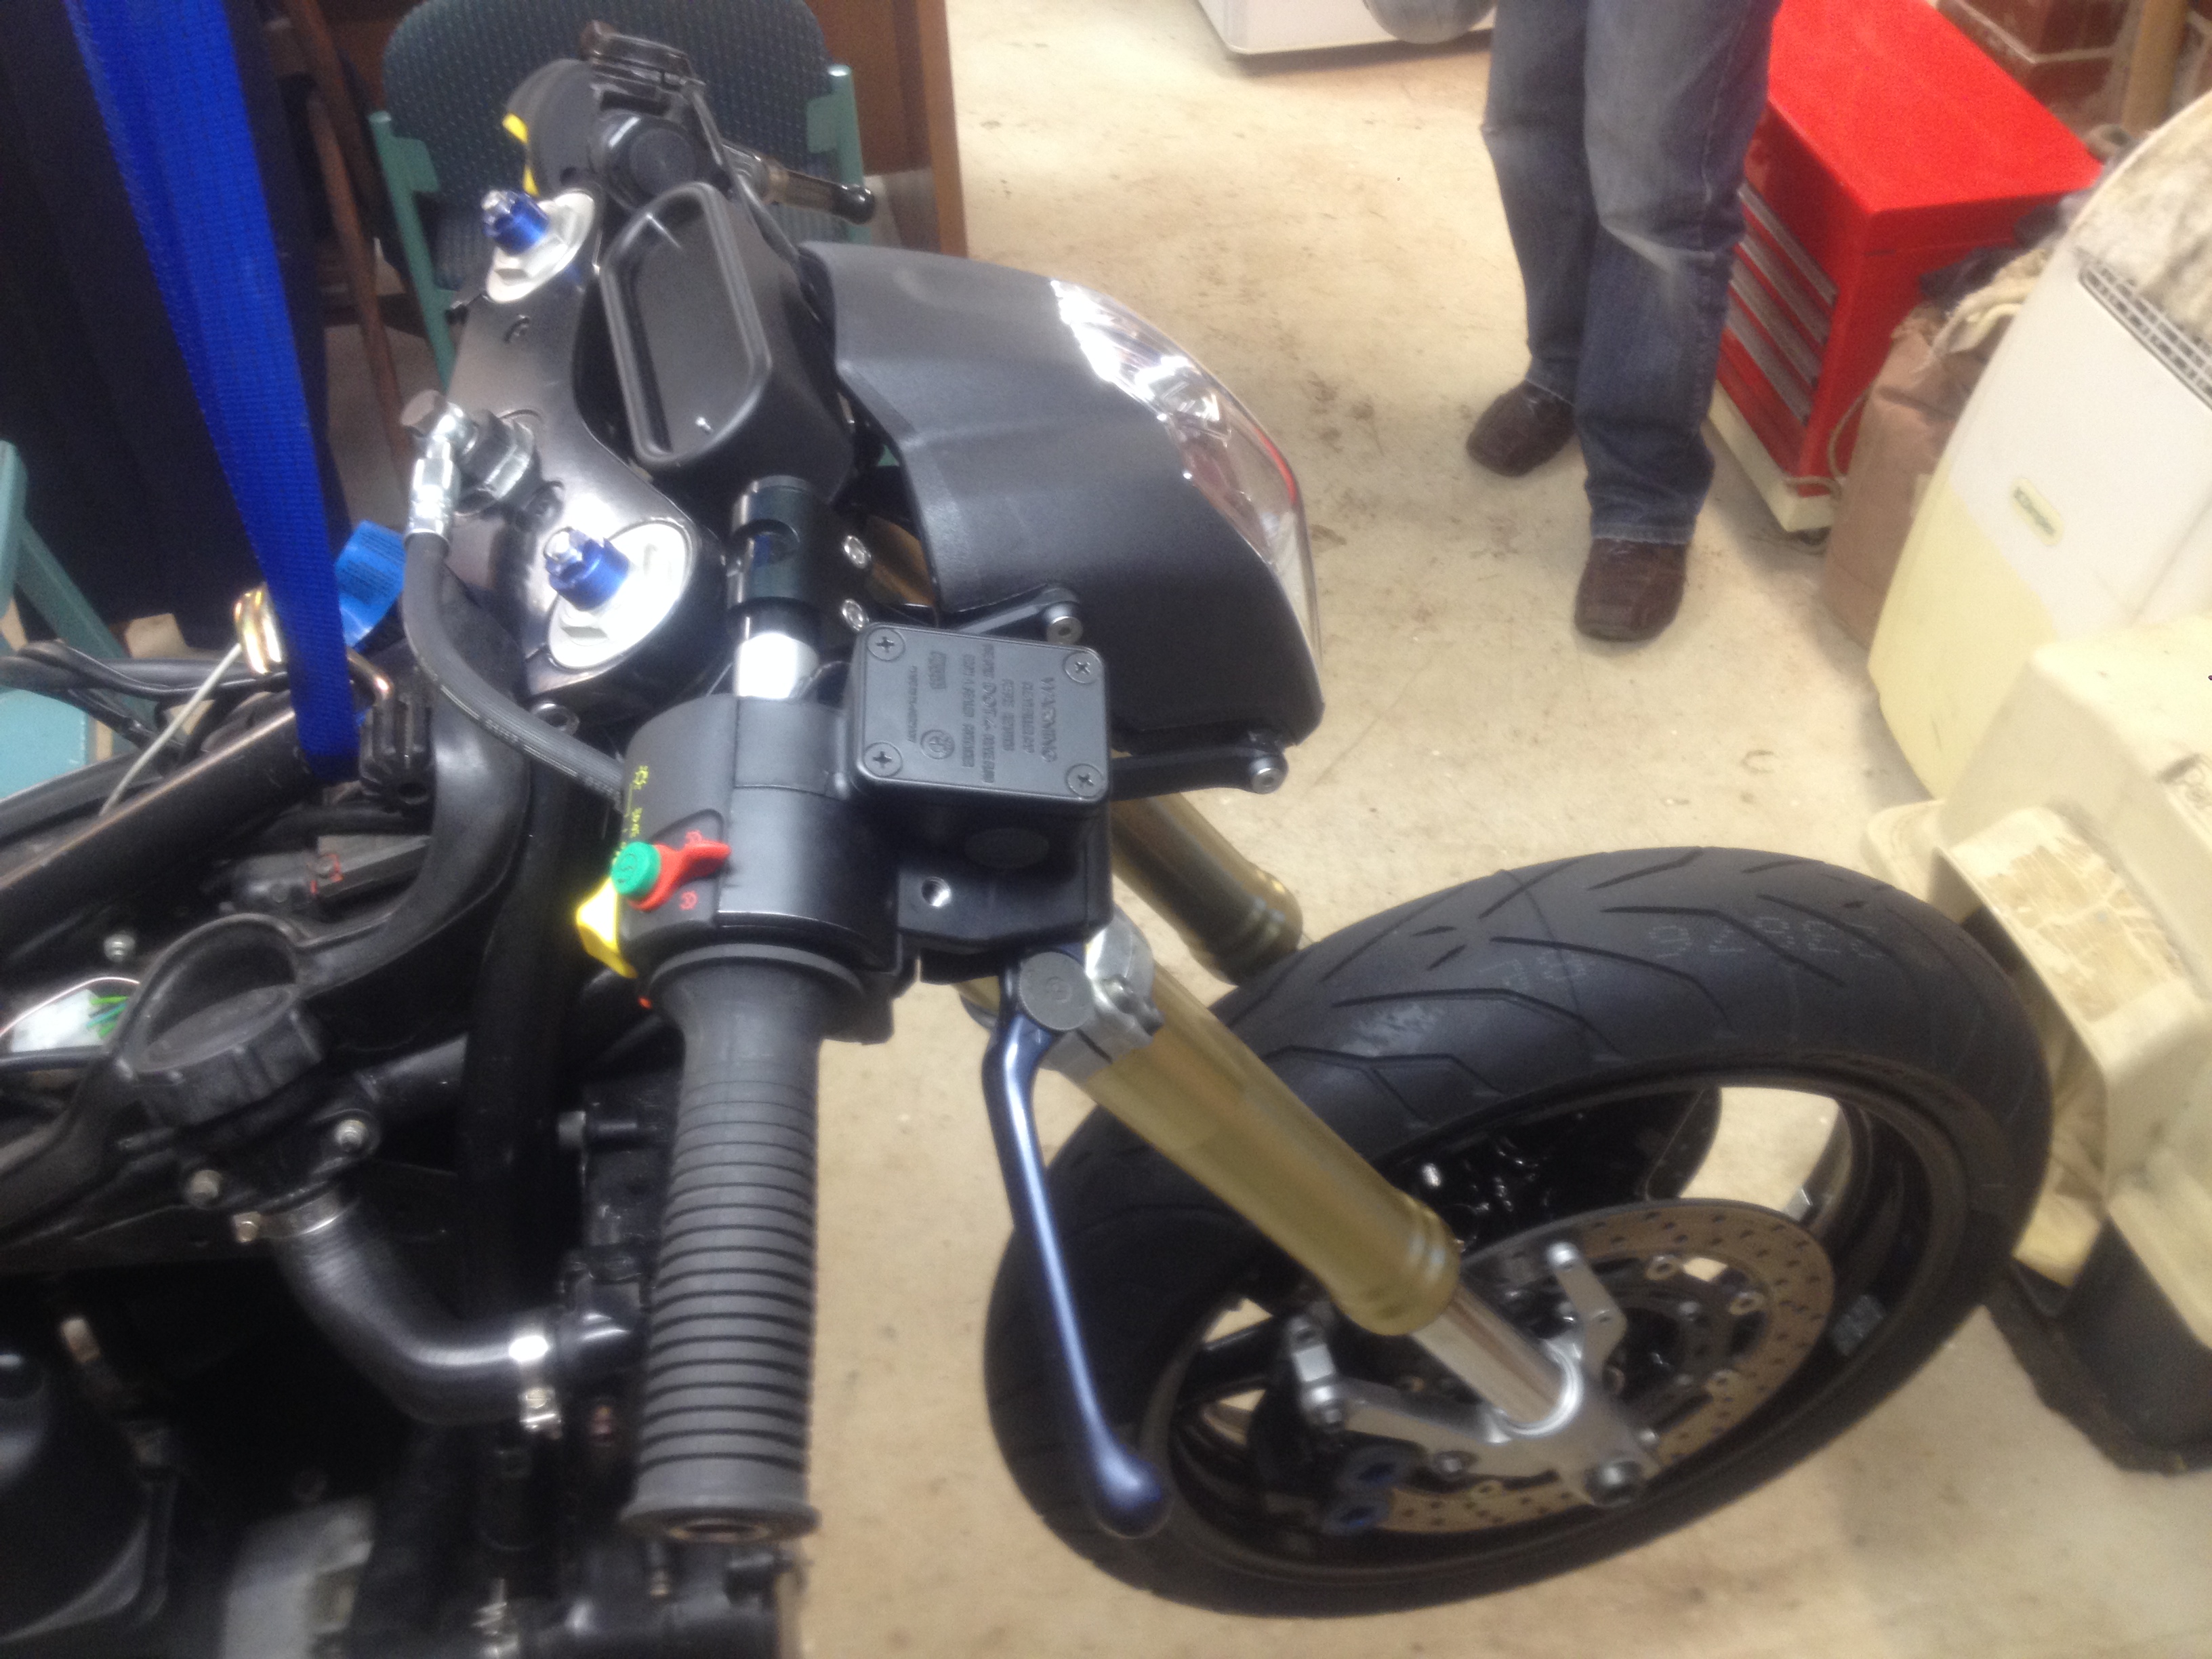
Have decided to change the headlight to the MT-03 unit.


I like it, but will have to see bike complete to be sure.
A whole new throttle quadrant was required. The K100 master cylinder is 13mm in diameter. This is OK for the original brakes, but would struggle to operate the R1 calipers. A K1100 (20mm) master cylinder is up to the task, but can only be fitted by replacing the whole quadrant. This necessitated a throttle cable change also.
I was going to re-route the front brake line to keep the top clamp clean, but I like the K100 design.

The bar controls all done, just need to get some brake hoses fabricated.
I had to modify the K1100 hubcap to fit the K100 hub. Found the carbon fiber badge on eBay.

A rat tail file allowed the headlight bracket to take the indicators.

The front end is now complete!
I got the tank and seat from the paint shop today. The paintwork is exceptional!!

The fuel pump mount was broken in the old tank. A new part tomorrow, then final assembly……..

I was concerned the modern front end might not flow visually into the rest of the bike, but I couldn’t be happier!


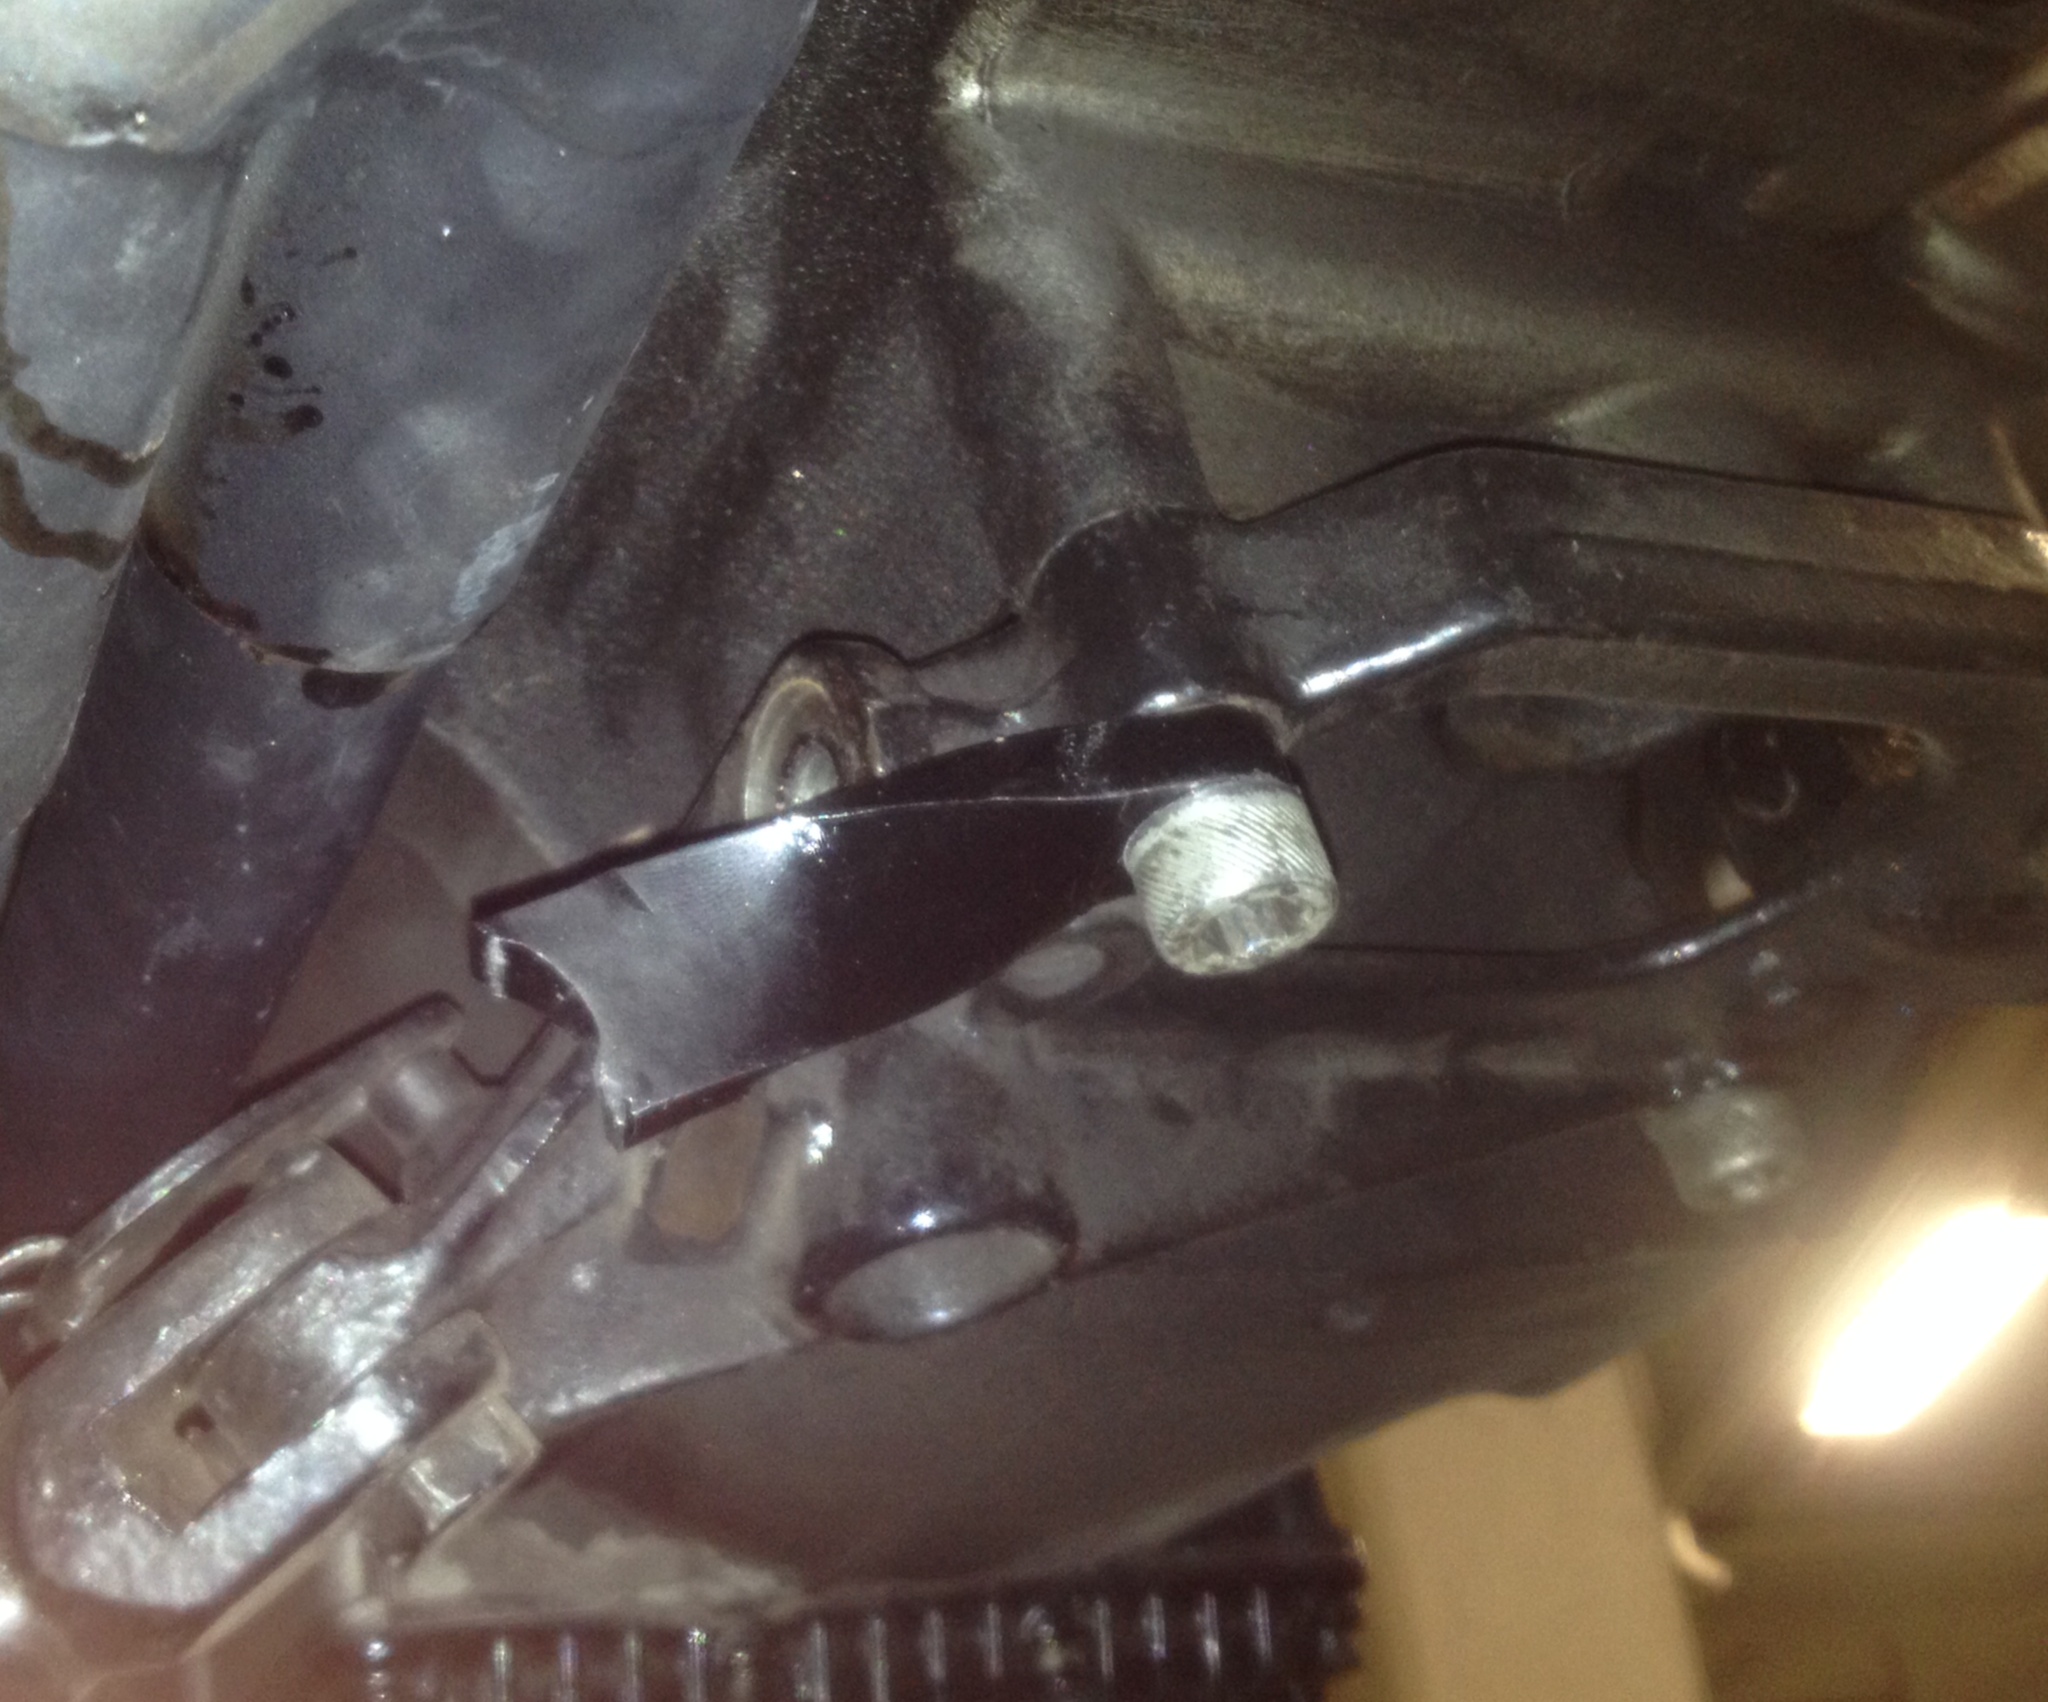
I used the remains of the bent gear shift as a stopper so the stand doesn’t hit the exhaust.
I took the bike for it’s first proper ride through the hills yesterday. With the new front end and Pirelli rubber, it now feels like a modern sports bike. It is much more planted to the road, and the brakes are now comparable to my K1200R. I can now say the blog is complete (17-05-2014). The rebuild took just under 2 months.
Thanks for checking it out! It has now featured on The Bike Shed, twice, Pipeburn, and Silodrome.
I was also contacted by BMW Australia who featured it on their website, then I was incredibly stoked to have it feature on the international BMW Motorrad website!


My bike was accepted into the 2014 Oil Stained Brain bike show.


I finally got around to weighing it!
It now weighs 215kg fully fueled. Stock bike is 249kg, so it has lost 34kg. Distribution is 51/49 front/rear.
UPDATE
I haven’t updated this post for a long time now. After 4 years of trouble free riding, I’m considering letting the Hornet go. If you are interested, drop me a message.

With much pleasure having viewed your twice-as-right build, my current trepdiations regarding a choice between buying a K1100RS 4v or a K75 for my cafe project took one small step forward, but still a bit of a stumble as I worry over weight, the bike as well as mine. I currently ride an R100/7 cafe/street tracker now with 150K miles. It’s light, nimble, fast enough and comfortable as old tennies. I ride 7 days a week in Los Angeles traffic, no car for five years. Will the R1100RS, though trimmed of fairing, etc., be too portly for peace of mind riding in the real world of unreal L.A.? Or should I go more svelte with a K75 for the project?
Regards,
Paul
Hi Paul,
I have yet to weigh the finished bike, but it certainly feels no more than 200kg. The centre of gravity is also quite low. I find it a great bike for city riding, much more nimble than my K1200R.
Paul
Hey Paul,
Thank you for the inspiration of this build – I am currently doing one myself based around the modifications that you have done.
Just wanted to say thankyou for the kickstart.
warmest regards,
Michael
Thanks Michael,
Good luck with the build.
Gday my name is Stefan bought a 76 K100 of a mate and road around Australia great bike for the trip .I have been offered a basket case K100 and would like to a mod job on it.I see you have Vic club plates I live in Prahran ,would like to see you and your bike if possible?Cheers
Get along to “Oil Stained Brain” in Collingwood 1-2 November. My bike is in the show.
Good work on your K100, really look nice !!
But I have a question on the rear wheel.
I got 1 K100 and 1 K1100 and I tried to fit the rear K11 wheel on the K100 and it fits, no problem. But with the original swing arm of the K100, the wheels is shifted of 2-3 centimeter on the left and is no more aligned with the frame. Did you notice it and did it change something on the ride ?
Best wished from France 🙂
I removed the spacer, which gives about 1mm clearance on the 160 wide tyre. There is still a small offset as you say. This is not noticeable, even riding hard. BSK SpeedWorks in the UK races a K100 with even a wider rear wheel, so you might want to ask them if they have any issues?
Hi cool bike turned. I want to also do so only two local girls skate. I had a few questions for you, I’m from Ukraine, using a translator writing takchto if something is unclear izvenyayus.
1. Question: How much money has gone to all?
2. Question: Are you doing something in the engine, transmission, such as the replacement of the rings or piston?
3. Q: Can you give a complete list of the names and parts are used?
4. Question: mozheli you help me find inexpensive haroshevo donor and send to Ukraine?
5. Question: How much time has gone to build?
6. Q: Why did you replaced the yoke and fork with the first option for a second after the accident, and why replacing wheels, and why nepostavil posterolateral koliso also with Yamaha?
Question 7. Give your facebook or add BR Friend!
https://www.facebook.com/PanchenkoMaximA
Hi Jason, read the blog again. There is info on the swap
Hi Paul,
I own a 1986 K100 and I finally have the space to work on it this winter. I am planning on doing a build with mine. Prolly not as wild as yours. Although i’d like that, I don’t have that kind of money to spend and second, more importantly, I don’t want to compromise on the bike’s touring capabilities.I plan on building a rear pannier mount with a top case that I can remove or put on if I go on a touring trip, so I can ride it naked when I ride in the city or go on a high speed ride.
This being said, I find my k100 to lack a bit of performance, and I wonder what are the best weight saving modifications you did on yours. Also I wonder if you had to do anything with the ECU or any other modifications so the bike runs fine with the new exhaust.
Thanks for this blog. Congratulations for your build.
Best regards
Eric
Hi Eric,
Good luck with the build. I use my K1200R if I need a power trip.
The K100 goes well, mainly due to the weight loss you see documented in the build. The ECU handles the new exhaust no problems.
Paul
Gday Paul
Just had a look. Better than NICE WORK. Love it.
I will be in touch.
Damien Cook
what a great read! Your bike is as unique as gorgeous looking. Well done for the effort and congratulations on the spectacular outcome
Thanks Mark
loved your blogg from start to finish, the bike is the poodles pods mate well done. I have total respect for your patients with the build and re-build both were good with in their own right.
I am doing a K100 from the bare frame up but I’m going the diesel bike route, and hopefully get a blogg done stage by stage lol. I am a bit of a siv head when it comes to documents and stuff but seeing your blogg gives a full detailed progress through the build period.
Respect
ALAN
Sheffield, England, UK, S25
Hi mate, really great build! I’ve just started my K75 build and have been able to get some great ideas from your build so first off all thank you!
I have quick question regarding the cpu and battery if you don’t mind me asking. .
Cpu; where did you mount it?
Battery; what battery are you running? Id like to get one similar for my build.
Thanks again !!
Jono
Hi jono,
I bought a 12V 340CCA YTZ14-S SEALED AGM BATTERY.
It is a small lead/acid, which can be laid on its side, $90
The ECU is mounted under the seat, between the frame rails.

Hi Paul,
First of all: What a great bike!
I’m doing a ’85 K100 as well for the moment, and it’s comming together pretty well 😉
I’m doing all the electrical wiring for the moment, and I just wanted to know how you connected your LED indicators…
Did you use resistors?
I bought 2 pair of resisitors (2 left + 2 right) and the indicator on the left works fine, but the right one is still flashing too fast! Did you have this problem as well?
Thanks!
Grtz from Belgium,
Pieter
Hi Pieter,
I used 4 resistors, but wired them in two parallel pairs (left and right). I located them next to the flasher unit in the electronic box under the tank.
Paul
HI. ABSOLUTELY LOVE WHAT YOU DID TO THIS BIKE! ARE YOU INTERESTED IN SELLING IT? 3475981553 THANKS
Bike looks awesome, what supertrapp exhaust is that?
http://supertrapp.com/product_sections/cat.asp?CatID=34
Thanks for the response , I saw your bike a while ago which inspired my to have a go at one myself, although I’ve bought a K1100
Hi Paul
Flatracer.com sell a lovely aluminium fuel cap for the K series
Regards Pete
Hey!
I read the blog and i love your bike.
I got a K100 and ride it for a few months now, i already swapped the speedo and a few other things.
My question, what stuff did you use to polish the bike? It looks much better than plain black and I’d like to give it a try but I’m not sure what to use.
Sandpaper I guess?
The R1 front is Plug&Play? Everything fiits in?
Thanks a lot, and again, fantastic bike.
Sascho from Germany
Hi Sascho,
I used metal polish with a scourer to clean the cases. Read my blog again regarding the fork swap.
Paul
Hi Paul,
First off – fantastic build and thanks so much for posting so much detail throughout it.. Super helpful as I’m customizing my k100!
Question for you — where did you find the LED fixtures that fit in the frame tube ends? I’ve been looking but not able to find anything.
Many thanks in advance.
Cheers, Fearghal.
Hi fearghal,
Cool name! There is a hyperlink on the blog, but here it is
http://motogadget.com/de/blinker/m-blaze-cone/m-blaze-cone.html
Paul
Epic. Thanks Paul!!
Hello Great build!
I was wondering if the Rear wheel still aligned in the middle even though its wider?
And I would also like to know if a wired wheel from R 1100GS would fit the same way?
Thanks!
Hi,
I run the wider wheel without the spacer. It is still slightly offset, but is not noticeable when riding. BSK SpeedWorks races successfully with the 5″ wheel.
Not sure about the spoke option, sorry.
Paul
Paul:
Like everybody else I love what you did with the brick.
I myself am slowly collecting parts for my own build. I think you covered a lot in your blog and thank you for that. My one question is about the Hyperpro Shock
how did you calculate which one you needed as well as porting and spring.
Can you give a clue on how to figure that out.
Cheers from Canada
Hi Gord,
I bought one which was set up for a K100, but my bike has lost 35kg. I contacted the Australian rep for Hyperpro. I gave him a photo of the bike and my weight. He then re-valved the shock, and fitted an softer spring. I took the bike to a local suspension shop who dialed in the shock and front end settings for free! Many thanks to Kroozetune in bayswater.
Hi Paul,
Just wanted to say thanks for the inspiration. I’ve completed my K project. It just needs a seatpad but its rideable and boy do these things fly when the weight is dropped. I have some pics if your interested but not sure I can post them here.
thanks again
Kent
Hi Kent,
If you can’t post to the blog, send me some pics at papajhotel@gmail.com
Congrats on doing the build.
Hello, nice job, I’m really interest in what you did, could you tell how hard was to set the speedo ? did you fix the neutral ? which cautinons light did you get working ?
Regaards,
Alexandre.
Hi Alexandre,
The speedo was easy to calibrate. GPS speedo on phone, manually calibrate the speedo on freeway, matching speeds.
I didn’t bother with gear indicator or neutral as the it can be set up with the Dakota Digital. If you want to use the BMW circuits, there is info on http://www.k100-forum.com/t7772-installing-aftermarket-speedo
The rest of the cautions were easy.
Paul
Hi Paul,
Thanks for your feedback. Just get my k100 rs 91 yesterday , drop into custom shop to check all fluids and also mechanical stuff, I hope don´t get any surprise.
Alexandre.
Hi Paul,
Sorry to bother you again, but I’m curious about why did you change the front wheel to R1, it’s because the BMW front wheel didn´t worh with the R1 suspension ?
Regards,
Alexandre.
Hi Alexandre,
I wanted choice of modern tyres. The BMW rim is only 2.5″ wide.
Hi Paul,
Great idea!!
fantastic job, you’ve inspired me to my k100
Hi Paul,
Could you tell me what color did you use?
Hi,
I’m not sure of the manufacturer but the color is called “hornet orange” from the “vibrance” range.
👏🏻👏🏻👏🏻
Love your new multifunction display. I really want one for my 86 K100, but I’ve been told it’s too much of a headache to try unless you’re a pro. Any suggestions for the average dude?
Hi,
It is a pain in the arse, but you can find some help on the K100 Forum http://www.k100-forum.com/portal
The interactive wiring diagram is a must http://hrsbstaff.ednet.ns.ca/bvogel/K100/download/electrical/diagrams/interactive_diagrams.htm
I have stumbled upon your build which has become somewhat of a muse for me. I was wondering what you did to attach clip on bars to your bike. Since the K100 has a 40.3mm shaft its hard to find proper sizing. Shims are hard to find or I’m not looking in the right place.
Hi Alex,
I think the tube is 41.3mm? I bought some 41mm clip ons. I took them to Valley Engineering to machine the clip ons to 41.3mm.
What an amazing project! Your bike is amazing, good work! I’m just starting my k100 restoration, having problems with my neutral light sensor. Which stops the engine from starting. Not sure if it’s the sensor or the instrument. I would like to change the instruments anyway. Did you manage to get the neutral light working on your new display?
Thanks
Hi George,
I did not get the light working, but the Dakota Digital speedo has gear position and neutral indicator. I have to pull in the clutch for the starter to operate.
Paul
I replaced the old lunch box with the acewell digital speedo. The acewell needs a negative/ground to operate the neutral led but the K100 start permission circuit requires a positive. I wired three double pole relays in series to give both the positive and negative output, switched through the gear position switch. I no longer need to pull the clutch to start the bike which is impossible when on the side stand…
Hey Ray, Thanks for the reply. Sorry would you mind explaining a little more what you did with the relays? Im a little slow!
Thanks
George
Hi George, the links Paul put before are really useful so go back and check them all out. I also have the Clymer service book that came in handy.
On the back of the old lunchbox are two connectors, one green and one white. Pin one on the green connector is all time power to keep the clock. Pins 2, 3, and 4 are the return negatives or grounds from the gear position switch. Pin 5 is the start permission that needs a positive to allow you to start without pulling the clutch and pin 6 is the ignition power positive.
To switch the positive to pin 5 you need 3 relays. Wire the positive from pin 6 to one side of the coil on all three relays. Wire the ground return from pin 2 to the coil of relay 1, pin 3 to the coil of relay 2, and pin 4 to the coil of relay 3. The gear position switch gives you a ground on all three only when you have selected neutral. Other gears give a different sequence to allow the indicator to display your gear position.
Now wire a positive from pin 6 in series through all three relay contacts so that all three relays need to be energised to switch the positive through, now wire the switched positive to pin 5. Test the circuit by switching the ignition key on, and selecting neutral. You should be able to start without needing to pull the clutch.
You can also use this switched positive to power a neutral indicator. In my case the acewell required a negative so I used double pole relays to switch a negative through the contacts and operate my neutral indicator. Alternatively you could use a fourth relay…
Hope this helps:)
Hi, I’ve started a project on a K100LT, after becoming inspired by this article!
I’ve encountered a few issues, wondering if there’s any way I could contact you to try and maybe solve them?
Thanks,
Jason
Hi Paul,
hai lavorato molto bene, la tua moto è molto affascinante, complimenti!
Ciao, Francesco.
las barras de la r1 encajan sin ningun trabajo en la tijas de la k75?el eje es el mismo ?
When getting the bike registered in Vic, did you have to provide engineering certificates to pass the structural welding modifications?
Yes, that is required
Hey what are the first headlights you used before the crash???
They called Dominator Twin.
Congratulations, nicest bmw k I’ve ever seen, what is the speedo ?
Thanks,
The speedo is from Dakota Digital
http://www.dakotadigital.com/index.cfm/page/ptype=product/product_id=510/category_id=544/home_id=-1/mode=prod/prd510.htm
I found it for good price on amazon
The Dakota multifunction display is amazing, but pricey. I opted for the Danmoto 180 at less than 1/4 of the price. Exterior plastic body is a little on the light duty side, but I’ve decided it meets my needs in terms of functionality and style. http://www.dan-moto.com/DM_INT/danmoto-180-digital-cockpit-product-389.htm
Sorry, the correct url for the Danmoto 180 is here:
http://www.dan-moto.com/DM_INT/danmoto-180-digital-cockpit-product-389.html
Hi Paul,
very nice job! I love it!
I’m working on an ’84 K100 and I’ve just bought the R1 forks and the K1100 rear wheel.
As you said in your blog, the rear wheel fitted without problems while next week I will try to fit up the forks with my grease monkey. He is a little bit skeptic about this solution and he is not sure if we have to change/buy/modify some stuff.
Could you give me more info on what did you do to mount the R1 forks. The sentence “Not cheap, but bolted up perfectly!” is scaring me!
Cheers!
Federico from Italy
Hi Federico,
Press the post out of the R1 triple clamp. The BMW post was slightly smaller. This required the R1 clamp to be drilled out so a plug could be welded in. The plug then needs to be machined to accept the BMW post.
Finally you will have to grind down the steering stops to get more steering. Do this with the tank on. Grind down till forks just clear the tank. If you want more you will have to move the tank back.
Paul
Thanks for your quick reply! I don’t understand what you mean with “The BMW post was slightly smaller. This required the R1 clamp to be drilled out so a plug could be welded in. The plug then needs to be machined to accept the BMW post.”
Are you talking about the key post?
Just another question, the Yamaha the steering column and its bearings fit easily?
Thanks in advance!
Federico
Hi,
Yes, the key post. That way you use the BMW bearings. I mated the BMW post to the R1 clamp. I forgot you also have machine the R1 top post underside to be same as the BMW post, to sit correctly on the BMW knurled bearing cap. You probably need a machinist to do this work.
Paul
Hey, Paul
Love the build! I’m currently modifying an ’88 K100RT and have hit a road block with the tachometer swap. Do you know which pin/wire is the “hot” or power supply wire? Have looked at more schematics than I can count but have come up empty handed. Any advice would be immensely helpful! Thank you in advance.
Anthony – San Diego, California
It depends what you are trying to do. All the pinouts are in this link. Are you after constant siwtched 12v? If so there are probably better places to take it from than the gauge connector…but if you have to then pin 24 grey/blue should work. Use a multimeter and make sure its constant with the lights on or off.
http://www.motobrick.com/index.php/topic,6941.0.html
Thanks Kent! I’ve forgotten all that.
Hey mate great project, bravo looks gorgeous need an information from you i am planning to install a 2001 yamaha R1 front end on my k75 also.
What are the modifications you did?
What bearing did you isnatall for the tripple clamp to fit?
Thanks and best regards
Hi Salim, check out my reply to Federico in comments. Contact me again if that doesn’t answer your questions
Thanks Paul for your advice! Here my K100 with the new forks https://goo.gl/photos/288iasVTCkNK8HgDA
Great job! You won’t believe the brakes
Hi, love you work, looks amazing – Which battery did you use for your build?
I bought a 12V 340CCA YTZ14-S SEALED AGM BATTERY. It is a small lead/acid, which can be laid on its side, $90
Hi Paul, I work on my electric part of my K75 and I’m looking for a battery. After long research it seems that you are using a VTZ14 SSB battery because I can’t find any YTZ14 with a 340cca !
All the YTZ14 I can find here in Europe are 230 CCA…And to me it’s the limit to start a K75 / K100.
What do you think about this ?
I checked my battery, it is a SSB RTZ14-S with 340cca. I would not go less on the cca, mine turns it over ok, but runs out of grunt pretty quickly if I have starting issues. Good luck!
https://www.batteriesdirect.com.au/mobile/shop/product/25759/ssb-xr-series-high-performance-agm.html
Hi , well done on your flying brick project ( both of them )
I was hoping you may give me the site you got your rear indicators from . I can’t seem to find the ones I want
Regards
Chris
Hi Chris,
There is a hyperlink on the blog. Here is a link.
http://motogadget.com/de/blinker/m-blaze-cone/m-blaze-cone.html
Love your build, Like many other comment-ors I’m taking great inspiration from it, Quick Question: what did you use to attach the hose to your new overflow coolant tank?
Hi Shane,
I’m replying in WordPress app, so can’t paste a photo, but I used one like this with compressible washers (like brake hose washers).
https://encrypted-tbn3.gstatic.com/images?q=tbn:ANd9GcROgpF7e_M5LgfENRmlUDVmdzRsRkgMl-zid6UHxkzmzDftlYpU
Hi , your k is perfect love it!
I want to ask you some questions about the front fork
I have gsxr k8 forks 725mm
And R1 forks that is 740mm
Although the stock k100 forks length is 810mm
And my question is if put gsxr or R1 fork there is no problem due to shorter lenght at steering the bike ? And if not can i put the gsxr that is shorter than r1 ?
Sorry about my english !!
Regards
Constantinos
Hi,
My bike is still quite stable, no head shakes in nearly 8000km. Sorry, I’m not sure if even shorter forks would cause handling problems.
I also lowered the rear of my bike by running a 17″ wheel instead of the 18″ with high profile tyre
Hi Paul,
Which 17″ rear wheel are you using ?
Regards,
Alexandre.
My mistake, was thinking of my current build! It is an 18″ wheel (K1100), but lower profile tyre.
Thanks for your advice Paul and I really appreciate your quick reply.
Hey Paul,
I can’t stop reading your article…
Super nice project, I wonder where I could find the carbon fiber badge for the k1100 wheel, I kept on looking for it on ebay but can’t find it 😦 , that would be nice of you if you could leave a link.
Merci Monsieur,
Greetings from France
Olivier
Hi Olivier,
Here is the Australian eBay search, I just glued one the K1100 centre cap.
http://www.ebay.com.au/sch/i.html?_from=R40&_trksid=p2050601.m570.l1313.TR0.TRC0.H0.Xcarbo+fibre+bmw+badge.TRS0&_nkw=carbo+fibre+bmw+badge&_sacat=0
Hi Paul,
Just curious, which rear tire did you choose ? Regards. Alexandre.
Hi,
I used Pirelli Angel GT 160×18 on the rear
G’day Paul!
What a fantastic build! THe new one is coming along quite nicely, too!
I’m currently building a 1989 BMW 3-Series and have just picked up an 89 K100 to convert to a cafe racer so the car has a sister bike.
Regarding the R1 front end – the reasoning behind it is fantastic, wanting a matching 3-spoke front wheel, bigger brakes and USD forks is pretty genius.
Is there a chance you’ve got an e-mail address i could drop you a line on to discuss some more about the triple clamps offline?
Cheers,
Dan.
Hi Dan,
No prob.
papajhotel@gmail.com
Paul
Very nice build. You are a true innovator. I am starting out in this “cafe racer ” craze goin on here in Chicago. I’ve decided on the BMW r100 but can not find one. After looking at your build. I now have changed my mind to a k100. Hahahaha… Thanks for the inspiration.
Hi James,
Good luck with build. Feel free to contact me if you need to.
Paul